
Direct Vent Fireplace Venting: Check Pipe, Route and Clearances
Plan direct vent fireplace venting by model, approved pipe, vent geometry and termination clearances. Know what to check before enclosing the installation.
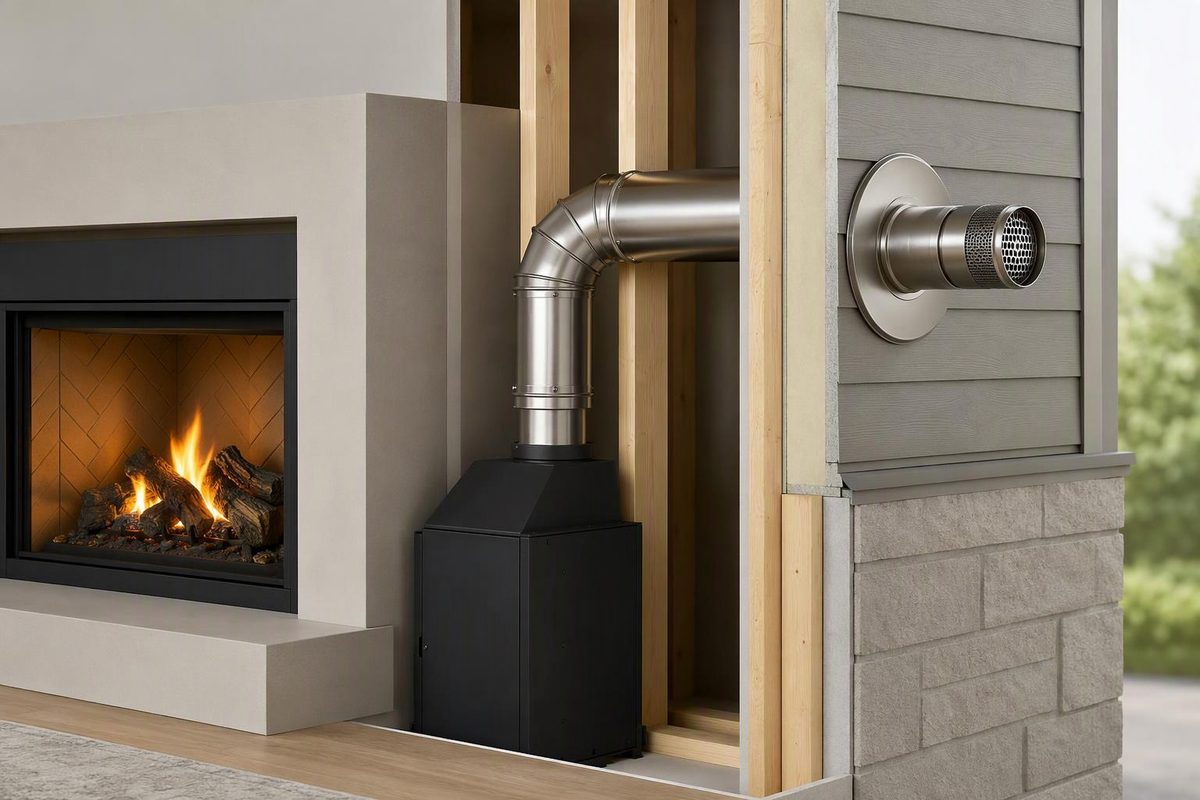
A direct vent gas fireplace takes combustion air from outdoors and sends exhaust outdoors through a dedicated vent system. It can terminate through a wall or roof when that route is approved for the particular appliance. “Direct vent” does not mean any short pipe through the nearest wall will work. The fireplace, vent components and termination must be an approved combination. Heat & Glo’s installation manual explains the outside-air arrangement and model-specific routing requirements.
Before choosing the fireplace location—or buying a vent kit—check the following in order. Have a qualified installer verify the design, and check permit and inspection requirements with your local building authority before work begins.
1. Identify the appliance and approved vent system
Record the full model number, serial number and fuel from the rating plate. Obtain the installation manual that applies to that unit, not just a brochure or a manual for a similar-looking fireplace.
Look for the manual’s approved vent systems, component list and vent diagrams. Pipe diameter alone does not establish compatibility. For example, DuraVent DirectVent Pro comes in 4-inch × 6⅝-inch and 5-inch × 8-inch sizes, but DuraVent requires appliance-manufacturer approval before its use. Its concentric construction has an inner exhaust pipe and an outer passage supplying combustion air. DuraVent’s product specifications explain both the airflow and listing requirements.
Do not substitute B vent, wood stovepipe, Class A chimney or furnace vent pipe merely because it fits. Likewise, do not mix brands, adapters or joining methods unless the appliance instructions expressly approve that arrangement. The cited Heat & Glo manual approves particular DVP and SLP systems and prohibits mixing manufacturers’ pipe, fittings and joining methods. Approved-pipe requirements, section 4.C.
If you are still identifying the appliance type, start with gas fireplace venting by design.
2. Prove that the complete route is permitted
Sketch the vent from the appliance outlet to the outdoor cap. Mark:
- Top or rear outlet, where applicable.
- Every vertical rise and horizontal run.
- Every elbow and offset.
- Wall, ceiling, floor and roof penetrations.
- The exact termination cap.
Then compare the sketch with the matching diagram in the manual. A maximum total length is not permission for every combination of rise, horizontal run and elbows. Approved configurations can require a minimum rise, limit individual horizontal sections, or reduce allowable horizontal distance when elbows are added. Follow the manual’s measurement method, too: effective installed pipe length may differ from a component’s nominal length. Heat & Glo’s measuring standards and vent diagrams, sections 4.D–F.
Do not import pellet-vent elbow allowances or another appliance’s slope rule. This Heat & Glo manual permits level horizontal runs; that is a specification for the covered models, not a universal direct vent instruction.
An existing chimney is another possible route only where approved. Use the specified liner or chimney-conversion arrangement, adapters and termination—not the bare chimney flue as a substitute. DuraVent lists chimney-reline configurations among the arrangements that must be checked against the appliance instructions. Chimney-route planning guidance.
Stop here if the proposed route does not match an approved configuration. Change the location or have the installer obtain a manufacturer-approved alternative before framing.
3. Check the outdoor termination before cutting
The cap location can rule out an otherwise convenient wall route. Check the manual’s termination-clearance diagram against the actual exterior, including:
- Windows and doors.
- Building air intakes and other appliance intakes.
- Gas regulators and meters.
- Corners, soffits and overhangs.
- Decks, porches, walkways, grade and expected snow accumulation.
Clearances can differ by jurisdiction, siding material and surrounding construction. Do not use one generic “distance from a window” for the whole installation. The Heat & Glo manual, for example, gives separate U.S. and Canadian termination requirements and additional conditions for vinyl soffits and covered areas. For a roof route, check roof pitch, nearby walls and overhangs, and the required height to the cap’s discharge opening. Termination requirements, sections 4.A–B.
Use the approved cap, installed in its specified orientation. A generic chimney cap or homemade enclosure is not a replacement. Each direct vent appliance needs its own vent; common vent systems are prohibited by DuraVent’s termination instructions.
4. Preserve air-space clearances inside the building
Vent clearance is measured from the pipe to combustible material, not merely to the finished wall surface. Check framing, sheathing and insulation along the entire route.
Model-specific example: Figure 5.1 in the Heat & Glo 6000CLX-IFT/8000CLX-IFT installation manual, revision S dated February 2023, shows 3 inches above horizontal vent, 1 inch below and beside it, and 1 inch around vertical sections. It also contains specific SLP wall-firestop exceptions and elbow heat-shield requirements. These dimensions illustrate why “1 inch everywhere” is an unsafe assumption; they are not defaults for other fireplaces. Vent-clearance details, section 5.
Use the required wall firestops or thimbles, ceiling firestops, supports, attic insulation shields and roof flashing. Do not fill required clearance spaces with foam, fiberglass or other material to stop a draft. Seal only the locations and with the materials authorized by the instructions.
Before enclosing or operating the fireplace
Ask the qualified installer to document the approved route, component part numbers, clearances and required inspection before the work is concealed. Joint locking and sealant requirements are system-specific: DuraVent says DirectVent Pro needs no gaskets or sealants unless the appliance manufacturer specifies them. Joint and clearance specifications.
For an existing installation, with the fireplace off and cool, visually check safely accessible venting and the cap for obstruction, corrosion or separation, particularly after snow or exterior construction. Stop using the fireplace if venting is disconnected or the fixed glass is damaged or missing, and arrange qualified service. The Heat & Glo owner’s manual calls for seasonal vent checks and professional inspection before use and at least annually.
If you smell gas, leave the building without operating switches or using a phone indoors. Call the gas supplier from outside; if you cannot reach the supplier, call the fire department. Do not continue investigating the vent. Gas-emergency instructions.