
See-Through Fireplaces: Choose the Fuel, Vent Path and Wall Assembly First
Plan a see-through fireplace by fuel, listing, vent route, clearances, heat management, service access and what lies on each side.
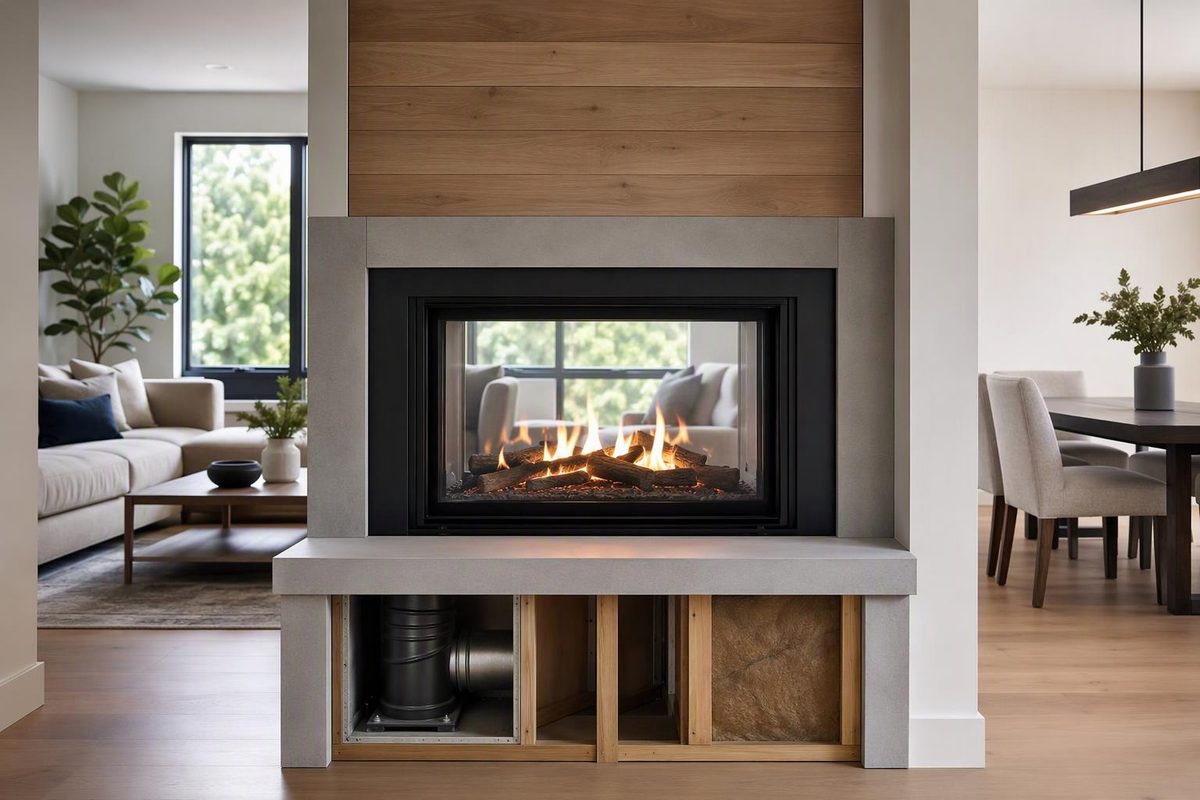
A see-through fireplace has viewing areas on opposite sides of one firebox. It may divide two indoor rooms, sit in a partial-height partition or provide a view from an indoor room toward an outdoor area. “Double-sided” usually means the same thing; corner and three-sided “peninsula” fireplaces require different framing.
Settle the fuel, exact appliance and vent path before deciding wall thickness, stonework or TV placement.
Compare the common built-in types
| Type | Best fit | Main planning constraint |
|---|---|---|
| Direct-vent gas | A real flame and permanent architectural feature; models range from decorative appliances to room heaters | Listed vent route, gas supply, model-specific electrical needs, clearances and heat management |
| Electric | Flame effect without combustion venting; comparatively flexible placement between rooms | Circuit and wiring requirements, heater-airflow clearances and service access |
| Wood-burning | A traditional fire in a purpose-designed masonry or listed factory-built system | Chimney design, hearth protection, combustion air, smoke control and substantial clearance requirements |
Do not assume every see-through gas fireplace is a room heater. The current Heat & Glo Primo II manual classifies that series as a vented decorative gas appliance and says it is not intended as a heat source. Valor, by contrast, publishes output figures for its L1 See-Thru and describes it as zone heating for two spaces. Compare the rating plate, output specifications and manual—not flame width or input rating alone—when heating performance matters (Heat & Glo installation manual; Valor L1 specifications).
An electric unit avoids gas piping and combustion venting, but it remains a built-in electrical appliance with airflow and framing requirements. Napoleon’s current CLEARion Elite, for example, supports 120- or 240-volt wiring, has independently controlled heaters on its two faces and specifies an 8-inch minimum framing depth. “Electric” does not mean that any unit will fit safely in a thin partition (Napoleon CLEARion Elite specifications).
Use these decision gates
1. Define what is on each side
Record whether the fireplace will separate:
- two conditioned indoor rooms;
- an indoor room and a screened or covered outdoor area;
- two outdoor spaces; or
- a room and a circulation path.
An indoor see-through model is not automatically approved for an indoor/outdoor installation. The Primo II instructions, for example, prohibit that application unless the corresponding indoor/outdoor kit is used. The kit changes the framing dimensions and aligns the back of the appliance with a window rather than exposing an ordinary indoor fireplace face directly to weather (Heat & Glo installation manual). Weather exposure also introduces wall-envelope, drainage and corrosion questions that an all-indoor partition does not have.
For a heating or combustion model, assume both faces need protection from traffic, furniture and draperies until the exact manual establishes otherwise. Do not place a hot face where people must squeeze past it.
2. Select the exact model before framing
Obtain the current installation manual for the exact model and fuel. Verify:
- appliance and rough-opening dimensions;
- clearances to combustible framing;
- required noncombustible facing areas;
- mantel, side-wall and ceiling limits on both sides;
- approved vent parts and permitted configurations;
- gas, electrical and outside-air connection locations;
- heat-management components, if specified;
- service-access location; and
- hearth or floor-protection requirements.
These values are not interchangeable across brands—or even among models in one series. The Primo II manual has separate framing tables for its 48-, 60- and 72-inch see-through models, identifies a zone where combustibles are prohibited and requires clearance for service access. Its installation checklist also covers the vent configuration, firestops, vent clearances, gas-leak testing and barrier glass before operation (Heat & Glo installation manual).
The completed installation must satisfy the appliance listing and instructions as well as permits, locally adopted codes and the authority having jurisdiction. A showroom display, rendering or generic framing diagram is not a substitute for those requirements.
3. Prove the vent or chimney route
For gas, draw the complete route from the appliance collar to the termination, including vertical rises, horizontal runs, elbows, penetrations and the termination. Check that route against the exact model’s approved vent diagrams. A convenient exterior wall does not guarantee that a horizontal termination will clear doors, windows, soffits, grade or air intakes.
First identify whether the appliance is direct vent, B-vent or another listed category; those systems are not interchangeable. See why gas-fireplace venting depends on appliance design.
For wood, design the fireplace, openings, flue, chimney height, offsets, hearth and combustion-air provisions as one system. Do not adapt the chimney plan from a conventional one-sided fireplace after the divider wall has been drawn. For a comparison of site-built and factory-built construction, see the masonry fireplace guide.
4. Resolve heat on both elevations
A TV, wood mantel or framed artwork shown close to a fireplace in marketing photography is not blanket approval for that arrangement. Some models permit reduced temperatures only with a specified heat-management kit or installation geometry; others require greater separation.
Prepare a dimensioned elevation for each face showing the opening, combustible trim, mantel depth, television, receptacles and finish transitions. Annotate both elevations with the exact manual requirements before ordering cabinets or stone.
5. Preserve installation and service access
A see-through fireplace can be enclosed by different finish trades on its two sides. Establish how a technician will reach the valve, controls, electrical connection, fans and glass retainers after completion. Confirm which panels, trims and barrier assemblies must remain removable.
Coordinate the sequence among the framer, fireplace installer, electrician, gas fitter and finish contractor. Photograph concealed vent clearances, firestops and utility connections before drywall or masonry hides them. Heat & Glo’s current checklist likewise recommends photographing the installation for the project file (Heat & Glo installation manual).
Account for hot glass and combustion safety
Gas-fireplace viewing glass can cause severe burns. A CPSC statement on the vented-fireplace standard documented the particular danger to children and advised purchasers to choose applicable models with the protective barrier installed (CPSC statement on vented gas-fireplace glass). The current Primo II manual requires its barrier glass before operation and warns that the inner glass can cause burns if the barrier is removed. Never operate a fireplace with required glass, screens or barriers missing.
For any fuel-burning fireplace, install and maintain carbon-monoxide alarms as required locally. NFPA recommends alarms outside each sleeping area, on every home level and in other code-required locations; follow the alarm manufacturer’s placement instructions (NFPA carbon-monoxide guidance). A CO alarm does not compensate for incorrect venting or missed appliance service.
If you smell gas, do not operate switches or try to light the appliance. Leave the building immediately and call the gas supplier from outside; call the fire department if the supplier cannot be reached, following the appliance manual’s emergency instructions (Heat & Glo installation manual).
Stop using the fireplace and arrange model-specific service if glass is damaged or displaced, soot appears outside the firebox or the vent may be disconnected. A proper gas fireplace inspection covers more than appearance.
Pre-purchase worksheet
Bring these items to the dealer, installer and permitting office:
- Exact model and fuel.
- Current installation manual and listing information.
- Plan showing what occupies each side.
- Complete vent or chimney route.
- Framing depth, wall height and finish thicknesses.
- Mantel, TV, cabinet and furniture locations on both faces.
- Gas and electrical requirements.
- Heat-management and outside-air components, if required.
- Service-access plan.
- Permit, inspection and local amendment requirements.
If any item remains unresolved, hold the framing. Changing a finish is manageable; correcting a buried vent, missing clearance or inaccessible valve after both faces are complete is not.