
Choosing a Chimney Liner That Fits Your Appliance, Flue, and Fuel
Material, size, construction, insulation, fittings, support and termination must match the particular appliance, masonry chimney and jurisdiction.
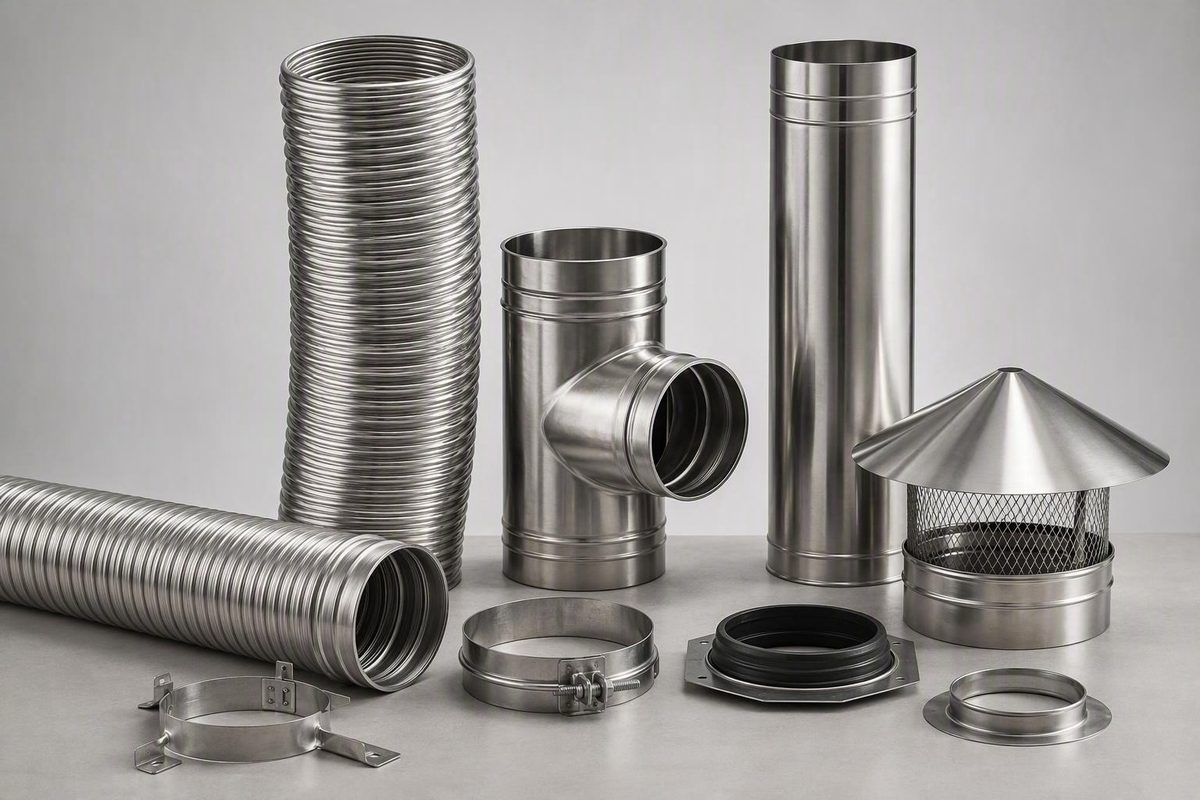
A stainless flue liner is not simply a metal tube selected by diameter and lowered into a chimney. It is one part of a venting system whose material, size, construction, insulation, fittings, support, and termination must match a particular appliance, masonry chimney, and jurisdiction.
Use this buying sequence:
- Identify the exact appliance, fuel, venting category, pressure conditions, and condensation potential.
- Inspect the chimney’s structure, existing liner, and route.
- Determine the required diameter, length, and usable liner construction.
- Select a compatible alloy within a documented liner system.
- Confirm insulation, clearances, fittings, listing conditions, and local requirements.
- Compare the complete installed cost—not merely the liner or kit price.
What a stainless flue liner does—and when relining may be necessary
A chimney liner is the conduit inside a chimney that contains combustion products, directs them outdoors, and protects the chimney walls from heat and corrosion. Liners may be made from clay, ceramic, or metal. Stainless steel is therefore one possible relining material, not something every chimney automatically needs. Stainless systems are commonly installed in existing masonry chimneys when the original flue is missing, damaged, unsuitable, or incorrectly sized for the connected appliance. This chimney-liner comparison provides the underlying functional definition and describes stainless steel primarily as a relining option.
Reasons to have a chimney evaluated for relining include:
- No existing liner
- Cracked or displaced clay flue tiles
- Deteriorated mortar joints between tiles
- A flue incorrectly sized for the appliance
- A new appliance or fuel that is incompatible with the existing liner
- A route or connection that cannot accommodate the proposed appliance as built
These conditions justify inspection, but they do not predetermine the repair. Depending on the findings, the appropriate remedy may be repairing the existing liner, installing a stainless system, using a cast-in-place lining, replacing damaged masonry, or rebuilding part of the chimney.
A stainless liner does not stabilize unsound masonry. It also does not provide the structural reinforcement attributed to some properly specified cast-in-place systems. Loose brick, major settlement, failed mortar, or other structural defects must be evaluated separately before relining. A comparison of liner types distinguishes stainless relining from the reinforcing function associated with some cast-in-place systems.
When reviewing products or contractor proposals, work through the project in this order:
- Appliance and fuel
- Venting category, pressure, and condensate conditions
- Chimney condition and geometry
- Required diameter and length
- Compatible alloy and liner construction
- Insulation and clearance requirements
- Approved connectors, supports, and termination parts
- Permit, inspection, and commissioning requirements identified by the relevant authority
That sequence prevents a common purchasing error: choosing an attractively priced “all-fuel” kit and then trying to make the appliance and chimney fit it.
Start with the appliance: fuel alone does not determine compatibility
Fuel is only one part of compatibility. Two appliances burning the same nominal fuel can have different exhaust temperatures, pressure conditions, condensation characteristics, outlet dimensions, and approved vent materials.
For example, a conventional natural-draft gas appliance and a high-efficiency condensing gas appliance should not be treated as equivalent merely because both burn gas. A pellet appliance should not be assumed to have the same venting requirements as a naturally drafted wood stove, nor should a coal appliance be treated as interchangeable with a wood-burning insert.
| Appliance or fuel | Main operating concern | Source-specific material guidance | What the buyer must verify |
|---|---|---|---|
| Wood stove or fireplace insert | Temperature, deposits, natural draft, appliance outlet, and chimney geometry | One manufacturer manual permits its specified 304 or 316 systems for wood and fireplace-liner applications | Exact model, outlet, required diameter, approved alloy, insulation, cleaning access, and connection method |
| Pellet appliance | Appliance-specific vent arrangement and possible pressure at the outlet | The same manual includes specified pellet applications within its liner system | Whether the appliance permits connection to a masonry-chimney liner, plus the required vent type, joints, diameter, adaptor, and pressure conditions |
| Oil appliance | Condensation and corrosion conditions vary with appliance design and operation | Some specified conventional systems permit 304 or 316 for covered oil appliances | Appliance category, flue temperature, condensate potential, draft requirements, and approved vent material |
| Low-efficiency Category I gas appliance | Sizing, draft, and condensation remain important | The cited system permits specified 304 or 316 liners for covered low-efficiency Category I gas applications | Category, appliance input, chimney height, connector layout, draft, and sizing method |
| Coal appliance | Corrosive combustion products and conflicting commercial guidance | One system manual requires 316, while a separate 316 kit excludes coal | Written approval for the exact coal appliance, coal type, liner model, alloy, and jurisdiction |
| Condensing or Category II–IV gas equipment | Corrosive condensate, lower exhaust temperature, and potentially positive pressure | A conventional all-fuel liner must not be presumed suitable | Appliance-specified vent system, pressure class, sealed joints, condensate drainage, supports, and termination |
| High-efficiency gas or oil equipment | Corrosive condensate may control material selection | One seller markets AL29-4C for these applications and excludes solid fuel | Exact appliance approval, alloy, temperature and pressure limits, condensate management, and complete system documentation |
The CHIM A LATOR instructions illustrate why the system manual matters more than a general fuel label. That manual covers specified wood, pellet, oil, and low-efficiency Category I gas appliances, but excludes Category II–IV gas equipment, appliances producing corrosive-acid condensation, and positive-pressure chimney systems. It also contains product-specific sizing, insulation, clearance, and component rules. Because the supplied manual is partial, contains extraction errors, and cites older standards, it should not be treated as current universal code. Review the product-specific manufacturer instructions rather than transferring their rules to unrelated liners.
Coal shows the danger of shopping by headline. The manual above requires 316 for its coal application, while a commercially offered 316 kit expressly says it is not recommended for coal. The separate kit page states that exclusion directly. UK retailer guidance, meanwhile, recommends 904 for smokeless fuel. These are not interchangeable rules; the exact appliance instructions, liner-system documentation, fuel, and jurisdiction must control.
Condensing and positive-pressure equipment require particular caution. Do not substitute a conventional flexible “all-fuel” liner simply because gas or oil appears in its description. Rockford markets AL29-4C for acidic condensate from certain high-efficiency gas and oil appliances and says it is unsuitable for solid fuel. That is seller guidance for its own product range, not a universal specification for every condensing appliance. Rockford’s catalog separates AL29-4C from its conventional 316L and 316Ti offerings.
Before requesting a quote, gather:
- Exact appliance manufacturer and model
- Fuel and any approved fuel subtypes
- Venting category
- Negative- or positive-pressure operation
- Condensation potential
- Maximum operating conditions stated by the appliance manufacturer
- Outlet shape and dimensions
- Required vent material and system
- Whether connection to a masonry chimney is permitted
- Approved adaptors, transitions, and termination arrangement
Look first in the appliance installation manual, especially its venting, chimney, specifications, and approved-components sections. The data plate may identify the model and input, but category, pressure, and vent material should not be inferred from efficiency, fuel, or marketing language. If the current manual is unavailable or ambiguous, ask the appliance manufacturer or a qualified installer for written clarification.
Pellet appliances deserve the same model-specific review. Their required vent system, pressure conditions, joint construction, and permitted masonry-chimney connection must come from the appliance documentation—not from a generic fuel chart. For related context, see this guide to pellet-stove venting requirements and common mistakes.
“Multi-fuel” and “all-fuel” are not unlimited permissions. They apply only to the fuels, appliances, conditions, diameters, components, and assembly described by the product’s current documentation.
304, 316L, 316Ti, 904, and AL29-4C: interpret alloy labels carefully
Alloy names are useful identifiers, but none independently guarantees that a liner is suitable. Compatibility also depends on fuel chemistry, condensation, temperature, pressure, wall construction, seams, joints, insulation, and the scope of the complete tested or documented system.
Commercial guidance commonly positions the alloys as follows:
- 304 or 304L: frequently marketed for wood-burning applications
- 316L or 316Ti: frequently marketed for broader multi-fuel service
- 904: promoted by some UK sellers for smokeless-fuel applications
- AL29-4C: marketed for corrosive condensate from certain high-efficiency gas and oil equipment, not solid fuel
These are starting points for document review—not universal selection rules.
Rockford, for example, recommends 304L rigid liner for wood and markets 316L as multi-fuel for gas, oil, wood, corn, coal, and pellet appliances. Its rigid products are described for straight masonry chimneys without offsets or dampers. Those statements apply to that seller’s product range; they do not establish that every liner bearing the same alloy designation has identical approvals. Rockford’s rigid-liner guidance provides its product-specific alloy and application distinctions.
The CHIM A LATOR manual takes a somewhat different system-specific approach. It permits its stated 304 or 316 products for covered wood, oil, low-efficiency gas, and fireplace applications while requiring 316 for coal. A separate commercial 316 kit excludes coal. The resulting lesson is not that an alloy name is meaningless, but that approval belongs to the complete product and its operating conditions.
In the UK market, one retailer recommends 316 for seasoned wood and 904 for smokeless fuel. That advice belongs to a UK commercial and regulatory context and should not be transferred automatically to a US installation. The retailer also directs readers to the stove manufacturer and applicable local process.
Treat AL29-4C as a separate application discussion rather than as a premium substitute for a conventional solid-fuel liner. Conversely, a product intended for condensing gas or oil service may expressly exclude wood, pellets, or coal.
A sound alloy decision asks:
- Does the appliance manufacturer approve this vent material?
- Do the liner instructions name the relevant appliance or fuel category?
- Are expected condensate, pressure, and temperature conditions within scope?
- Does approval apply to the selected diameter, shape, and construction?
- Must the liner be insulated?
- Are the connectors and termination parts part of the same approved system?
- Are there fuel, cleaning, installation, or documentation restrictions in the warranty?
Avoid unsupported promises such as “best alloy,” “corrosion-proof,” or a guaranteed service life. Even if a product advertises a lifetime warranty, review the exclusions, approved fuels, maintenance requirements, installer conditions, transfer rules, and required records before assigning value to it.
Flexible, rigid, smooth-wall, and pre-insulated liners compared
The chimney route may eliminate some products before alloy or price is considered.
| Construction | Route suitability | Practical advantages | Constraints | Verify before ordering |
|---|---|---|---|---|
| Flexible | Existing masonry flues with offsets or irregular passages | Can follow routes that rigid sections cannot; commonly sold in configurable kits | Still needs adequate room and can be damaged or trapped by sharp edges, debris, displaced tiles, or severe restrictions | Permitted bends, pulling direction, actual outside diameter, insulation space, wall construction, and approved connections |
| Rigid | Straight, unobstructed flues without offsets or dampers | Smooth interior and sectional assembly can suit accessible, straight routes | Should not be forced around bends; joints, support, and access must remain workable | Route straightness, joint orientation, support, clearances, and transition parts |
| Smooth-wall flexible | Offset routes where a smoother inner surface is desired | Combines flexibility with a less corrugated interior | Dimensions, bend restrictions, and handling requirements are product-dependent | Tested configuration, actual dimensions, permitted bend radius, and compatible fittings |
| Corrugated flexible | Common relining routes with manageable offsets | Widely available and often comparatively economical | Wall construction and durability vary by product | Approved fuel, wall type, handling limits, and cleaning method |
| Pre-insulated | Projects using a packaged liner-and-insulation assembly | Packages the liner and insulation as one selected product | The finished assembly may not pass through a tight flue | Finished outside diameter, listing scope, connector fit, support, and clearances |
| Oval, square, or rectangular | Restricted or non-round chimney passages | May fit routes where a required round liner will not | Sizing and fittings are product-specific | Manufacturer’s sizing method, appliance approval, actual dimensions, and available components |
Flexible does not mean infinitely bendable. Before selecting one, inspect the route for loose mortar, projecting tile edges, displaced tiles, debris, abandoned hardware, dampers, and abrupt changes in section. A liner can negotiate an offset only if its instructions permit the route and enough space remains for the liner plus any required insulation.
Rigid liner is generally a candidate for a straight, clear path. It should not be treated as material that can be bent or hammered through a restricted passage. One seller describes its rigid products for straight masonry chimneys without offsets or dampers and gives system-specific connection and clearance conditions. Those conditions belong to the seller’s stated rigid-liner assembly, not every rigid liner.
Smooth-wall and corrugated liners are both available, but advertised percentage improvements in airflow, draft, firing rate, or capacity should not be treated as established performance facts when the seller does not provide a common baseline, test method, geometry, or appliance configuration. Do not reduce diameter in anticipation of a claimed flow improvement.
Pre-insulated products package liner and insulation together, but they do not eliminate the need to verify fit. The assembled product still has specified dimensions, approved applications, connectors, support arrangements, and clearance conditions.
Round, oval, square, and rectangular products are sold. Do not ovalize or otherwise reshape a round liner merely because it appears close to fitting through a damper or tile. Confirm that the exact manufacturer permits the modification, provides a method, and supplies the resulting sizing information.
Chimney geometry checklist
Measure or document:
- Internal flue dimensions at multiple accessible levels
- The smallest known restriction
- Number, direction, and severity of offsets
- Damper opening and smoke-chamber restrictions
- Appliance outlet and connector location
- Horizontal distance from the appliance to the chimney entry
- Total chimney height and complete liner route
- Space at the top for support and termination
- Room for any required insulation
- Possible access points if the liner becomes caught
- Roof pitch, chimney location, and available access
How to determine liner diameter and length before ordering
The existing chimney opening does not determine the correct liner diameter. A large clay flue does not justify installing the largest liner that fits, and a restricted damper does not justify reducing the liner until it passes.
The appliance outlet is an important starting measurement, but not always the final answer.
The CHIM A LATOR manual, for example, directs users of that system to match liner cross-sectional area to the appliance exhaust opening and provides a separate fireplace rule. Those are product-specific directions from a partial manual referencing older standards. They should not replace the current instructions for another appliance or liner.
Before ordering, record:
- Appliance manufacturer and exact model
- Outlet diameter or rectangular dimensions
- Input, output, firing rate, or other data requested by the manual
- Required venting category and material
- Chimney height
- Vertical and horizontal connector layout
- Number and type of offsets
- Proposed adaptor, tee, elbow, or transition
- Whether one or multiple appliances will be connected
- Nominal inside diameter and actual liner outside diameter
- Finished outside dimensions with insulation
Retailer guidance commonly recommends beginning with the appliance manual or vent-outlet size, then measuring from the appliance connection to the chimney top. It also distinguishes flexible liner for offset routes from rigid liner for straight flues. These are useful purchasing principles, not substitutes for an appliance-specific sizing method. Northline presents them as general selection guidance.
Measure length along the complete intended route from the approved appliance connection or bottom adaptor to the top termination. Include the depth of any tee or connection, the path through offsets, the top support arrangement, and enough allowance to complete and trim the termination as instructed. Do not order solely from the visible exterior chimney height.
Printable liner measurement worksheet
| Measurement or condition | Project entry |
|---|---|
| Appliance manufacturer and model | |
| Fuel and appliance category | |
| Appliance outlet size and shape | |
| Required vent material | |
| Chimney height from connection to top | |
| Internal flue width and depth | |
| Smallest restriction | |
| Damper opening dimensions | |
| Number and location of offsets | |
| Horizontal connector location, length, and rise | |
| Proposed adaptor, tee, or elbow | |
| Liner nominal inside diameter | |
| Liner actual outside diameter | |
| Insulated assembly outside diameter | |
| Required termination allowance | |
| Roof pitch and access method | |
| Top support and cap space | |
| Extra length for connection and trimming |
Do not reduce diameter or improvise a transition without written approval from the relevant appliance and liner manufacturers. UK commercial guidance warns that a bottleneck can cause smoke backup, but the same page’s minimum-diameter rule and DEFRA exception are UK-specific rather than universal requirements. The UK guide also advises checking the route and allowing additional length before installation.
Fireplaces, boilers, furnaces, multiple-appliance chimneys, co-linear systems, and unusual connector arrangements need model-specific sizing. A simple “match the collar” rule is not sufficient for every installation.
Insulation, listings, clearances, and approved system components
Insulation should not be decided from fuel alone. The answer can depend on:
- The liner’s installation instructions and listing conditions
- Whether the chimney is lined, unlined, or has damaged tiles
- Masonry thickness and condition
- Appliance instructions
- Distance to combustible construction
- Chimney location
- Local requirements
- The specified insulation material and installation method
As a bounded example, the CHIM A LATOR manual requires full-length ceramic-blanket insulation at least 1/2 inch thick for its liner in an unlined masonry chimney. Under that same manual, insulation is not required in a lined chimney meeting existing codes. It also gives product-specific masonry conditions and clearance figures of 1 inch for an exterior chimney and 2 inches for an interior chimney, while stating that local codes may differ. These figures apply only to that system and documented installation condition. The partial manufacturer manual contains those system-specific insulation and clearance provisions.
Do not turn that example into either blanket rule:
- “Every stainless liner must be insulated.”
- “A liner installed inside an existing clay flue never needs insulation.”
Obtain a written answer for the selected system and actual chimney condition.
A seller’s statement that a liner is “UL 1777,” “zero clearance,” or “code compliant” is not enough by itself to design an installation. Verify the claim for the exact:
- Brand and model
- Diameter and shape
- Liner construction
- Fuel and appliance category
- Insulation assembly
- Connector and termination components
- Masonry condition
- Clearance condition
- Installation method
“Zero clearance” does not mean a liner can be installed in any chimney without regard to insulation, masonry, nearby combustibles, or the appliance manual.
Likewise, do not generalize the 18-inch clearance stated for one seller’s single-wall rigid product or the 1-inch and 2-inch figures in the manufacturer example above. Clearance belongs to the exact assembly and installation condition.
Mixing parts creates another verification problem. A liner from one brand, a tee from another, generic insulation, and an improvised top plate may physically connect, but that does not establish that the finished installation remains within any one documented system. The CHIM A LATOR manual expressly warns that using unspecified parts or materials may not provide a listed system.
Pre-purchase listing workflow
- Obtain the current appliance manual.
- Obtain the current liner installation manual—not just the product page.
- Ask for the certification or listing record and determine its scope.
- Confirm approved fuels and appliance categories.
- Confirm pressure, temperature, and condensation limitations.
- Verify the exact diameter, shape, and liner construction.
- Identify approved connectors, fasteners, supports, insulation, and termination parts.
- Confirm masonry and combustible-clearance conditions.
- Ask the local permit authority what approvals and inspections apply.
- Keep the manuals, product labels, invoices, and inspection records with the appliance file.
What a complete liner kit may need—and what the price leaves out
A “kit” may be complete for one configuration and incomplete for another. Build the parts list from the appliance connection upward.
Parts checklist
- Stainless flue liner in the approved diameter, alloy, construction, and length
- Appliance adaptor or bottom connector
- Tee for a horizontal connection, where approved
- Removable tee snout
- Tee clean-out cap
- Approved elbow or insert adaptor
- Connector pipe between the appliance and liner
- Approved transitions
- Top plate or top support
- Support clamp
- Storm collar
- Rain cap or cowl
- Approved fasteners, bands, or rivets
- Required insulation and covering or mesh
- Sealants specifically permitted by the system
- Clean-out access
- Identification labels or notice plate where required
- Installation instructions and warranty documents
The bottom connection depends on the appliance. A horizontally connected stove or furnace may use an approved tee with a removable snout and clean-out cap. An insert with a top outlet may instead need an approved adaptor or elbow. Neither arrangement should be inferred from a kit photograph.
One commercial 3-inch-by-30-foot kit illustrates what a package can include: a flexible 316 stainless liner, tee, tee cap, 13-by-13-inch top plate with built-in storm collar, round cap, fasteners, instructions, and warranty card. The seller markets that kit for selected wood, oil, gas, and pellet applications while excluding coal. Its dimensions and marketing do not establish suitability for any particular appliance. The kit contents, measurements, and seller-stated limitations appear on the product page.
When comparing prices, distinguish among:
- Liner-only per-foot pricing
- Basic kits with minimal top and bottom fittings
- Configurable kits
- Smooth-wall kits
- Heavy-wall or multi-layer construction
- Pre-insulated kits
- Oval, square, or rectangular systems
- Co-linear systems
- Fully installed proposals
Illustrative product prices
The following commercial prices were displayed in material reviewed in August 2026. They are point-in-time examples, not market averages or complete installed prices:
- SafeFlex light-wall liner listings showed approximately $12.16–$34.18 per foot, while smooth-wall listings showed $22.04–$41.47 per foot. Dimensions, options, availability, and displayed prices can change. See the retailer’s displayed SafeFlex category pricing.
- Rockford displayed selected flexible-kit starting prices from $476.99 to $853.99, depending on construction and configuration; non-round products required further configuration. The retailer identifies these as starting or configuration-dependent prices.
- Northline displayed selected 6-inch products from $774.99 to $1,549.99, including different lengths and a pre-insulated product. Its 6-inch collection shows the price variation within one nominal diameter.
A broader retailer guide estimates $20–$40 per linear foot for flexible stainless liner and $1,000–$3,000 for a simple installation. Those are commercial estimates, not dependable national averages; diameter, length, insulation, labor, site access, masonry work, permits, and system design can change an actual proposal substantially. Northline provides those figures as broad retailer estimates.
Total-cost worksheet
| Cost item | Estimate |
|---|---|
| Liner diameter and length | |
| Alloy | |
| Flexible, rigid, smooth-wall, or other construction | |
| Round or non-round shape | |
| Insulation system | |
| Appliance adaptor, tee, or elbow | |
| Clean-out parts | |
| Top plate, support, and clamp | |
| Storm collar and cap | |
| Connector pipe and approved transitions | |
| Fasteners and permitted sealants | |
| Shipping and oversize charges | |
| Roof-access equipment or scaffolding | |
| Installation labor | |
| Chimney sweeping and inspection | |
| Masonry opening, tile removal, or repair | |
| Permit and inspection fees | |
| Commissioning or testing | |
| Contingency for restrictions or damaged masonry | |
| Estimated total |
Do not compare a liner-only price with a pre-insulated kit or an installed contractor proposal. Do not assign value to a “lifetime warranty” until you have reviewed its exclusions, fuel limitations, maintenance duties, installation conditions, documentation requirements, and transfer rules.
Before installation: inspection, professional help, and regional compliance
This is a buying and risk-assessment framework, not a step-by-step installation tutorial. Chimney relining can combine roof access, concealed masonry conditions, combustion venting, system-specific assembly, and local approval requirements.
Before a liner is ordered or lowered, the chimney should be:
- Swept
- Inspected for structural soundness
- Measured throughout the proposed route
- Checked for soot, debris, and abandoned components
- Examined for cracked, displaced, or projecting tiles
- Checked at the damper and smoke chamber
- Assessed for offsets and constrictions
- Verified to have room for the complete insulated assembly, where required
No liner should be presented as a remedy for structurally unstable masonry. The manufacturer manual used in this article requires the chimney to be cleaned, structurally sound, correctly sized, and assembled with specified components before relining.
Commercial installation guidance commonly recommends at least two people, with one person potentially working from secure roof-level access. It also warns that suitable ladders, scaffolding, or other stable access may be necessary rather than working while perched on roof tiles. The UK retailer guide describes the two-person and roof-access demands while recommending professional installation.
Professional installation or direct professional oversight is especially appropriate when the project involves:
- Steep, high, wet, icy, or otherwise unsafe roof access
- Significant offsets
- A restricted damper or smoke chamber
- Opening masonry or removing tiles
- Uncertain structural condition
- Field-applied insulation
- Boilers, furnaces, fireplaces, or multiple appliances
- Condensing or positive-pressure equipment
- Uncertainty about permits or inspections
- Questions about listing scope or warranty conditions
Installation errors can create several hazards: falls during roof work; liner damage from sharp masonry or excessive bending; incorrect sizing; omitted insulation; incompatible components; and leakage of combustion products. Commercial guidance also identifies carbon-monoxide exposure and chimney-fire risk as reasons to use professional inspection and installation rather than assuming that access to instructions makes a project safe.
Regional requirements must remain separate. Document J, HETAS procedures, DEFRA sizing exceptions, notice plates, and the cited smoke-test and commissioning practices belong to a UK context. One UK guide states that work not performed by a HETAS-registered installer must be inspected under Document J and calls for commissioning and a smoke test before use; those are not automatically US requirements. The source expressly presents these as UK installation and approval procedures.
For any location, ask the relevant authority and installer to identify:
- The current appliance manual that governs the connection
- The current liner-system instructions
- Necessary permits or approvals
- Required inspections
- Required commissioning, draft, leakage, or smoke testing
- Applicable carbon-monoxide protection requirements
Final go/no-go checklist
Use this checklist alongside the appliance manual, liner instructions, and requirements identified by the local authority. Do not treat it as a substitute for those documents.
- [ ] The masonry chimney has been found structurally sound.
- [ ] The chimney has been swept and inspected.
- [ ] The exact appliance and fuel are documented as compatible with the liner system.
- [ ] Pressure and condensation conditions are within the system’s scope.
- [ ] Diameter has been established using the applicable sizing method.
- [ ] The complete route and smallest restriction have been measured.
- [ ] The selected construction can pass through the route without prohibited bends or damage.
- [ ] Alloy compatibility is documented.
- [ ] Insulation requirements have been confirmed.
- [ ] Masonry and combustible clearances have been verified.
- [ ] Connectors, supports, fasteners, and termination parts are approved for the system.
- [ ] A suitable roof-access and handling plan exists.
- [ ] Permit and inspection questions have been resolved with the relevant authority.
- [ ] Required inspection, commissioning, or testing has been completed.
- [ ] Required carbon-monoxide protection has been installed and checked.
- [ ] Manuals, invoices, labels, and inspection records have been retained.
Frequently asked questions
What size stainless flue liner do I need?
Start with the appliance outlet, but do not assume that matching it automatically produces the correct liner. Follow the appliance manufacturer’s current sizing method and the liner-system instructions. Depending on the appliance, sizing may also account for input, fireplace opening, chimney height, connector layout, fuel, and venting category.
Measure the complete route and verify that the liner’s actual outside diameter—plus required insulation—will pass through the smallest restriction. Fireplaces, boilers, furnaces, multiple-appliance chimneys, and co-linear systems need specific sizing rather than a general diameter rule.
Does every stainless flue liner need insulation?
No universal rule applies. Insulation can depend on the liner system, existing chimney construction, condition of the clay tiles, masonry, appliance instructions, combustible clearances, and local requirements.
Some systems require full-length insulation in an unlined chimney while permitting another arrangement in a compliant lined chimney. Other products may have different documented assemblies. Confirm the requirement for the exact liner model and actual installation.
Can a standard stainless liner vent a high-efficiency or condensing gas appliance?
Do not assume it can. Conventional all-fuel stainless systems may exclude Category II–IV equipment, positive-pressure operation, and appliances producing corrosive-acid condensate.
Use the venting system specified by the appliance manufacturer. It may require a purpose-designed alloy, sealed pressure-rated joints, condensate drainage, particular supports, and a specific termination. A product description that merely includes the word “gas” is not sufficient approval.
Is a flexible or rigid stainless liner better for an existing chimney?
Neither is inherently better for every chimney. Flexible liner is generally more practical where the existing flue has offsets or an irregular route. Rigid liner generally suits a straight, unobstructed masonry chimney without offsets or dampers.
The decision also depends on available space, insulation, permitted bends, liner construction, support, connection method, and cleaning access. Inspect and measure the route before selecting the construction.
Can a homeowner install a stainless flue liner without a professional?
Do not assume either that homeowner installation is allowed or that it is prohibited. Ask the local permit authority what approvals, inspections, and installer qualifications apply to the property and appliance.
Relining can involve roof access, hidden obstructions, masonry alteration, insulation, appliance sizing, containment of combustion products, and post-installation testing. Professional installation or oversight is prudent when access is unsafe, the route is difficult, the chimney condition is uncertain, or the appliance and liner requirements are not fully understood.
The safest selection order is straightforward even when the project is not: identify the exact appliance and operating conditions; have the masonry chimney inspected; determine the required size and route; choose a compatible documented liner system and alloy; confirm insulation and clearances; price every component and service; and complete the inspections or commissioning identified for the installation before use.
The best purchase is not the liner with the broadest marketing claim or lowest starting price. It is the complete system whose current documentation matches the appliance, chimney, and jurisdiction.