
How to Choose a Liner System That Actually Fits Your Appliance and Chimney
Match appliance and fuel requirements to diameter, material, insulation and finished dimensions, then compare kit contents and total project cost.
By Gus Halloran, who installed hearth products and venting for 18 years. About Mechanical Mentor.
A chimney liner kit is not a generic metal tube selected to match the opening inside a chimney. It is one part of an appliance-specific venting system. Diameter, material, construction, insulation, connectors, support, and termination must all be checked against the appliance, the exact liner system, the chimney route, and local acceptance requirements.
Use this pre-purchase sequence:
- Identify the exact appliance and fuel.
- Obtain the appliance manual and the proposed liner system’s current instructions.
- Determine which permits, inspections, and local requirements apply.
- Inspect and measure the complete chimney route.
- Establish the permitted liner diameter, material, and construction.
- Account for insulation and the system’s finished outside dimensions.
- Select every connector, support, and termination component.
- Verify listing documentation, installation conditions, warranty terms, and return restrictions.
- Compare the total project cost rather than advertised kit prices.
This is a shopping and measurement guide, not an installation specification. The appliance instructions, liner listing and instructions, adopted requirements, permit conditions, inspection process, and local authority must all be reconciled for the actual project. Mechanical Mentor’s safety notice likewise describes its material as general reading and notes that combustion appliances and venting may involve permits and inspections.
What a chimney liner kit includes—and why “complete” is relative
A chimney liner is a conduit installed inside a chimney to contain combustion products, carry them outdoors, and separate them from the chimney walls. That definition does not establish whether a particular liner is permitted for your stove, insert, pellet appliance, furnace, boiler, water heater, fireplace, or other equipment.
Retailer collection pages commonly place several product types together:
- Complete or configurable liner kits
- Basic insert kits
- Bare flexible liner
- Rigid liner sections
- Pre-insulated liner
- Separate insulation kits
- Tees, adapters, caps, plates, and couplers
- Cleaning and installation accessories
The product title, selected options, and itemized contents therefore matter more than the collection heading. A low displayed price may represent a bare liner, an insulation package, or an accessory rather than an installable system.
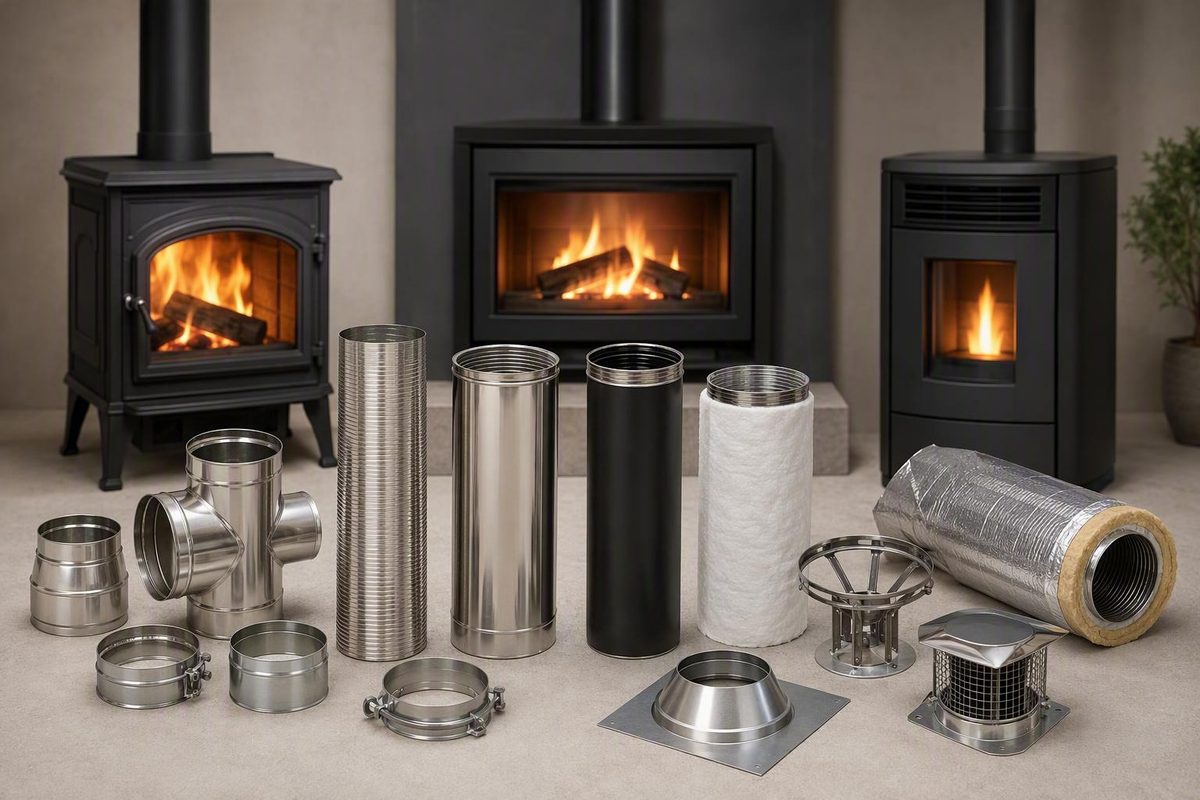
A typical tee-based kit may include:
- A specified diameter and length of liner
- A tee body or appliance connector
- A removable tee cap
- A top plate or support plate
- A rain cap
- Bands, clamps, screws, or other fasteners
- Installation instructions
- Warranty or registration information
For example, the Flex-All retailer describes its kits as including a liner, removable tee and tee cap, integrated storm-collar top plate, round cap, fasteners, instructions, and warranty card. That is the seller’s description of one product line, not a universal definition of a complete kit. See the stated Flex-All kit contents.
Some fireplace-insert or “basic” kits use a stove adapter instead of a tee and cleanout cap.
Items frequently sold separately include:
- Wrap or poured insulation
- Protective mesh or an outer jacket
- Specialty appliance adapters
- Pellet-specific or low-profile connectors
- Extended tee snouts
- Approved couplers
- Oval, square, or rectangular transitions
- Manufacturer-specified sealants
- Pulling cones and other tools
- Top plates for unusual chimney crowns
- Masonry, crown, thimble, or smoke-chamber repairs
- Chimney cleaning and debris removal
A pre-insulated liner is not the same product as a separate insulation kit. A pre-insulated assembly combines an inner liner, insulation, and an outer protective layer. An insulation kit may contain only insulation and the accessories needed to apply it.
Use the same checklist on every product page:
| Item to verify | Product-page answer |
|---|---|
| Exact product type: complete kit, basic kit, bare liner, or insulation kit | |
| Liner material and alloy | |
| Wall or construction type | |
| Inside diameter or equivalent venting area | |
| Ordered length | |
| Finished outside dimensions | |
| Insulation included? | |
| Bottom connector type | |
| Tee cap or cleanout arrangement included? | |
| Tee-snout length | |
| Top plate or support type | |
| Rain cap included? | |
| Couplers required or included? | |
| Fasteners or locking bands included? | |
| Sealants required or included? | |
| Instructions available for the exact model? | |
| Listing and warranty documents available? | |
| Custom product returnable? | |
| Shipping or oversize charges included? |
Do not let the word complete replace this inventory. It ordinarily describes a defined standard configuration, not everything every chimney could require.
Start with the appliance, fuel, and governing instructions
Treat the following as a verification sequence, not a universal hierarchy of legal authority:
- Obtain the exact appliance installation and venting instructions.
- Obtain the exact liner system’s listing documentation and installation instructions.
- Determine the adopted local requirements, permit conditions, and inspection process.
- Ask the local authority which documents and configurations it will accept.
- Use retailer guides only for preliminary comparison and measurement planning.
All applicable requirements must agree. A general buying guide cannot authorize a configuration prohibited by an appliance manual, liner-system instructions, permit condition, or local authority.
Create an appliance record before shopping:
- Manufacturer and exact model
- Appliance type
- Fuel
- Flue-outlet shape and dimensions
- Rear, top, vertical, or angled outlet
- Efficiency or vent category, where applicable
- Existing connector type
- Proposed connection method
- Whether the appliance instructions address condensate
- Whether the chimney will serve only this appliance
- Required vent height or sizing method
- Permitted liner materials
- Insulation and clearance conditions
- Restrictions on reducing, reshaping, or coupling the vent
The existing chimney answers a physical question: What assembly can pass through this route? It does not answer the venting question: What system does the appliance require?
A large clay flue does not mean the appliance should receive the largest liner that fits. A narrow clay flue does not authorize reducing the approved liner size until it passes through.
As a cautious shopping rule, do not plan to reduce a liner below the appliance outlet unless the appliance’s approved instructions expressly permit that configuration. Retail sizing pages commonly start with outlet size but direct buyers back to the appliance manufacturer’s instructions; their typical diameters are examples rather than model-specific approvals. See Chimney Liner Depot’s appliance-first sizing guidance.
Open fireplaces are a separate sizing case. Some sellers publish ratios based on fireplace-opening area, but those methods apply to the open-fireplace context in which they are presented. Do not transfer them to stoves, inserts, pellet appliances, furnaces, boilers, or water heaters.
For gas or oil equipment, do not shop from fuel name alone. Record the appliance’s stated vent category, efficiency, draft method, temperature limits, and condensate instructions. Then look for a vent or liner system expressly permitted by the appliance manufacturer.
If more than one appliance may use the chimney, treat that as a design question for the appliance manufacturers, selected vent-system manufacturer, and local authority. Do not assume that a single-appliance kit is suitable for a shared arrangement.
Match liner material to the appliance—not a broad “all-fuel” label
Stainless steel, aluminum, and AL29-4C are application-dependent materials. They are not interchangeable upgrades in which the most expensive alloy is automatically the right choice.
“All fuel” can be a product-family label or category filter. It does not establish that every diameter, fitting, insulation arrangement, or configured kit is permitted for a particular appliance.
Stainless-steel products
Manufacturers and retailers commonly offer 316L and 316Ti flexible stainless products across several fuel categories. National Chimney, for example, describes M-FLEX as 316L stainless steel and separates standard, basic, smooth-wall, pellet/corn, aluminum, pre-insulated, and rigid configurations. The same catalog describes one 304 product more narrowly for wood-burning use. These are the manufacturer’s product classifications, not universal alloy rules. Compare National Chimney’s liner materials and configurations.
Do not select 304, 316L, or 316Ti from the alloy name alone. Verify:
- The exact appliance and fuel are permitted
- The liner construction appears in the relevant system documents
- Applicable temperature limits cover the proposed use
- The system is suitable for the conditions identified by the appliance instructions
- Required insulation and clearances can be achieved
- The proposed fittings are permitted for that system
- The warranty covers the selected appliance, fuel, and installation method
Aluminum products
The aluminum products in the supplied commercial evidence are marketed for limited gas applications, not solid fuel. One retailer describes an aluminum liner for Category I natural-draft gas-fired heating equipment and gas fireplaces; another manufacturer limits its aluminum kit according to appliance efficiency.
That does not establish that aluminum is suitable for every gas appliance. It means buyers must confirm the exact appliance category, draft method, efficiency, temperature, condensate conditions, and system documentation. The supplied evidence does not support substituting aluminum for a wood, pellet, coal, corn, or other solid-fuel liner.
AL29-4C products
The cited AL29-4C offering is described by its seller for certain high-efficiency gas and oil applications and expressly not for solid fuel. The same catalog separates it from stainless multi-fuel product families. Review Rockford’s attributed material categories and limitations.
Do not infer that a material marketed for demanding gas or oil conditions is therefore suitable for a solid-fuel appliance. The exact appliance and vent-system documents must establish compatibility.
Material document-checking matrix
This matrix is not a material selector. It identifies what to investigate before purchasing.
| Appliance and fuel | Starting point for investigation | Restrictions to verify | Documents to check |
|---|---|---|---|
| Wood stove or insert | Vent or liner system expressly permitted for the appliance; sellers commonly offer stainless systems | Diameter, solid-fuel use, insulation, chimney condition, cleaning method | Appliance manual, exact liner documents, local requirements |
| Pellet appliance | The vent or liner system named or permitted by the appliance manufacturer | Diameter or sizing method, joints, connectors, cleaning access, route limits | Appliance manual and exact vent-system instructions |
| Coal or corn appliance | A system expressly documented for that appliance and fuel | Material exposure, temperature, maintenance, warranty exclusions | Appliance manual, system documents, warranty |
| Category I natural-draft gas appliance | Appliance-permitted gas vent or liner; aluminum is only a candidate where expressly allowed | Category, efficiency, sizing method, vent arrangement, condensation | Appliance instructions, exact liner instructions, local review |
| Higher-efficiency gas appliance | The corrosion-resistant vent system named or permitted by the appliance manufacturer | Condensate handling, joint method, orientation, temperature, termination | Appliance venting instructions and exact system documents |
| Oil appliance | The vent or liner system named or permitted by the equipment manufacturer | Temperature, condensate conditions, fuel-specific limitations | Appliance manual, liner documents, warranty |
| Open masonry fireplace | A system documented for open-fireplace use | Fireplace sizing method, height, smoke chamber, insulation, physical fit | Liner instructions and locally applicable requirements |
The useful question is not “Which alloy is best?” It is “Which documented system is permitted for this appliance, fuel, and chimney configuration?”
Choose flexible, smooth-wall, rigid, shaped, or pre-insulated construction
After identifying a candidate material and approved vent size, select a construction that can negotiate the complete route.
Flexible liner
Flexible liner is commonly marketed for masonry chimneys with offsets or irregularities. Its principal shopping advantage is route adaptability, but it still has product-specific limits on bends, handling, pulling, reshaping, and connection methods.
A flexible liner can fail the fit check because of:
- Shifted or broken clay tile
- Mortar projections
- A narrow damper opening
- A severe offset
- An undersized thimble
- Insufficient room for insulation
- A connector wider than the liner body
- A pre-insulated outside diameter that exceeds the available passage
Rigid liner
Sectional rigid liner is generally marketed for straight, adequately sized chimneys. It introduces joints and requires enough room for assembly, support, and the manufacturer’s approved connection method. Retail sellers distinguish flexible products for offset routes from rigid products for chimneys without offsets, but that classification remains product-specific rather than universal. Compare the seller’s flexible, smooth-wall, rigid, and pre-insulated categories.
Do not choose rigid construction merely because the flue looks straight from one end. Hidden offsets, displaced tiles, mortar projections, and changes in section can alter the decision.
Smooth-wall flexible liner
Smooth-wall flexible liner is another available construction. Sellers advertise benefits such as lower drag or greater capacity, but the supplied commercial material does not independently establish a universal performance improvement. Treat percentage claims as marketing unless the applicable product documentation and sizing method substantiate them for the exact configuration.
Reshaping can also be restricted. Vendor guidance states that some smooth-wall flexible liners cannot be ovalized. Verify the exact instructions before planning to alter a round product.
Oval, square, and rectangular liner
A shaped liner may pass through a restricted damper or non-round flue, but changing shape can reduce effective cross-sectional area. A nominal round diameter therefore does not fully describe the completed vent.
Obtain:
- Minor outside dimension
- Major outside dimension
- Resulting inside area
- Shape-specific sizing data
- Finished dimensions with insulation or jacket
- Confirmation that reshaping is permitted
- Approved shape-transition fittings
Treat shape as part of vent sizing, not simply a packaging choice.
Pre-insulated liner
A pre-insulated system combines the inner liner, insulation, and an outer protective layer.
Compare the chimney with the manufacturer’s complete finished dimensions—not just nominal inside diameter. Include seams, outer layers, clamps, couplers, and the bottom connection.
Co-linear systems
A co-linear kit uses separate intake and exhaust liners in a specialized appliance configuration. Investigate one only when the appliance’s approved venting design calls for it.
Route-based decision tree
Is the flue straight, unobstructed, and adequately sized?
- Yes: Investigate permitted rigid and flexible systems. Compare joints, insulation, supports, connector access, and maintenance.
- No or uncertain: Continue below.
Does the route contain offsets or irregularities?
- Yes: A permitted flexible system is usually the first construction to investigate.
- No: Either construction may remain possible, subject to the exact product documents.
Is the fireplace damper the controlling restriction?
- Yes: Measure its width, depth, and connection angle. Ask whether an approved shaped liner, adapter, or authorized masonry alteration is available.
- No: Identify the narrowest point elsewhere in the route.
Is the flue non-round?
- Yes: Compare required venting area and finished outside dimensions using the manufacturer’s shape-specific data.
- No: A round system may be possible.
Is there too little space for the approved liner and required insulation configuration?
- Yes: Stop treating the problem as a product search. Ask the appliance manufacturer, liner manufacturer, chimney professional, and local authority what design or chimney work is acceptable.
- No: Proceed to connector and termination selection.
Measure the chimney route before ordering
Accurate measurements prevent two common failures: ordering a liner that is too short and ordering an assembly that cannot pass through the chimney.
Measure the route from the appliance connection to the top termination. Do not substitute basement height, roofline, attic height, or estimated building height.
Commercial guides give different ordering allowances. Some suggest extra length for bends and the top connection; others recommend the next available standard length. Northline Express gives an example in which a measured 31-foot route leads to a 35-foot liner. That is an ordering example—not a universal four-foot allowance—and the selected system’s instructions should determine the final length. See the retailer’s measurement example.
Measure both the widest and narrowest internal dimensions. Nominal clay-tile size can differ from clear space because of tile thickness, misalignment, mortar, damage, and construction variation. Rockford gives the example of a nominal 8-by-13-inch tile whose internal dimensions may range from 6 to 8 inches on the short side and 11 to 13 inches on the long side. See Rockford’s wood-stove liner measurement guide.
Do not assume the top opening is the narrowest point. Record every known offset, tile-size change, damper restriction, smoke-chamber transition, thimble, mortar projection, and displaced section. If concealed conditions remain uncertain, ask a qualified chimney professional whether a camera inspection is appropriate.
For a fireplace insert, record:
- Appliance outlet size and shape
- Outlet position and angle
- Route length from outlet to termination
- Damper opening width and depth
- Smoke-chamber restrictions
- Space for the adapter and any shape transition
- Access needed to connect and service the liner
For a freestanding appliance connected through a thimble, record:
- Appliance outlet and connector size
- Thimble inside dimensions
- Thimble depth
- Route length from thimble to termination
- Space for the tee body
- Required tee-snout reach
- Access to the cleanout cap
- Offset between appliance and tee
Printable measurement worksheet
| Measurement or fact | Recorded value |
|---|---|
| Appliance manufacturer and model | |
| Appliance type | |
| Fuel | |
| Efficiency or vent category, if applicable | |
| Outlet inside/outside dimensions | |
| Outlet shape | |
| Outlet location and angle | |
| Proposed connector: tee, stove adapter, or other | |
| Connection-to-termination route length | |
| System-specified extra allowance | |
| Planned order length | |
| Flue dimensions at top | |
| Narrowest internal width | |
| Narrowest internal depth | |
| Tile-size or shape changes | |
| Number and location of offsets | |
| Damper opening width and depth | |
| Smoke-chamber restriction | |
| Thimble inside diameter | |
| Thimble depth | |
| Required tee-snout reach | |
| Approved liner inside diameter | |
| Bare liner outside dimensions | |
| Insulation type and thickness | |
| Insulated finished outside dimensions | |
| Largest coupler or connector dimension | |
| Top-tile condition and projection | |
| Proposed top-plate configuration | |
| Inspection findings and required repairs | |
| Permit and inspection questions |
Do not improvise an unsafe access method to obtain these measurements. If the route cannot be measured safely or confidently, have it inspected and measured professionally.
Resolve diameter, shape, and insulation as one fit problem
Diameter, shape, and insulation cannot be selected independently. Together they determine venting capacity and the assembly’s physical outside dimensions.
1. Determine the permitted vent size
Begin with the exact appliance manual and its approved venting method. Retailer statements that an appliance type “usually” uses a particular diameter are illustrations, not recommendations for your model.
Do not use the clay-flue dimensions as the target diameter, and do not automatically choose the largest liner that fits. The appliance establishes the permitted venting size or sizing method; the chimney establishes a separate physical constraint.
For an open fireplace, commercial guides sometimes describe 10:1 or 12:1 ratios between fireplace-opening area and flue area. Those are seller-provided methods for the open-fireplace context. They are not substitutes for appliance-specific sizing instructions.
2. Determine whether the liner will remain round
If the route requires an oval, square, or rectangular form, obtain the manufacturer’s resulting cross-sectional area and outside dimensions. Flattening or otherwise reshaping a liner changes more than its profile.
Do not buy a round liner on the assumption that it can be reshaped during installation. First verify:
- That reshaping is permitted
- The minimum and maximum finished dimensions
- The resulting venting area
- The available transition fittings
- The effect on insulation and outside clearance
3. Resolve the insulation configuration
Whether and how insulation is used may depend on the liner-system documents, appliance instructions, chimney construction and condition, clearance findings, proposed fuel, warranty terms, and local acceptance requirements.
The available evidence does not support calling insulation universally mandatory or universally optional. Treat it as an installation-specific condition to resolve before ordering.
Possible documented configurations may include:
- Uninsulated liner where expressly permitted
- Field-applied wrap insulation
- Poured insulation installed under the selected system’s method
- Factory pre-insulated liner
- Another manufacturer-approved assembly
Each option changes the fit calculation. Wrap may add mesh or a protective sleeve. A poured system requires defined surrounding space and an approved installation method. A pre-insulated product has factory-defined dimensions. Couplers, bands, and adapters may extend beyond the liner body.
4. Perform the complete fit check
Use this sequence:
- Establish the appliance-permitted diameter or sizing method.
- Confirm whether round or shaped construction is permitted.
- Identify the required or permitted insulation configuration.
- Obtain the completed outside dimensions.
- Record the largest dimensions of couplers, bands, and connectors.
- Compare them with the narrowest flue section.
- Check every offset, damper, smoke-chamber transition, and thimble.
- Confirm that the bottom connection and top support can be assembled.
- Confirm that the required inspection and cleaning access can be maintained.
- If any part does not fit, refer the configuration back to the relevant manufacturers and local reviewer.
A vent size that is correct for the appliance but cannot pass through the chimney presents a design, access, or chimney-repair problem. Do not treat that conflict as permission to reduce the diameter, omit a specified insulation configuration, crush an unapproved shape, or alter a fitting. Ask what the exact system documents permit.
Select the connector, termination, listing, and warranty together
Treat the liner, bottom connector, top support, and cap as a proposed system rather than a collection of diameter-matched parts. Before combining components, verify in the selected manufacturer’s instructions that the exact parts and connection methods are permitted.
Bottom connection choices
A tee with a capped cleanout is common where the liner reaches a side thimble. Check:
- Tee-body dimensions
- Snout length
- Fastening method
- Required orientation
- Access to the removable cap
A stove adapter is used in some insert configurations. Confirm that the appliance outlet position, angle, and connection space match the documented adapter arrangement.
An extended tee snout may be needed for a deep thimble or masonry wall. Measure the required reach rather than assuming a standard snout is long enough.
A pellet-specific or low-profile connector should be evaluated under the appliance and liner instructions rather than treated as interchangeable with a general stove tee.
Top connection choices
The chimney top affects support and sealing choices. A sound projecting clay tile may use a different arrangement from a tile that is damaged, cut down, or removed.
Possible product configurations include:
- Terra-cotta-mounted plate
- Flat top plate
- Custom plate
- Top clamp
- Storm collar
- System-specific cap
Ask the liner manufacturer which arrangement applies to the existing chimney top and whether crown or tile repairs are needed first. Also confirm how the liner is supported and how the termination can be removed or accessed for inspection and cleaning.
Couplers and field modifications
General retailer advice conflicts on joining shorter flexible liners: one vendor describes a connector for joining sections, while another advises against joining separate liners to compensate for insufficient length. The correct answer is therefore system-specific.
Before planning a coupler, ask:
- Does the exact system permit a joint in that location?
- Is the named coupler approved for the selected liner?
- Must the joint remain accessible or inspectable?
- Does it change insulation or clearance conditions?
- Does it affect warranty coverage?
- Is the custom or coupled product returnable?
Apply the same approach to ovalizing, changing a tee snout, cutting a top plate, or combining components from different product families. Do not assume a field alteration is allowed merely because it is physically possible.
Listing and warranty verification checklist
Before ordering, obtain and review:
- [ ] Listing documentation for the exact liner system
- [ ] Installation instructions for the selected construction
- [ ] Permitted appliances and fuels
- [ ] Permitted diameters and shapes
- [ ] Applicable temperature and condensate limitations
- [ ] Insulation and clearance conditions
- [ ] Permitted connectors, couplers, and adapters
- [ ] Top-support and termination instructions
- [ ] Cleaning and inspection requirements
- [ ] Maintenance and recordkeeping conditions
- [ ] Professional-installation requirements
- [ ] Warranty registration process
- [ ] Fuel-specific exclusions
- [ ] Transferability conditions
- [ ] Proof-of-purchase requirements
- [ ] Installation-documentation requirements
- [ ] Return rules for made-to-order products
“Lifetime” and “transferable” do not mean unconditional. A RoofingDirect listing for an M-Flex kit states that its advertised lifetime transferable warranty depends on professional installation and maintenance. The page also lists a 316 stainless liner, stove adapter, tee, tee cap, rain cap, and top plate, but does not clearly establish that insulation is included. Check the listed M-Flex configuration and warranty condition.
Treat statements about UL status, code compliance, zero-clearance use, temperature limits, country of origin, and warranty coverage as seller or manufacturer claims until you obtain the current documents for the exact configured product.
Compare total cost and decide whether the project needs a professional
The kit price is only one part of the project budget. Include:
- Chimney inspection
- Camera inspection if appropriate
- Cleaning and debris removal
- Creosote remediation
- Authorized flue preparation
- Masonry, crown, smoke-chamber, or thimble repairs
- Liner
- Insulation
- Protective mesh or outer jacket
- Bottom adapter, tee, cap, and snout extension
- Couplers and shape transitions
- Top plate, support, storm collar, and cap
- Specified sealants and fasteners
- Tools and access equipment
- Shipping and oversize charges
- Custom-fabrication charges
- Permit and inspection fees
- Professional labor
- Future cleaning and maintenance
- Warranty-required service or documentation
Starting prices are not comparable unless diameter, length, alloy, wall construction, insulation, connectors, freight, and warranty conditions are normalized.
They are examples of different products—not a value ranking or installed-cost estimate.
| Product example | Exact displayed configuration | Construction and stated contents | Displayed price and source* |
|---|---|---|---|
| Flex-All single-ply kit | 3 in. × 15 ft | Single-ply stainless; liner, removable tee and cap, top plate, round cap, fasteners, instructions, warranty card | $292.95 |
| Lifetime single-wall kit | 5 in. × 35 ft | Single-wall liner; tee configuration | $699.99 |
| Pre-insulated hybrid liner | 6 in. × 30 ft | Pre-insulated 316L-alloy product; complete fitting set not established by the collection listing | $1,549.99, same Northline Express collection |
| M-Flex standard kit | Configurable 3–8 in.; 15–50 ft options displayed | 316 stainless; stove adapter, tee, tee cap, rain cap, top plate | $731.95–$1,883.95 |
*Displayed prices, options, inventory, and shipping terms can change. Confirm the exact configuration and final checkout price directly with the seller.
Northline Express also publishes broad commercial estimates of approximately $20–$40 per linear foot for flexible liner and about $1,000–$3,000 for a simple professional installation, with more complex work potentially costing substantially more. These are retailer estimates, not quotes, and can vary with location, diameter, material, access, chimney height, offsets, repairs, permits, and season. Review the retailer’s stated cost ranges.
A low-priced kit may become expensive after adding insulation, a specialty adapter, freight, tile removal, or crown repair. A higher-priced pre-insulated product may reduce field assembly but still fail the physical-fit check. Compare completed systems for the same appliance and chimney—not cartons or starting prices.
When professional help should move from optional to prudent
Pause the purchase and request qualified local review when:
- Chimney condition is unknown.
- Clay tiles appear cracked, shifted, missing, or obstructed.
- Heavy creosote, soot, debris, or signs of a previous chimney fire are present.
- Moisture or possible condensate damage is visible.
- Clearances to combustible construction have not been established.
- The appliance-permitted liner size does not fit.
- The liner fits bare but not in the required insulation configuration.
- The route has severe or concealed offsets.
- The damper or smoke chamber may need alteration.
- Roof access cannot be managed safely.
- Appliance category or fuel compatibility remains unclear.
- More than one appliance may share the chimney.
- Components from different systems appear necessary.
- A field modification or unverified coupler appears unavoidable.
- Permit or inspection requirements remain unclear.
- Warranty coverage depends on professional installation or maintenance.
A chimney liner kit supplies components. It does not, by itself, resolve chimney condition, safe access, appliance sizing, system documentation, local acceptance, or inspection requirements.
Before ordering:
- Identify the appliance and fuel.
- Obtain the appliance manual and proposed liner-system documents.
- Determine the local permit and inspection process.
- Inspect and clean the chimney as needed.
- Measure the complete route and its tightest restrictions.
- Establish the permitted diameter, material, shape, and construction.
- Account for insulation and finished outside dimensions.
- Select the correct bottom connector, top support, and termination.
- Verify listing documentation, installation conditions, and warranty terms.
- Compare total project cost—not advertised starting price.
- If condition, access, clearance, fit, or compatibility remains uncertain, stop and obtain qualified local review.
Frequently asked questions
What size chimney liner kit do I need?
Use the diameter or sizing method in the exact appliance’s approved venting instructions. Outlet size may be the starting point, but the appliance documentation can impose additional conditions.
The existing clay flue tells you what may physically fit; it does not determine what the appliance requires. Do not plan to reduce the vent below the appliance outlet unless the approved appliance instructions expressly allow that configuration.
Once the permitted vent size is known, confirm that the liner, insulation, couplers, and connectors can pass through the narrowest section and every offset. If they cannot, refer the conflict for system-specific design or chimney-repair guidance.
Does a chimney liner kit normally include insulation?
Sometimes. A standard kit may include the liner, tee or stove adapter, top plate, cap, and fasteners while selling insulation separately. A pre-insulated liner combines the liner, insulation, and an outer protective layer. Configurable kits may offer insulation as an option.
Check the itemized contents rather than relying on “complete.” Resolve the permitted or required insulation configuration from the exact liner and appliance documents, chimney findings, warranty conditions, and local review. Perform the fit check using the completed outside dimensions.
Should I choose a flexible or rigid chimney liner?
Flexible liner is commonly the first product type investigated for a chimney with offsets or irregularities. Sectional rigid liner is generally investigated for straight, adequately sized flues.
Neither is automatically superior. Flexible liner remains subject to bend, handling, shape, connection, and insulation limits. Rigid liner requires permitted joints, support, assembly access, and adequate room throughout the route. Inspect the chimney before choosing because a route that looks straight from below may contain concealed restrictions.
Can an aluminum chimney liner be used for a wood or pellet appliance?
Not based on the products documented here. The cited sellers limit their aluminum products to specified gas applications, including qualifying lower-efficiency or Category I natural-draft equipment. The supplied evidence does not present aluminum as a wood- or pellet-liner substitute.
Use only a vent or liner system expressly permitted for the exact appliance and fuel. Do not infer solid-fuel compatibility from diameter, flexibility, price, or a catalog filter.
Can I install a chimney liner kit myself?
That depends on the appliance, selected system, chimney condition, local requirements, safe access, and warranty terms. Retail availability to homeowners does not establish that a product is appropriate for every DIY project.
Do not proceed on assumptions when sizing is unclear, the chimney may contain concealed damage, clearances are unknown, access is unsafe, masonry changes appear necessary, or the components have not been documented as one permitted system. Some warranties also condition coverage on professional installation or maintenance.
Even where owner installation is accepted, the appliance instructions, liner-system instructions, permit conditions, and inspection process still apply. If any part of the condition, fit, access, or compatibility assessment remains uncertain, have a qualified chimney professional inspect and specify the system before ordering.