
How to Plan and Set Ledger Stone Around a Fireplace
Verify fireplace clearances and compatibility, estimate stone, prepare the approved substrate, dry-lay panels, and support stone above the opening.
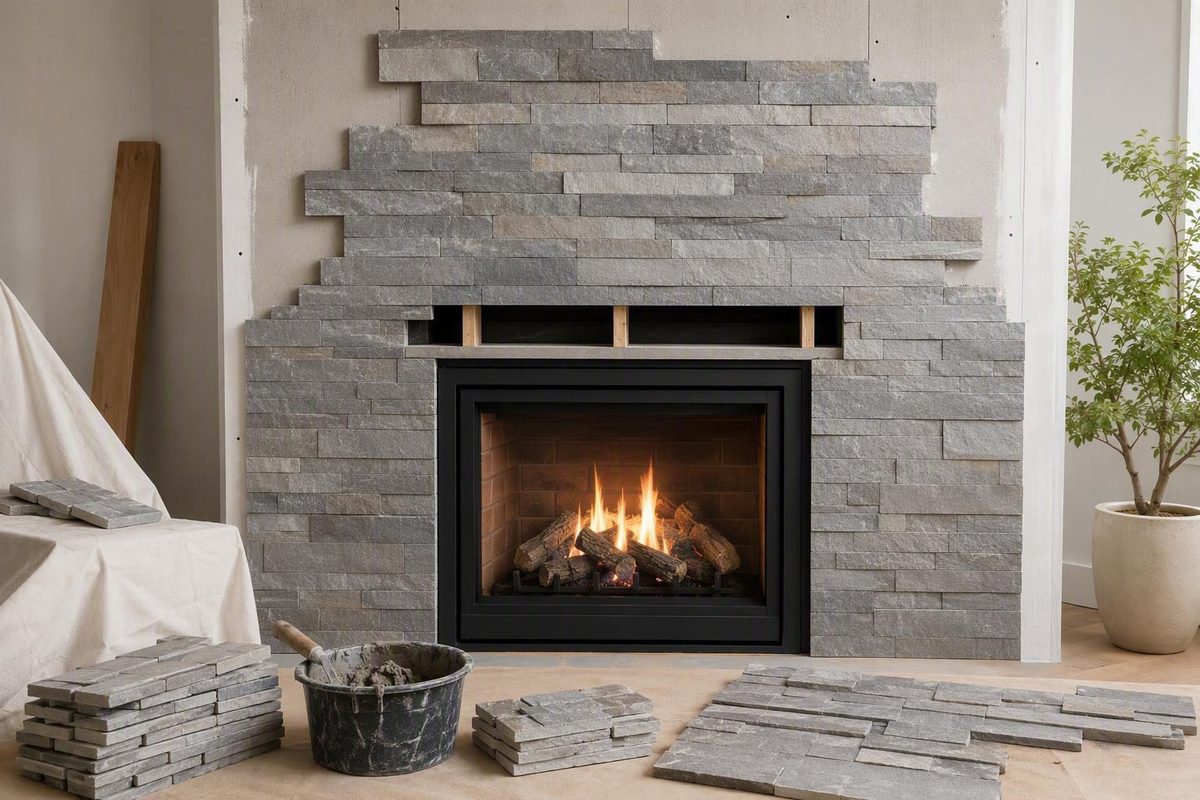
A stacked stone veneer fireplace surround should begin as a documentation and planning project. Confirm the fireplace’s listed facing and clearance requirements, verify that the veneer, mortar, and substrate are compatible, and determine how panels above the opening will be supported. Only then should you measure, prepare the approved surface, dry-lay the stone, establish level courses, and begin setting panels.
The steps below summarize a supplier’s ledger-panel method rather than establishing a universal fireplace assembly. Fireplace-specific clearances, heat exposure, hearth details, structural support, and firebox transitions must come from the applicable fireplace and material documentation.
Verify the assembly before buying or bonding stone
Complete this checklist before ordering materials:
- Identify the fireplace manufacturer and exact model.
- Obtain the current installation manual and product-listing information.
- Locate the requirements for facing materials, the hearth, firebox edges, mantels, trim, and nearby combustible construction.
- Obtain the veneer manufacturer’s installation instructions.
- Confirm that the mortar is approved for the veneer, substrate, location, and expected conditions.
- Obtain the substrate or backer-board instructions, including fastening and joint-treatment requirements.
- Ask the local building department whether permits, inspections, or locally adopted provisions apply.
- Confirm that the wall and its supporting construction are suitable for the complete assembly.
- Decide how veneer above the fireplace opening will be supported while the mortar sets.
MSI’s ledger-panel guide covers estimating, substrate preparation, layout, bonding, cutting, corners, and temporary support. It does not establish universal fireplace clearances, hearth requirements, firebox-edge details, temperature ratings, or structural requirements.
Do not assume that a decorative stone surface makes underlying drywall, combustible framing, mantel components, television-mounting parts, or concealed hardware acceptable. If clearances, heat exposure, substrate condition, product compatibility, or support cannot be confirmed, pause and consult the appropriate manufacturer, mason, fireplace technician, structural professional, or local code official.
Measure the surround and add a waste allowance
Calculate the gross wall area, subtract the fireplace opening and any other areas that will not receive veneer, and then add an allowance for cuts and waste.
| Calculation step | Formula | Result |
|---|---|---|
| Gross wall area | 10 ft × 8 ft | 80 sq. ft. |
| Fireplace opening | 4 ft × 3 ft | 12 sq. ft. |
| Net veneer area | 80 − 12 | 68 sq. ft. |
| Add 10% | 68 × 1.10 | 74.8 sq. ft. |
| Initial estimate | Round appropriately | About 75 sq. ft. |
MSI advises ordering approximately 10% extra for cuts and waste. It describes its standard panels as covering about one square foot and its XL Rockmount panels as covering 1.5 square feet; those coverage figures are product-specific and should not be transferred to another panel format (review MSI’s estimating and installation guidance).
In this example, 75 square feet is only a starting estimate. Complex firebox cuts, breakage, pattern selection, package quantities, and purpose-made corner units can change the final order. Calculate corner pieces separately using the selected product’s packaging and coverage instructions.
Prepare only a substrate approved for the selected system
MSI identifies cement-block walls and cement board as suitable substrates for the ledger-panel installation described in its guide. This is a product-system recommendation, not approval of every masonry wall or backer board.
For cement board, follow the board manufacturer’s fastening and joint-treatment instructions. MSI directs installers to fill the joints with the specified mortar and embed the required tape according to those instructions. Also verify that the completed surface satisfies the veneer system’s requirements for condition, flatness, cleanliness, and compatibility.
Do not treat the guide as approval to bond panels directly over drywall, paint, tile, existing brick, damaged masonry, or an older veneer. Whether any existing surface may remain depends on the instructions for the particular fireplace, veneer, mortar, and substrate assembly.
A cracked, damp, deteriorated, uneven, moving, or unidentified wall requires further assessment before installation. The correct preparation or support method cannot be determined from a generic ledger-panel guide.
Dry-lay the stone and plan every interruption
Open several cartons and arrange panels on a clean floor before mixing mortar. Blend variations in color, texture, length, and thickness so obvious clusters or repeating seams do not develop. Retain useful offcuts for returns and narrow spaces without concentrating short pieces in one visible area.
Check the hearth or floor for level rather than using it automatically as the starting line. Establish a level chalk reference for the first course and plan how any variation at the bottom will be handled.
Map the following before setting panels:
- Inside and outside corners
- Both sides and the top of the fireplace opening
- Mantel brackets and concealed anchors
- Trim and transition profiles
- Outlets, switches, controls, and service panels
- Vents and louvers
- Television or accessory mounting points
- Required clearance and movement gaps
MSI recommends installing mantels, trim, and wall fixtures before fitting its panels. Treat that as supplier guidance, not a universal sequence. Fireplace requirements, attachment design, access needs, or the chosen veneer system may require concealed components to be installed first and visible trim to be fitted later.
Never fill a specified clearance or movement gap simply to make the stone appear continuous. Plan the termination around the applicable requirement.
Set, cut, and level the ledger panels
Use this as a general sequence, with the product instructions controlling mortar selection, mixing, application, adjustment time, and curing:
- Prepare and inspect the approved substrate.
- Mark the level reference and planned joints.
- Mix compatible mortar as directed.
- Apply the mortar using the specified technique.
- Set the first course against the reference line.
- Cut panels where required rather than forcing poor-fitting pieces.
- Check level and alignment while adjustment remains possible.
In MSI’s method, thin-set is applied to both the prepared wall and the back of each panel to fill voids and promote contact. Panels are pressed into place, tapped with a rubber mallet, interlocked with adjoining pieces, and checked for level; suitable shims or spacers may be used where needed. MSI also recommends a wet tile saw for cutting its panels (see MSI’s ledger-panel method).
Correct a drifting course immediately rather than expecting the next row to conceal it. Measure firebox edges and penetrations individually because apparently matching sides may differ.
Do not choose mortar solely because its label says “thin-set,” “stone mortar,” or “high heat.” Use only a mortar confirmed as compatible with the selected veneer, substrate, panel format, installation location, and expected conditions.
Finish corners and support stone above the opening
For MSI’s system, outside-corner rows begin with purpose-made corner pieces. Successive corner units are rotated 180 degrees to vary the seam pattern. Other veneer systems may use different corner profiles or layouts, so verify the required detail before ordering.
For inside corners, MSI directs installers to cut pieces while maintaining a half-inch gap from the adjacent wall. That dimension is specific to the described system. It is not a universal fireplace clearance or movement gap, and it must not replace any larger gap required by the controlling documentation.
MSI also recommends temporary support beneath stone installed over a fireplace opening until the thin-set has set. Determine the appropriate support arrangement and removal point from the fireplace, veneer, and mortar instructions. The method must not damage the appliance, obstruct required openings, or conflict with specified clearances or movement gaps.
Obtain professional help if the span, veneer weight, attachment method, bearing location, or required temporary or permanent support remains uncertain.
Complete a safety and quality check before using the fireplace
Before removing support or operating the fireplace, compare the completed surround with the fireplace manual and listing, veneer-system instructions, substrate requirements, and any permit or inspection conditions.
Inspect for:
- Loose, rocking, or slipping panels
- Obvious areas of poor mortar contact
- Unsupported pieces above the opening
- Courses that have moved out of level
- Required gaps that were accidentally filled
- Unplanned contact with combustible trim
- Mounting components compromised by panel cuts
- Cracking, movement, or substrate damage
Follow the applicable mortar and veneer instructions before removing temporary support or exposing the surround to fireplace heat. If the required timing or conditions cannot be established, obtain guidance from the product manufacturer or a qualified installer rather than estimating.
Do not operate the fireplace when clearances, heat compatibility, substrate stability, or support remain unresolved.
Can stacked stone veneer be installed directly over drywall, paint, tile, or existing brick?
Not as a universal rule. The available MSI method identifies cement board and cement-block walls as suitable substrates, but it does not approve direct installation over drywall, paint, tile, existing brick, or old veneer.
Use the selected veneer, mortar, substrate, and fireplace instructions to determine whether an existing surface may remain. Loose, damaged, damp, moving, or unidentified construction should be assessed before work continues.
Should an indoor stacked-stone fireplace surround be sealed?
Not automatically. MSI recommends a penetrating sealer for the exterior installations described in its guide, but that does not create a sealing requirement for indoor fireplace surrounds.
Check the exact stone and sealer instructions for compatibility with the installation conditions, mortar, color, and finish. If an approved treatment is used, follow its application directions.
Proceed only when the fireplace requirements, veneer system, mortar, substrate, clearances, and support method agree. Once those conditions are documented, careful measurement, dry layout, contact promoted through the specified mortar method, level courses, planned corners, and temporary support above the opening provide a practical path to the finished surround.