
How to Repoint Small Fireplace Joints Without Using the Wrong Mortar
Covers when a small joint is DIY-safe, how to verify location-approved mortar, prepare and fill the joint, and complete product-specific curing.
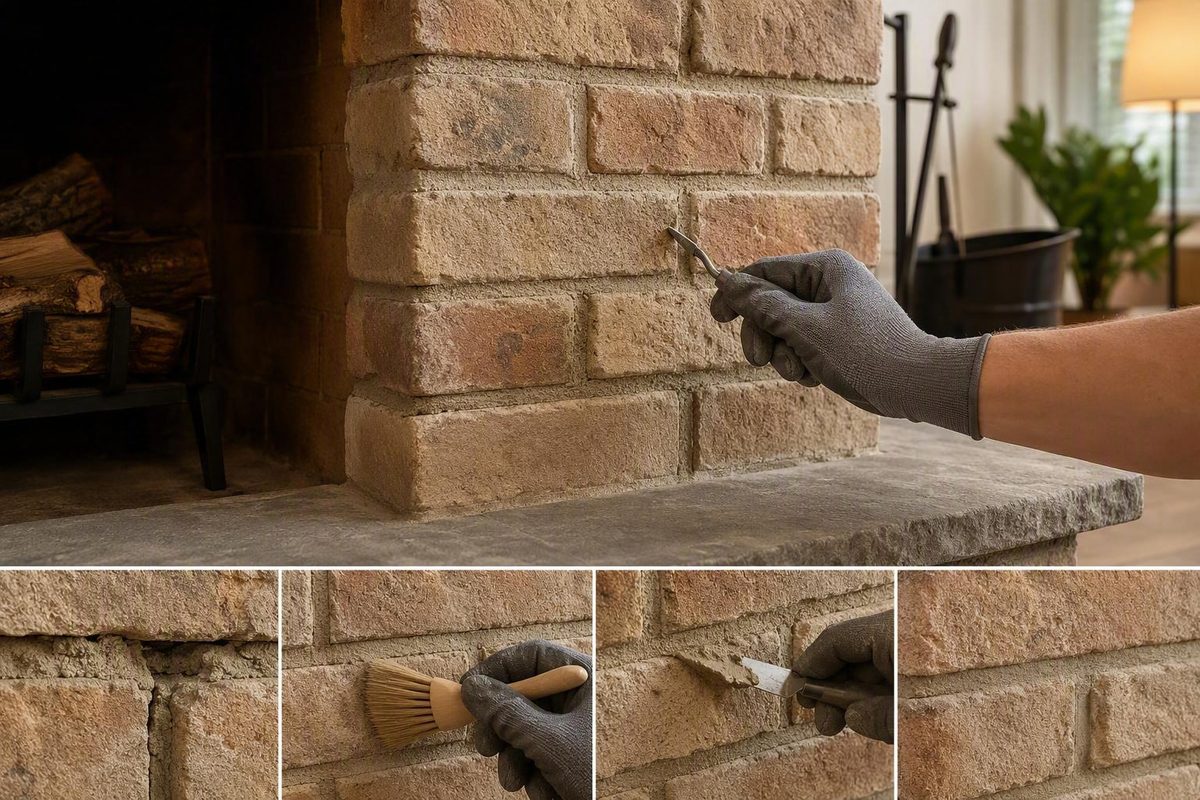
Fixing fireplace mortar begins with locating the failed joint. Limit DIY repointing to a few accessible joints where the surrounding brick remains stable; stop if masonry is loose, damage is extensive, or the problem may extend into the chimney system.
Start Here: Match the Mortar to the Repair Location
The word “fireplace” on a package does not, by itself, establish that the mortar is appropriate for every location.
| Location | Exposure | Material requirement | Recommended next step |
|---|---|---|---|
| Firebox walls or floor | Flame and intense heat | Product explicitly approved for the substrate and firebox exposure | Verify the application and temperature information on the current label or technical data sheet |
| Hearth | Heat varies by construction and proximity to the fire | Product approved for the exact hearth location and materials | Determine whether the joint is inside or outside the combustion area |
| Decorative surround | Usually lower heat, though construction varies | Mortar compatible with the existing brick or stone | Confirm the listed substrates and applications |
| Smoke chamber or concealed chimney area | Heat, combustion byproducts, and limited visibility | System-appropriate material over a sound assembly | Arrange an evaluation rather than making a blind surface patch |
| Exterior chimney masonry | Weather, moisture, and freeze-thaw exposure | Compatible exterior masonry mortar | Address evident water entry or drainage problems before repointing |
For a firebox joint, look for documentation that explicitly identifies the intended application, compatible masonry, relevant service-temperature information, surface preparation, curing requirements, and return-to-use conditions. Compressive strength and generic wording such as “for fireplaces” do not prove suitability for direct-flame exposure.
HGTV’s fireplace-repair summary recommends removing ash, dust, and loose mortar before repairing firebox joints with heat-resistant mortar. The summary does not identify a formula, temperature rating, or curing schedule, so it provides a general material category rather than a complete product specification.
A dated QUIKRETE document identifies Mortar Mix No. 1102 as a Type N mortar for brick or stone fireplaces and general masonry repairs. It does not provide direct-flame approval or a maximum service temperature. Its general reference to fireplaces therefore does not establish that the product is suitable for firebox interiors.
Decide Whether This Is a Repointing Job
The DIY scope is narrow: localized, visible deterioration in otherwise stable mortar joints and masonry. Before removing mortar, inspect nearby bricks for looseness, displacement, deep cracking, broken sections, and serious surface spalling.
Proceed only when:
- Deterioration is confined to a few accessible joints.
- The bricks remain solidly seated.
- Cracking is limited mainly to the mortar.
- There is no obvious pattern of movement or water entry.
- The entire damaged area can be seen and cleaned.
Stop and arrange an evaluation when:
- A brick is loose, displaced, broken, or badly spalled.
- Cracking is extensive, stepped, recurring, or crosses several bricks.
- Mortar or masonry is deteriorating over a large area.
- Dampness, staining, efflorescence, or another sign of water entry is evident.
- A previous patch has failed again.
- Damage may extend into the smoke chamber, flue, or chimney.
- Removing loose mortar begins to destabilize adjacent masonry.
These are conservative stop-work boundaries, not code-based measurements or a substitute for an inspection. They are intended to prevent a cosmetic patch from concealing a larger defect.
The dated manufacturer procedure says broken or badly damaged bricks should be replaced before conventional repointing rather than bridged with new mortar. Depending on the suspected defect, an appropriate evaluator may be a qualified chimney professional, fireplace technician, or masonry professional.
Gather the Product and Basic Repointing Tools
Keep the fireplace out of use and remove the ash before beginning. The joints and brick faces must be visible enough to confirm that the damage is localized.
For a limited manual repair, gather:
- Mortar approved for the exact location and substrate
- A joint-raking tool or small chisel
- A stiff brush
- A pointing tool sized for the joint
- Cleanup materials for loose debris and mortar residue
This procedure covers careful removal with hand tools only. Powered grinding or other mechanical removal falls outside its scope. Follow the tool manufacturer’s safety directions and the mortar product’s current safety information. If the work produces uncontrolled dust or flying debris, or cannot be completed without powered removal, stop and use a qualified masonry professional.
Before opening the mortar, review its current:
- Application approval and substrate compatibility
- Surface-preparation method
- Mixing directions and working time
- Application-temperature limits
- Curing conditions
- Return-to-service schedule
Do not copy a water ratio from an older document or instructions for another formula. In particular, do not substitute a generic Type N mortar in a direct-flame area unless the current documentation for that exact product explicitly approves the use.
Clean and Prepare the Failed Joints
Remove ash and surface dust first so the full joint is exposed. Cleaning may reveal deterioration beyond the initially visible area; reassess the repair before continuing.
Gently remove loose and crumbling mortar until sound material remains. Work along the joint rather than levering against brick edges. Stop immediately if a brick begins to move.
Rake loose mortar, sand, and particles from the joint, then brush it thoroughly.
The dated Type N repointing procedure calls for cutting deteriorated joints to an approximate depth of 3/4 to 1 inch, then raking and brushing out loose material. That range is specific to the documented conventional repointing method, not a universal requirement for every fireplace joint, firebrick assembly, or firebox-rated product. The same document calls for replacing broken or badly damaged bricks before repointing (manufacturer product document).
Those conventional instructions also call for dampening cleaned joints before packing mortar.
Pack, Layer, Tool, and Clean the New Mortar
Mix only as much mortar as can be placed within the product’s stated working time. Follow its mixing sequence and required consistency rather than applying one water recipe to every formula.
Use the pointing tool to press mortar firmly against the back and sides of the cleaned joint. Continue packing until the void is filled.
For the documented conventional repointing method, fill vertical head joints before horizontal bed joints. Work in a small area so the mortar can be packed and finished before it becomes too stiff.
An unusually deep conventional joint may require staged filling:
- Pack mortar into roughly half the joint depth.
- Wait until the first layer is thumbprint-hard—firm enough to resist a light impression rather than remaining wet and mobile.
- Add the remaining mortar and complete the joint.
The cited Type N procedure uses this sequence to reduce sagging or cracking in exceptionally deep joints. It also directs users to protect fresh mortar from freezing for the first 48 hours (manufacturer product document). These are product-specific conventional masonry instructions, not default directions for refractory mortar.
Tool the repair to match the existing joint profile when the mortar reaches the condition specified by its instructions. Avoid thin, feathered edges. Remove residue from brick faces promptly using the cleanup method permitted by the manufacturer.
Cure the Repair Before Using the Fireplace
Air-curing time, acceptable temperatures, heat-curing steps, and return-to-service requirements vary by formula and application.
Do not light a fire merely because the surface looks dry. Visual dryness does not replace completion of the product’s stated curing and return-to-use schedule.
For applicable conventional masonry mortar, protect fresh work from rapid drying and freezing as directed. The 48-hour freeze-protection requirement described above belongs to the cited Type N procedure; it is not a general cure rule for every firebox or refractory product.
Before using the fireplace again, confirm that:
- Every repaired joint is filled and remains intact.
- Mortar residue has been removed from the brick faces.
- No brick became loose during the work.
- The complete product-specific cure and return-to-service schedule has been satisfied.
Why Fireplace Mortar Repairs Fail Again
A repair may crack or crumble because the mortar was unsuitable for its location, debris remained in the joint, or new material covered weak mortar instead of reaching sound surfaces. Other plausible causes include filling a deep conventional joint in one pass, rapid drying, freezing, masonry movement, or unresolved moisture.
Staged filling can help limit sagging and cracking in deep conventional joints, but technique cannot compensate for incompatible mortar or unstable masonry.
If deterioration returns, investigate rather than applying another surface patch. Look for damp masonry, staining, loose brick, widening cracks, or damage extending beyond the original repair. Exterior chimney deterioration may require correction of water entry or drainage before repointing can last.
Stop patching when masonry moves, water damage is evident, failure recurs, or the affected area may extend into the smoke chamber or chimney. Use a qualified chimney professional or fireplace technician for suspected chimney-system defects and a masonry professional for movement, widespread deterioration, or exterior water-related damage.
The durable rule is location first: verify that the mortar is approved for the exact part of the fireplace, repair only small and stable joints, and let the current product instructions control preparation and curing.