
How to Plan a Hearth That Fits the Room, the Appliance, and the Structure
Before choosing color or pattern, identify the exact appliance, verify its requirements, assess structural support and confirm each product’s intended use.
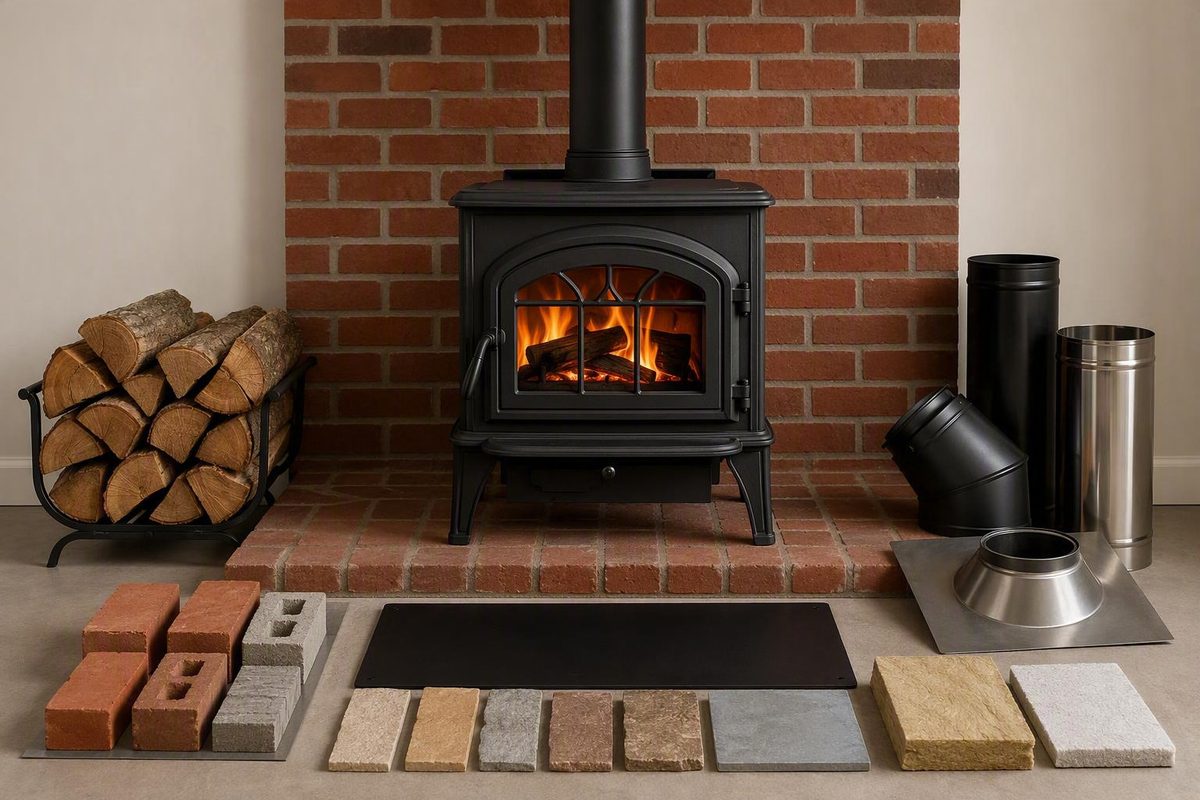
A brick hearth can anchor a room, protect adjacent flooring, and connect a new appliance to an older architectural style. One homeowner account says its floor protection used two layers of cement board plus brick How to Build a Brick Hearth | Peaceful Acres. Before selecting color or pattern, a homeowner needs to identify the exact appliance, determine what its instructions require, clarify the local approval path, assess the supporting construction, and verify that each product is documented for its intended location.
The planning order matters:
- Identify the appliance and obtain its current instructions.
- Confirm required floor protection, dimensions, clearances, permits, and inspections.
- Assess the existing floor, substrate, and structural support.
- Select materials documented for the proposed location.
- Develop the pattern, edge details, transitions, quantity, and budget.
- Assign gas, venting, structural, or engineered masonry work to appropriately qualified professionals.
This is a design-and-preparation guide, not a universal construction specification. No generic brick assembly, dimension, or layer count is suitable for every fireplace, stove, floor, or jurisdiction.
What a brick hearth does—and what a photograph cannot prove
A hearth is commonly described as the noncombustible floor of a fireplace that extends into the room. It separates the fire area from nearby flooring, may help contain sparks or embers where applicable, and contributes to the room’s design. Brick is one of the traditional materials used for this purpose, according to a retailer’s overview of fireplace hearths.
For project planning, distinguish among the different surfaces that may receive brick:
- Inside the firebox: the combustion area.
- Horizontal hearth surface: the noncombustible floor associated with the fireplace or appliance.
- Room-facing extension: the portion projecting beyond the opening.
- Surround: the finished wall area beside or above the opening.
- Raised face and returns: the exposed front and sides of an elevated hearth.
Terminology varies among appliance manuals and product literature, so use the terms found in the documents governing the actual project. The practical point is that these locations are not interchangeable. A decorative wall veneer should not be assumed suitable for a walked-on horizontal surface, and a product used outside the firebox should not be assumed suitable for direct flame exposure or use inside it.
Brick can support many design directions. Red clay brick can appear historical, rustic, traditional, or farmhouse-inspired. Pale brick with restrained joints can suit transitional or Scandinavian rooms. White glazed brick tile can produce a cleaner modern treatment, while reclaimed or antique-look brick introduces irregular color and texture. Bond pattern, orientation, sheen, joint color, and edge treatment can affect the result as much as the brick color itself.
What an inspiration photograph proves: color, scale, texture, pattern, and visual relationships.
What it does not prove: product suitability, required floor protection, structural capacity, substrate condition, clearances, attachment, or compliance with appliance instructions and local requirements.
A photograph also cannot establish whether a nearby mantel, television, built-in, wood trim, rug, or floor transition is appropriate for another installation. Use images to communicate visual intent—not to reverse-engineer a technical assembly.
Start with the appliance, required protection, and local approval path
Before choosing hearth dimensions or brick, identify what the hearth will serve:
- An open masonry fireplace
- A fireplace insert
- A gas fireplace or gas insert
- A freestanding wood stove
- A pellet stove
- A listed zero-clearance appliance
Record the manufacturer, exact model, identifying information where applicable, and the current revision of the installation manual. Similar-looking appliances may have different instructions, so measurements copied from a photograph, retailer description, or unrelated project are not a reliable basis for the design.
The exact appliance documentation and the local authority should answer these questions:
- How far must the protected area extend in front of and beside the appliance or opening?
- What clearances apply to combustible materials?
- What type of floor protection is required?
- Does the documentation specify thermal performance or a particular tested assembly?
- What conditions apply over combustible flooring?
- Is a permit or inspection required?
- At what stages must concealed work remain visible?
- Who can approve a proposed departure from the documented installation?
Do not assume which type is required, or define the assembly yourself; confirm the terminology and performance requirement in the exact appliance manual and with the local authority. A personal wood-stove account describes an approximately 4-by-4-foot hearth with two cement-board layers, but it does not identify the board properties, stove model, required thermal value, or an independently verified assembly. The account itself directs readers to the stove manual, local inspection process, and professional input, making it a useful example of questions to ask rather than a specification to copy (documented homeowner account).
Brick or cement board may be described as noncombustible, but that description alone does not demonstrate that the complete installation satisfies whatever performance the appliance requires. The correct question is not simply, “Are these materials noncombustible?” It is, “Is this complete assembly documented or accepted for this appliance, location, floor construction, and jurisdiction?”
Pre-design checklist
Complete this list before developing the finish design:
- [ ] Appliance category, manufacturer, and exact model
- [ ] Current installation-manual revision
- [ ] Product listing and listed floor-protection conditions
- [ ] Proposed appliance and hearth location
- [ ] Existing floor and supporting construction
- [ ] Required protected area and applicable clearances
- [ ] Required type and performance of floor protection
- [ ] Local authority contact
- [ ] Permit status
- [ ] Required inspection stages
- [ ] Process for reviewing any proposed deviation
Requirements can differ by appliance and jurisdiction. Mechanical Mentor’s terms and safety notice accordingly describe its material as general reading and direct readers away from treating web content as a replacement for the code-governed permit and inspection process. That notice establishes an editorial boundary; the appliance documentation and relevant local authority remain the project-specific sources.
Full brick or thin brick: choose by location and documentation
No brick format is universally best. The appropriate choice depends on where it will be installed, what the complete installation must accomplish, how much elevation and weight the project can accommodate, and what the product manufacturer documents.
Full brick
Full brick provides physical depth, material volume, and pronounced exposed edges. It can give a raised hearth substantial visual mass and create convincing returns without relying on separate corner veneer pieces. It also adds thickness and weight that must be reconciled with floor transitions, appliance elevation, access, and support.
One homeowner’s fireplace project used red clay bricks reported as 2.5 inches thick. The same project produced a raised hearth reported as 76.5 inches wide, 21 inches deep, and 5.5 inches high and used 190 bricks across its broader brick treatment. Those figures illustrate the scale of that particular design; they are not standard brick dimensions, a structural precedent, or a quantity benchmark (project account and dimensions).
Thin-brick veneer
Thin brick creates a brick face with less material depth. A retail collection describes many of its veneers as approximately 0.5 inch thick and lists flat pieces, corners, samples, and several color or reclaimed-look options. That thin-brick retail collection demonstrates available formats, but it does not establish that every listed product is approved for a hearth floor, firebox, structural application, or direct flame exposure.
Reduced thickness may simplify some finish layouts, but the project still needs documented answers about:
- The intended horizontal or vertical location
- The receiving surface
- Approved bonding and joint materials
- Exposed edges and corners
- Temperature limitations
- Floor versus wall use
- Cleaning and maintenance
- The role of the finish in the complete required assembly
Do not infer that thin brick is suitable merely because it is marketed for fireplaces. “Fireplace” may refer to a decorative surround rather than every surface associated with the appliance.
Glazed brick tile
Glazed brick tile can create a smoother, brighter, and more regular appearance. One manufacturer gallery shows white glazed 2.5-by-8-inch Olympic brick tile in an offset pattern on a hearth floor. The glazed brick hearth gallery supplies no substrate, heat-rating, structural, clearance, mortar, or installation information, so it should be treated only as a color-and-pattern reference.
Reclaimed brick
Reclaimed brick can bring softened edges, residue, wear, and irregular color. Those characteristics also create questions that should be answered before purchase or installation:
- Are the pieces stable and sound?
- Are old coatings or residues identifiable?
- How much cleaning is required?
- Will variations in thickness affect surface evenness?
- Is documentation available for the intended use?
- How will weak, broken, or unusually absorbent pieces be culled?
- Can replacement material be matched later?
“Antique,” “reclaimed,” and “historic” describe origin or appearance. They do not establish performance or approval for a particular hearth location.
Product-verification checklist
Request written answers before ordering more than samples:
- [ ] Exact intended location
- [ ] Manufacturer-approved use
- [ ] Floor or wall approval
- [ ] Temperature or heat-exposure limitations
- [ ] Direct-flame limitations
- [ ] Suitable receiving surface
- [ ] Required mortar, grout, or adhesive
- [ ] Required edge and corner treatment
- [ ] Cleaning instructions
- [ ] Compatible coatings or sealers, if any
- [ ] Warranty conditions and exclusions
- [ ] Any other installation details required by the manufacturer
Order samples from the actual product range. View them in daylight and artificial light, place them beside the flooring and trim, and mock up several joint colors and widths. Evaluate texture and cleanability, but keep visual sampling separate from technical approval.
Raised, flush, red, white, or reclaimed: turn inspiration into a workable design
A brick hearth should relate to both the appliance and movement through the room. Start with its broad form.
A raised hearth adds visual mass and creates a pronounced edge. It may balance a large fireplace wall or make brick returns more visible. Its height and projection can also affect walking routes, furniture placement, cleaning, and accessible movement. Irregular or poorly visible edges deserve particular attention during planning.
A flush hearth reduces visual interruption across the floor and may make a small room feel less divided. It still requires careful coordination of finished elevations, transitions, edge details, and the appliance-specific protection beneath the visible finish. “Flush” describes the appearance, not the technical complexity.
Evaluate either concept against:
- Edge visibility in daylight and low light
- Main walking routes
- Household accessibility needs
- Furniture and rug placement
- Floor transitions
- Surface evenness and stability
- Ash and debris cleanup
- Appliance loading and service access
- The likelihood that people will stand or place objects on the surface
Style directions grounded in brick choices
Traditional red clay: Warm red or brown brick with visible joints creates a classic hearth. Dark joints emphasize the bond; closer tonal matches make the field quieter.
Reclaimed or antique-look: Irregular edges, stains, and varied reds add age and texture. Decide how much variation the room can absorb before the surface becomes visually busy or difficult to maintain.
White glazed thin brick: A pale reflective finish can suit modern, transitional, or Scandinavian rooms. In a restrained palette, joint color and exposed-edge treatment become especially noticeable.
Painted or white-brick appearance: A coating changes the visual surface and creates a new maintenance question. Confirm that any proposed coating is documented for the brick, location, and expected exposure rather than assuming ordinary wall paint is appropriate.
Mortar wash: A wash can soften high-contrast brick and create an aged appearance. Sample it first because brick absorption, existing residue, and joint texture can affect the result.
Brick with wood or steel: Wood mantels can warm the composition, while steel bands, doors, or edge details create a more architectural treatment. Each adjacent material still needs to be evaluated against the appliance documentation.
Offset or staggered bonds appear in both traditional red-brick projects and modern glazed-brick examples. Other useful variables include running direction, soldier or header accents, joint width, joint profile, sheen, color variation, and exposed-edge construction.
Build a useful design board
For each saved image:
- Label the desired feature: color, format, finish, bond, joint, edge, or hearth height.
- Record whether it appears to use full brick, veneer, glazed tile, or an unknown format.
- Sketch the hearth relative to doors, walkways, furniture, and floor transitions.
- Mark adjacent wood flooring, trim, built-ins, mantels, and other combustible finishes.
- Note televisions, wiring, or heat-sensitive finishes near the fireplace.
- Submit the concept for appliance, product, structural, and local review before purchasing materials.
The goal is to convert inspiration into a clearly described proposal that can be checked—not to assume that the pictured room establishes safe clearances or a suitable assembly.
Substrate, weight, and existing conditions can change the project
The first site question is not “Will mortar stick?” but “What is under the finish?” The answer may be a concrete slab, existing masonry, tile, or a wood-framed floor. The supplied evidence does not establish a universal brick-installation method for any of those conditions.
Existing surfaces may have:
- Paint, sealer, adhesive, soot, or other residue
- Cracks, displacement, or hollow areas
- Movement or visible deflection
- Moisture exposure or staining
- Uneven elevation
- Concealed combustible layers
- Floor transitions that cannot accommodate the proposed thickness
A noncombustible top surface is not, by itself, evidence that the overall installation is suitable. The appliance documentation, product instructions, existing condition, and supporting construction must all be reconciled before the old surface is covered.
When planning over wood framing, consider the combined condition rather than the finish brick alone. That includes the proposed brick, installation materials, substrate layers, appliance, stored fuel, and anticipated use of the hearth area. A homeowner account reports checking the subfloor and joists before building a wood-stove hearth, but it supplies no calculations, professional assessment, or independent confirmation of adequacy. It should not be treated as structural evidence.
Project-specific structural review is prudent when:
- Joist size, span, condition, or capacity is unknown
- The floor is cracked, sagging, springy, or visibly deflecting
- Hearth edges lack clearly identified support
- A heavy appliance will be added
- New masonry will extend over an opening
- The design creates a substantial elevation change
- Existing framing must be cut or altered
- A new footing, foundation, or basement support is contemplated
Broader fireplace work can be dominated by support and access rather than finish material. A historical masonry-fireplace planning discussion describes sidewalk demolition, footings, basement support, chimney construction, and labor as significant parts of one proposed project. Its 2013 prices are not current guidance, but the discussion illustrates how little of a major fireplace project may be represented by the visible face brick.
Do not select joist reinforcement, support details, board layers, or fastening patterns by copying a generic example. Those choices need project-specific documentation or qualified design.
Site-survey worksheet
| Item | Existing condition | Proposed condition | Needs verification by |
|---|---|---|---|
| Floor type | Slab, masonry, tile, or wood frame | Remain, repair, or replace | Installer or structural professional |
| Visible damage | Cracks, movement, staining, decay | Repair scope | Appropriate trade |
| Level variation | Measured high and low areas | Required finished condition | Mason or tile installer |
| Appliance | Exact model and documented weight | Final position and elevation | Appliance professional |
| Finish area | Horizontal and vertical surfaces | Product and pattern | Designer or installer |
| Hearth elevation | Existing height | Raised or flush | Installer |
| Floor transitions | Material and height | Edge profile | Installer |
| Access | Doors, stairs, room protection | Delivery and demolition route | Contractor |
| Concealed support | Known or unknown | Required capacity | Structural professional |
Photograph existing conditions and retain measurements. If demolition exposes unexpected damage, combustible materials, or unsupported construction, pause before covering the area.
From dry layout to curing: the project stages and safe DIY boundaries
A sound planning sequence moves from verification to finish work:
- Verify the exact appliance, listing, manual, and local requirements.
- Clarify permits and inspection stages.
- Assess the existing structure and receiving surface.
- Select brick and installation products documented for their locations.
- Resolve finished elevations, transitions, and exposed edges.
- Dry-lay the proposed pattern.
- Plan cuts, corners, returns, and pattern alignment.
- Install products according to their manufacturers’ instructions and the accepted project documents.
- Finish joints and clean with compatible methods.
- Allow the materials to cure under the documented conditions.
- Complete required inspections.
- Return the appliance to service only as permitted by the applicable instructions and approval process.
A full dry layout is particularly useful with handmade or reclaimed brick. It can reveal cumulative dimensional variation, awkward slivers, uneven color distribution, and conflicts near the appliance opening.
In one DIY gas-fireplace project, the desired brick treatment led to raising the insert framing by six inches and relocating the exterior vent. The same account used Type S mortar and reported a 48-to-72-hour cure period. Those details belong only to that project; mortar selection, mixing, curing, appliance loading, and first firing must follow the selected products and appliance documentation (project-specific construction account).
The account also used half bricks and horizontal guides to create an offset pattern. That illustrates the value of controlling the layout, but its cutting and spacing decisions were tied to the particular brick and joint dimensions.
When finish work becomes technical work
Changing appliance elevation, opening support, framing, gas connections, or vent alignment is not simply decorative resurfacing. Do not treat the following as routine finish-DIY tasks:
- Disconnecting or reconnecting gas
- Relocating or modifying a vent
- Altering listed appliance components
- Cutting or changing structural framing
- Supporting masonry over an opening
- Designing reinforcement, footings, or foundations
- Resolving an uncertain load path
Depending on the project and local rules, appropriate help may include an appliance technician, gas professional, venting or chimney professional, experienced mason, structural professional, contractor, and local inspector. Trade titles and licensing requirements vary, so confirm the qualifications applicable where the work is located.
Do not copy improvised masonry-support techniques from personal tutorials or use an anecdotal mortar method unless the relevant product manufacturer documents it.
Stop-work triggers
Pause and obtain project-specific direction if you encounter:
- A conflict with the appliance manual or listing
- An unidentified brick, board, adhesive, mortar, coating, or sealer
- Damaged, cut, or displaced framing
- A need to move gas components
- A need to relocate or modify a vent
- Masonry requiring support over an opening
- An inability to document the required floor protection
- Unexpected combustible materials beneath the old hearth
- Cracking or movement that may indicate an unresolved structural problem
Stopping is not a failed project. It is the point at which a finish update receives the technical review its actual scope requires.
Estimate brick quantity and build a complete budget
Brick quantity begins with the proposed finished surfaces—not another project’s shopping list.
Quantity worksheet
- Divide the design into zones. Separate the horizontal hearth, raised face, side returns, surround, and borders.
- Measure each zone. Record finished width and height or depth.
- Choose the visible brick orientation. Stretcher, header, soldier, and mixed layouts cover an area differently.
- Define the module. Use the visible brick-face length and width plus the planned joint dimensions.
- Draw the bond. Identify half pieces, narrow cuts, corners, and pattern transitions.
- Count edge products separately. Include corners, caps, trim pieces, or fabricated returns where applicable.
- Add an explicit contingency. Base it on cutting, breakage, color selection, material irregularity, and desired spare stock.
- Check current package coverage. Convert the reconciled quantity into pieces, boxes, or pallets using supplier information.
For a simple rectangular field, a preliminary relationship is:
finished zone area ÷ installed face area of one brick-and-joint module = estimated units before contingency
This calculation is only a starting estimate. Reconcile it against a scaled drawing or dry layout, especially where the bond changes, edges are exposed, or irregular units are used.
Calculate zones separately if the horizontal surface, raised face, returns, and surround use different orientations or products. Corners and trim may also require separate pieces.
Budget the complete scope
Include:
- Finish brick or brick tile
- Corners, caps, trim, and edge pieces
- Samples and mockups
- Mortar, grout, or approved bonding materials
- Compatible receiving-surface materials
- Demolition and debris disposal
- Floor repair and transitions
- Structural assessment or support
- Appliance removal and reset
- Venting or chimney work
- Gas work
- Masonry and finish labor
- Protection of the room and access route
- Permits and inspections
- Documented cleaning and maintenance products
- Contingency for concealed conditions
Retail prices are temporary finish-material snapshots. The Fireclay gallery displayed its Olympic brick tile at $22 per square foot, but that price may change and does not represent shipping, accessories, waste, labor, substrate work, or total installed cost (gallery price listing). A separate thin-brick collection displayed several different per-square-foot prices, likewise without establishing suitability or complete installed cost (retail collection).
Compare written scopes rather than bottom-line bids alone. One proposal may include appliance handling, floor repair, permits, and inspection coordination, while another covers only visible masonry.
Cleaning, inspection, and long-term care
Porous brick can collect soot and dirt, and rough faces or deep joints create additional places for debris to settle. A smoother glazed surface presents a different cleaning condition, but no single cleaning method is suitable for every brick, mortar, glaze, coating, or appliance.
For routine care:
- Confirm that the appliance is off and the surface is cool.
- Remove loose ash and debris without grinding particles into the brick.
- Consult the brick, mortar, coating, and appliance documentation before choosing a cleaner.
- Test an approved method in an inconspicuous area.
- Avoid saturating the installation unless the product instructions permit it.
- Let the surface dry and inspect for changes in color, sheen, or joints.
Avoid universal recommendations involving acids, solvents, paint removers, aggressive abrasion, or household mixtures. The retailer hearth overview notes that porous brick can collect soot and dirt and require regular cleaning, but it does not provide a universal cleaning formulation (hearth care overview).
One homeowner left salvaged hearth brick unsealed because of personal concerns about heat and fumes. That choice is not evidence that all hearth brick must remain unsealed. Conversely, sealing should not be assumed beneficial. Use a coating only when its manufacturer documents compatibility with the exact material, expected exposure, and installation location.
Periodic inspection checklist
Look for:
- Loose, rocking, or displaced bricks
- Cracked, powdering, or missing joints
- New separation at edges or floor transitions
- Changes in level or signs of movement
- Repeated staining patterns
- Heat-related discoloration or surface changes
- Unstable or uneven walking areas
- Changes around the appliance, vent, or gas components
- Water entry or recurring dampness
Surface dirt is a maintenance issue. If damage appears associated with movement, heat exposure, appliance operation, gas components, venting, or recurring moisture, pause appliance use and obtain qualified, project-specific assessment rather than treating the symptom only.
Keep a permanent project file containing:
- Appliance manual and listing information
- Permit and inspection records
- Product data sheets
- Structural notes or drawings
- Trade invoices and warranties
- Batch, color, and product numbers
- Photographs of concealed layers
- Labeled spare bricks, where practical
Brick hearth FAQs
Can thin brick be used on a hearth floor?
Possibly, but “thin brick,” “fireplace brick,” or a hearth photograph does not by itself establish suitability. Verify that the manufacturer documents the product for the proposed horizontal location and that the complete installation satisfies the exact appliance instructions and local requirements.
Also confirm the receiving surface, bonding material, joints, exposed edges, temperature limitations, floor rating, cleaning method, and warranty conditions.
How large does a brick hearth need to be?
There is no universal size supported by the supplied evidence. Determine the required protected area and clearances from the exact appliance documentation and applicable local requirements.
Do not copy dimensions from a photograph or DIY project. Establish the required area first, then develop a brick module and pattern that fit it without awkward or unsupported edges.
Can I build a brick hearth over a wood-framed floor?
A brick hearth may be considered over wood framing only after the project-specific protection requirements and supporting construction have been assessed. Do not assume that a noncombustible visible surface makes the complete installation adequate.
Unknown framing, visible deflection, damage, unsupported edges, a heavy appliance, or a major elevation change should be treated as reasons to obtain qualified structural input. Do not adopt board layers, reinforcement, or fastening patterns from a homeowner example.
Should brick around a fireplace be sealed?
Not automatically. The answer depends on the brick, mortar, location, expected exposure, and sealer documentation.
A sealer may affect appearance and future maintenance. Test any documented product on a sample and use it only when its manufacturer identifies the exact material and application as suitable. One unsealed project does not establish a general rule.
When does a brick-hearth update require a professional?
Obtain qualified help when the work affects appliance position, gas connections, venting, chimney components, structural framing, masonry support over an opening, floor capacity, foundations, or an appliance-required protective assembly.
Professional review is also appropriate when materials are unidentified, the floor moves or cracks, or the proposed design conflicts with the appliance documentation. Match each task to the relevant appliance, gas, venting, chimney, masonry, structural, contracting, or inspection role recognized in the project’s jurisdiction.
Final go-or-pause checklist
Proceed only when every applicable answer is yes:
- [ ] Is the exact appliance and current manual confirmed?
- [ ] Is the required floor protection documented?
- [ ] Is the local permit and inspection path clear?
- [ ] Are the brick and installation products verified for their intended locations?
- [ ] Has the supporting construction been assessed for the complete project?
- [ ] Is the layout stable, accessible, cleanable, and compatible with walking routes?
- [ ] Does the budget cover the full scope rather than finish brick alone?
- [ ] Have gas, venting, structural, and engineered masonry tasks been assigned appropriately?
If any answer is no, pause before ordering materials or concealing existing construction. The visual brick choice should be the final layer of a verified plan—not the starting assumption.