
Chimney Cap Replacement: What to Check Before Ordering
Choose a replacement chimney cap by vent system, mounting dimensions, mesh and condition. Know when cleaning, chimney repairs or professional access come first.
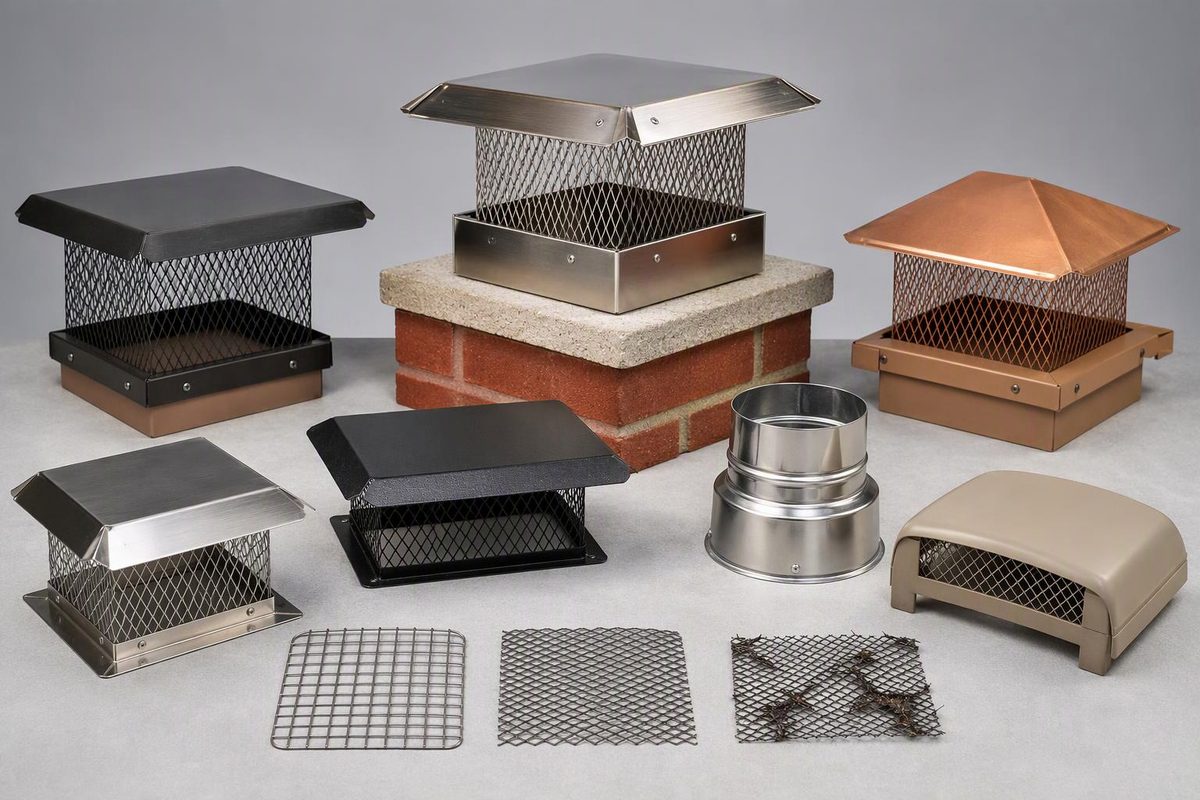
Chimney cap replacement starts with the appliance and chimney system—not the shape of the old hood. A masonry flue cap, a stainless liner termination and a factory-built chimney cap may look similar but require different attachments and approvals. Buying by appearance or diameter alone can leave you with a cap that fits physically but is wrong for the system.
Use this sequence to decide whether replacement is needed and give an installer enough information to specify the right part.
1. Decide whether the cap is actually the failed component
From the ground, look for a missing or tilted hood, torn screen, corrosion holes and disconnected supports. Take photographs rather than climbing onto the roof. Cap manufacturer HY-C recommends leaving roof access and installation to roofing or chimney professionals.
Ask the installer to distinguish three situations:
- Cleaning or reattachment: The cap is intact and compatible, but deposits or a fastening problem need attention.
- Cap replacement: The hood, screen, supports or attachment points are damaged, or the existing cap is incompatible.
- Chimney repair first: The flue tile, crown or metal chimney section that must hold the replacement is damaged.
Water inside the fireplace does not prove the cap is the only problem. CSIA identifies missing rain covers, damaged flashing and corrosion as issues to investigate; visible rust inside a factory-built fireplace can indicate damage higher in the system. A new cap should not substitute for diagnosing the water entry and resulting deterioration.
If the failed part is the broad metal sheet covering a framed chimney enclosure, see chimney chase cover measurement and specification instead.
Stop point: Do not operate an appliance with a known blocked exhaust path or unexplained smoke entering the room. Have the venting evaluated. After a chimney fire, cap replacement alone is not clearance to restart: for example, DuraVent’s DuraPlus instructions require inspection for possible chimney damage before reuse.
2. Identify what the cap serves
Record the appliance model, fuel, chimney or liner manufacturer, product series and size. Look for installation records and accessible labels; do not assume that every metal pipe is the same vent type.
| Existing termination | Replacement information to obtain |
|---|---|
| Exposed clay flue tile on a masonry chimney | Tile dimensions, projection above the crown and approved mounting method |
| Stainless liner in a masonry chimney | Liner system, diameter and termination assembly details |
| Factory-built metal chimney | Manufacturer, series, diameter and approved cap part number |
| Gas or pellet vent termination | Appliance and vent-system instructions—not a generic masonry-cap specification |
For example, DuraPlus instructions require authorized DuraPlus listed components and prohibit mixing parts or improvising connections. An adjustable “universal” masonry cap is therefore not a substitute merely because it slips over the pipe.
If the system cannot be identified, use the vent-cap identification guide before ordering.
3. Measure the mounting surface, not the old hood
Have the installer record measurements against the proposed cap’s drawing or fit chart:
- Outside-clamping tile cap: Actual outside width and length—or outside diameter—at the attachment location, plus exposed tile height.
- Slip-in tile cap: Inside dimensions and the insertion space required by that design.
- Crown-mounted multi-flue cap: Available mounting footprint, flue positions and the height of the tallest flue.
- Factory-built cap: System identification and the specified connection, not just a tape-measured diameter.
A product’s advertised size may describe a fit range rather than an exact flue measurement. For example, the HY-C Draft King copper sizing chart lists its 9-by-13-inch cap for outside flue dimensions of 7½–9½ inches by 11½–13½ inches. That range applies to that product, not every cap bearing the same size label.
The replacement also needs adequate space above the flue for exhaust to escape. For multi-flue caps, crown-to-hood height is not the same as flue-to-hood clearance. Verify the proposed geometry rather than copying the old cap.
4. Specify mesh and material together
HY-C offers caps labeled with ¾-inch and ⅝-inch mesh, but a nominal mesh label alone does not establish local spark-arrestor compliance.
As a model-code example, 2021 IRC R1003.9.2 specifies requirements where a spark arrestor is installed on a masonry chimney. Its openings must not pass spheres larger than ½ inch or block spheres smaller than ⅜ inch; the arrestor’s net free area must be at least four times the flue outlet’s net free area. It also specifies heat and corrosion resistance and cleaning access. Section R1003.9.3 requires the same four-times free area beneath a rain cap installed on a masonry chimney. These are model-code provisions, so confirm the locally adopted requirements and amendments with the building or fire authority. Ask for documented opening dimensions and net free area, not just a mesh label.
Do not add fine household insect screen or remove a required spark screen to address clogging. Specify an approved termination with cleaning access, then follow its maintenance instructions. Some systems need checks much more often than annually: DuraPlus instructions call for spark-screen checks every two to four weeks.
For a compatible masonry cap, stainless steel deserves consideration where corrosion caused the previous failure. HY-C identifies stainless as more suitable than its black galvanized caps for saltwater environments. For a listed vent system, select among its approved parts rather than changing material independently.
5. Compare complete replacement quotes
Angi’s guide, updated April 6, 2026, reports a replacement range of $190–$650, averaging $300; its displayed cost panel is labeled North Charleston, South Carolina. Treat that as a planning reference, not a national estimate or a price for your roof, cap or chimney condition.
Ask each quote to state:
- Cap manufacturer, model, material, dimensions and screen specification.
- Old-cap removal, roof access and installation labor.
- Attachment method and any repairs needed to provide a sound mounting surface.
- Inspection and cleaning scope, separately from replacement.
- Completion photographs, cleaning access and warranty terms.
For mounting details, see how to install a chimney cap by mounting type. The handoff should document a secure, compatible cap with an unobstructed exhaust path—not simply a new hood in place.