
Choose Chimney Flashing Sealant by Joint, Not Label
Match chimney flashing sealant to masonry, metal, asphalt shingles or a storm collar, and see when failed flashing needs rebuilding instead of caulk.
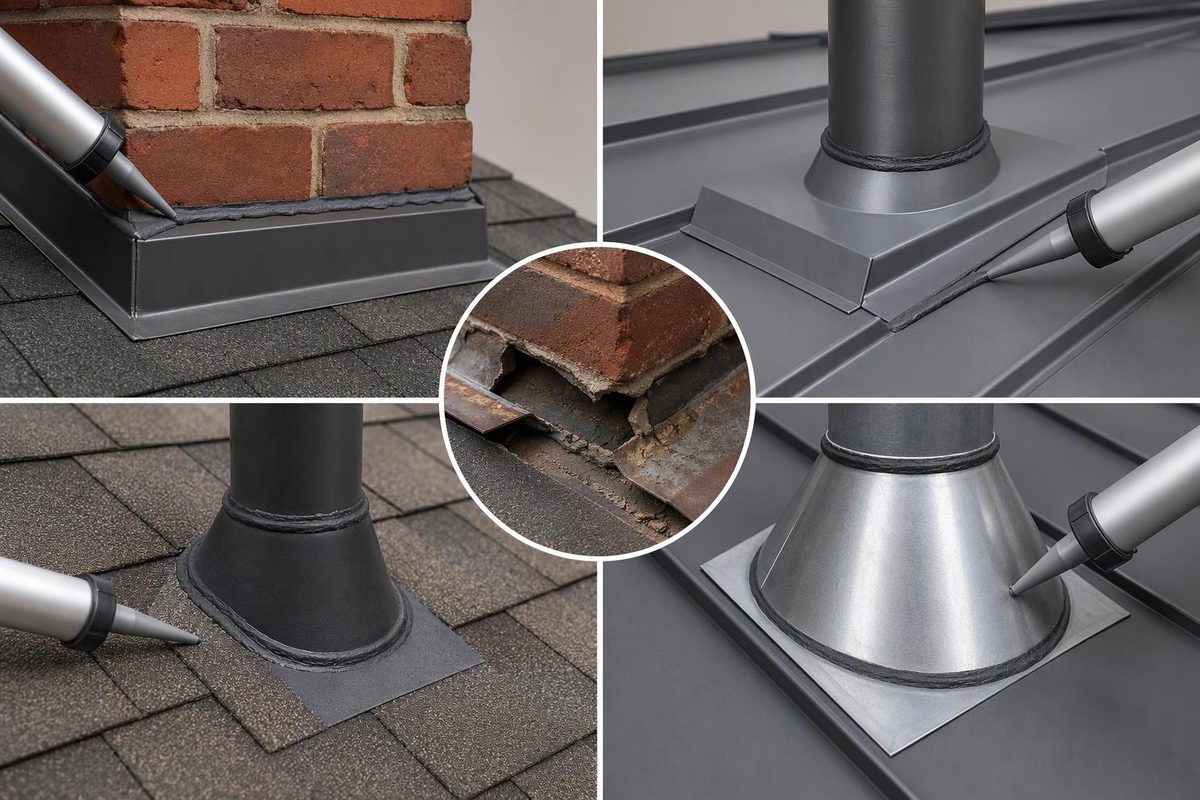
For the exposed joint where metal counterflashing enters a masonry chimney, use an exterior-grade elastomeric polyurethane or flashing/construction sealant whose current label approves both masonry and the flashing metal. Use plastic asphalt roof cement only where the applicable roofing or flashing instructions specify it. Sealant supports a correctly layered flashing assembly; it cannot replace step flashing, counterflashing or damaged masonry.
Do not choose a tube merely because it says “waterproof,” “roof” or “high temperature.” The correct product depends on the two surfaces it must bond to, expected joint movement, weather exposure and possible contact with asphalt.
Pick the joint you need to seal; the selector shows the appropriate product type and the condition to check first.
Exterior elastomeric polyurethane or flashing/construction sealant approved for both masonry and the flashing metal.
Check first: The counterflashing must be mechanically secure, and the sealant must be suitable for exposed weather and any nearby asphalt.
Source basis: GAF flashing details, Sika and Henry product data, and the applicable factory-built chimney instructions discussed in the article. Product labels and model instructions control.
Match the Product to the Joint
A polyurethane joint sealant can suit a metal-to-masonry joint because it remains elastic and bonds to common construction materials. One current product data sheet lists masonry, metal and common flashing details among its uses, but prohibits contact with bituminous or asphaltic materials. That restriction is why “use polyurethane everywhere” is not sound advice (Sika product data sheet).
A purpose-made flashing/construction sealant may cover a broader combination of materials, but its data sheet still controls. Henry 900, for example, requires sound, clean and dry joints and recommends testing adhesion on each substrate before full application (Henry technical data sheet). These products illustrate the checks required; they are not universal endorsements.
For a lap or seam between pieces of metal flashing, use a flexible sealant compatible with that particular metal and the flashing design. Sealant is not a substitute for a lap that should be folded, soldered or otherwise mechanically formed.
Beneath asphalt shingles, use plastic asphalt roof cement only where the shingle or flashing instructions call for it, and only in the specified amount. Excess cement can blister shingles. Check polyurethane and other construction sealants carefully for restrictions against contact with asphaltic materials.
A factory-built metal chimney is a separate case. Use the sealant named in the installation instructions for its brand and model rather than transferring masonry-chimney advice to the storm collar.
Failed mortar, a cracked crown, deteriorated brick or corroded metal is not a caulk-only repair. Correct the underlying defect before expecting a new sealant joint to remain watertight.
Check the Flashing Assembly Before Applying Sealant
A masonry chimney on a sloped shingle roof normally needs four water-shedding components:
- Apron flashing across the downhill face.
- Step flashing interwoven with the roof covering along both sides.
- Back flashing or a cricket on the uphill side.
- Counterflashing attached to the chimney and overlapping the base flashing.
These layers shed water in the same direction as the shingles. In its guidance for brick-veneer construction, the Brick Industry Association describes base flashing beneath counterflashing and says joints and laps must be sealed. It also identifies through-wall flashing where that wall construction requires it (BIA Builder Notes).
For asphalt-shingle roofs, a City of Cheney guide based on the 2015 IRC illustrates counterflashing with its upper leg set into a groove in a mortar joint. It also shows base and counterflashing at masonry intersections and quotes the requirement for a cricket on the ridge side of a chimney more than 30 inches wide, measured perpendicular to the roof slope (City of Cheney chimney-flashing guide). Check the code adopted where the house is located because editions and local amendments vary.
A bead smeared across the top of loose, surface-mounted metal does not recreate this layered assembly. If flashing is rusted, split, loose, too short, incorrectly lapped or missing, more sealant is temporary at best.
A Sound Counterflashing Joint Is Mechanically Secure
GAF’s steep-slope field guide presents two ways to secure counterflashing in a cut mortar joint: setting it in mortar or mechanically retaining it with wedges. For the mechanically retained detail, the guide calls for filling the joint with plastic roof cement or polyurethane sealant and bonding the sealant to the masonry. It directs replacement, rather than reuse, of rusted, cracked or deteriorated counterflashing (GAF Pro Field Guide).
The joint must also accommodate movement. Metal expands and contracts more than masonry as temperature changes. The Insurance Institute for Business & Home Safety advises designing flashing joints and laps to allow that movement while preventing water entry (IBHS metal-flashing guide).
If a mortar joint has crumbled, brick faces are spalling or the flashing pulls out during a light check from a safe position, stop. The substrate needs repair before new sealant can hold. See chimney mortar repair options to distinguish repointing from more serious masonry work.
Renew Only a Small, Otherwise Sound Joint
Proceed only when the metal is intact, correctly overlapped and firmly attached.
- Confirm the likely entry point. Water near a chimney can enter through the crown, porous masonry, roof covering or the uphill side of the flashing. An interior stain does not identify the failed exterior joint by itself.
- Remove failed sealant. Do not bridge loose, cracked or poorly bonded material. Avoid damaging the metal coating or enlarging the mortar joint.
- Clean and prepare the surfaces. Remove dust, oil and loose masonry. Follow the selected product’s requirements for dryness, primer and application temperature.
- Verify compatibility. The current label or data sheet should cover masonry and the actual flashing material, whether galvanized steel, aluminum, copper or another metal. Check restrictions involving asphalt, silicone, coatings and damp substrates.
- Fill and tool the intended joint. Apply a continuous bead that contacts both joint faces without voids. Do not leave only a thin surface skin. Follow the manufacturer’s bead dimensions and tooling directions.
- Allow the required cure. Protect the work from rain if the instructions require it, then inspect the area after the next storm.
Do not run an improvised continuous bead across an edge intended to drain. Preserve the laps and open drainage paths shown in the roof or flashing detail.
Some Failures Require Rebuilding, Not Resealing
Bring in a qualified roofer or chimney professional for missing step flashing, face-nailed patch metal, open corners, corrosion, repeated heavy tar patches, an absent required cricket or visible masonry movement. A cracked crown or damaged chimney can also direct water toward the roof intersection; use the broader cracked-chimney checks before blaming one flashing bead.
Do not use ordinary flashing sealant as firestop material, inside a flue or to modify a listed factory-built chimney. Identify the manufacturer and model first. For example, one DuraVent DuraTech manual calls for non-hardening waterproof sealant at the storm collar and identifies non-hardening high-temperature silicone in its detail. That instruction applies to that system, not every metal chimney (DuraVent DuraTech installation instructions).
Roof work carries serious fall risk, and deteriorated masonry can be unstable. Ground-level viewing, binoculars and attic observations during rain are useful homeowner checks. Cutting a reglet, lifting shingles or rebuilding flashing is professional work unless suitable access, skills and fall protection are already in place.