
Choose the Right Class A Chimney System
Learn how to identify Class A chimney pipe, distinguish it from stovepipe and B vent, and verify listing, clearance, supports, and termination.
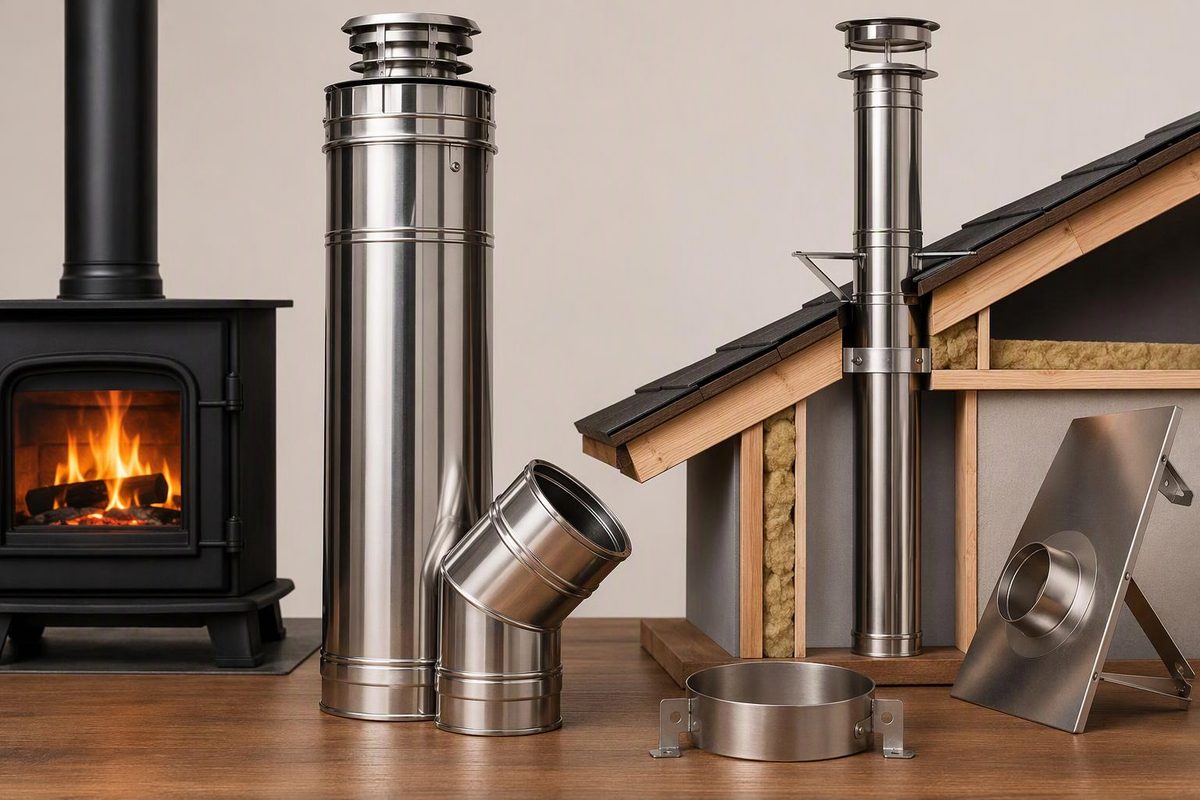
Class A chimney pipe is trade shorthand for insulated, factory-built metal chimney that carries high-temperature flue gases through walls, ceilings, attics and roofs. For a wood stove or another solid-fuel appliance in a U.S. dwelling, look for chimney marked “Type HT” and “Residential Type and Building Heating Appliance Chimney”—not merely packaging that says “Class A.”
Choose the appliance fuel and where the vent runs; the tool identifies the product category to verify.
Listed Type HT Factory-Built Chimney
For a solid-fuel appliance in a U.S. dwelling, verify a listed Type HT chimney system at every building penetration.
- Match the appliance’s required flue diameter and chimney standard.
- Use the listed adapter, supports, shields, flashing and cap from the compatible system.
- Maintain the clearance printed on that system’s label and instructions.
Source: 2021 IRC §R1005 and the appliance and chimney manufacturers’ instructions. Local amendments may differ.
The 2021 International Residential Code requires factory-built chimneys to be listed, labeled, installed and terminated according to their manufacturer’s instructions. For solid-fuel appliances in dwellings, it requires compliance with the Type HT requirements of UL 103, with a limited exception for open-combustion-chamber fireplaces (IRC Section R1005). Check the code edition and amendments adopted locally before buying parts.
Class A Pipe Is Not Stovepipe
A typical freestanding-stove installation uses two distinct products:
- Connector or stovepipe runs from the appliance to the chimney adapter or support within the room. It may be single-wall or a listed double-wall connector.
- Insulated chimney pipe begins at the listed transition and continues through building assemblies and outdoors to its termination.
Black stovepipe cannot substitute for insulated chimney at a wall or ceiling penetration. DuraVent describes its stovepipe as an uninsulated interior connector that cannot penetrate walls or ceilings; its insulated chimney pipe is designed for those penetrations (DuraTech planning brochure).
The transition occurs at the system’s specified adapter, support box or wall-pass-through assembly—not at an improvised joint.
Class A chimney is also not Type B gas vent. B vent serves compatible listed gas appliances under a different standard and has different fittings and operating limits. See B vent uses, clearances and routing if the appliance burns gas.
Keep Every Part Within One Listed System
The pipe sections are only part of the tested assembly. Depending on the route, the installation may also require:
- a connector-to-chimney or appliance adapter;
- a ceiling support box, roof support or wall-supported tee;
- a wall thimble or firestop radiation shield;
- an attic insulation shield;
- elbow supports, wall straps or an extended roof brace;
- flashing, a storm collar and the listed cap.
Do not assemble a chimney from similar-looking parts chosen by diameter alone. The chimney instructions identify the sections, adapters, supports and shields tested together. DuraVent, for example, directs installers to use authorized DuraTech parts and not mix them with other products or improvised components (DuraTech installation instructions). Use the exact compatible product family unless the manufacturer documents an approved connection.
For an existing chimney, record the manufacturer, product line, inside diameter and listing information from its labels before ordering a cap, tee, adapter or additional section. If the system cannot be identified, have it evaluated rather than test-fitting a similar-looking part.
Plan the Chimney From the Appliance Outward
Verify the Appliance Requirements
Start with the appliance data plate and installation manual. Confirm the permitted chimney standard, flue diameter, minimum chimney height, connector type and model-specific restrictions. “All-fuel” in a chimney catalog does not establish that a particular appliance may use that chimney.
Do not reduce or enlarge the flue merely to fit the framing. DuraVent generally directs users to match chimney diameter to the appliance outlet and warns that improper sizing can impair draft and increase creosote formation (DuraTech 5–8-inch specifications). The appliance manual controls for the particular appliance.
Favor a Short, Predominantly Vertical Route
A short, predominantly vertical interior route generally supports stronger draft and keeps the flue warmer. A through-the-wall route adds a horizontal connector, wall assembly, tee, exterior chimney and supports. DuraVent notes that a cold exterior chimney can produce less draft and more creosote than an interior route (DuraTech specifications).
Before cutting, map joists, rafters, wiring and plumbing. Do not notch or remove structural framing simply to preserve the first proposed stove location. Move the appliance or have the opening properly redesigned.
Preserve the Listed Clearance
Many residential systems require 2 inches of airspace to combustible material, but that is a common product requirement rather than a universal Class A clearance. Current DuraTech specifications and Selkirk SuperVent/SuperPro instructions both specify 2 inches for those systems (DuraTech specifications; Selkirk installation instructions). Verify the label and manual for the exact product.
Keep the required space open. Do not fill it with fiberglass, loose-fill insulation, spray foam, lumber or trim unless the chimney instructions expressly permit a listed component there.
Where a factory-built chimney passes through an insulated assembly, IRC Section R1005.8 requires an insulation shield that maintains the manufacturer-specified clearance and prevents insulation from being displaced into it (IRC Section R1005.8).
Check Offsets, Supports and Roof Height
The 2021 IRC limits factory-built chimney offsets to 30 degrees from vertical and no more than four elbows. A particular chimney may be more restrictive, so follow its offset tables and support instructions (IRC Section R1005.7).
A common termination rule is at least 3 feet above the roof penetration and 2 feet above any part of the building within 10 horizontal feet. Confirm that rule against the locally adopted code and the chimney instructions.
Also check the manufacturer’s bracing threshold. DuraTech 5–8-inch chimney, for example, requires an extended roof bracket when the chimney extends 5 feet or more above the roof penetration (DuraTech specifications). Meeting minimum roof height does not by itself guarantee adequate draft where trees, terrain or nearby structures disturb airflow.
Stop If the System Cannot Be Verified
Do not add parts to, alter or use a questionable installation until these conditions have been resolved:
- The chimney system or proposed replacement part cannot be positively identified.
- Brands or product families have been mixed without documented approval.
- Stovepipe passes through a wall, ceiling or attic.
- Insulation, framing or wiring intrudes into the required clearance.
- Required supports, firestops or insulation shields are absent.
- Joints have separated, or pipe is corroded, dented, distorted or heat-damaged.
- There is evidence of a chimney fire.
The permit authority and a qualified chimney or hearth professional can determine what must be corrected. For broader project sequencing, see how to install a woodburner stove safely and the parts of a chimney.
Have a solid-fuel chimney inspected at least annually and cleaned or repaired as needed. A chimney fire can damage a factory-built metal system even when the event is not dramatic. After a suspected chimney fire, stop using the appliance and arrange a professional evaluation before relighting (CSIA chimney-fire guidance).