
Plan a Safe Wood-Stove Installation From Hearth to Chimney
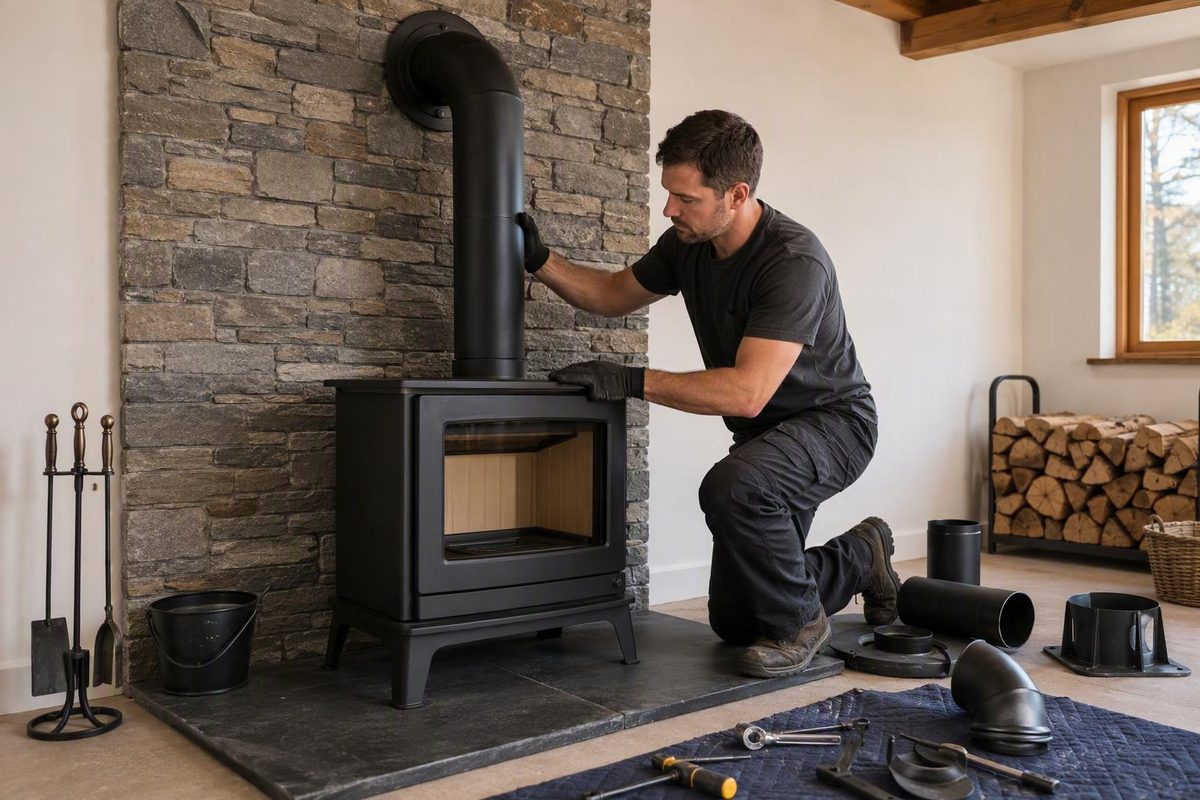
Installing a woodburner is not simply a matter of placing an appliance on a stone slab and attaching a pipe. The stove, hearth, connector, chimney, combustion-air supply, building penetrations, terminal, alarms, inspection, and approval process form one safety-critical system.
This guide explains how to install a woodburner stove at the planning and verification level. It can help you compare an existing masonry chimney with a new insulated chimney, identify the decisions and components involved, and prepare questions for an installer or approving authority. It is not a construction specification, legal opinion, commissioning procedure, or substitute for assessing the property in person.
Before You Begin: What This Guide Can and Cannot Tell You
No general article can specify a safe installation for every stove, chimney, and building. The controlling information must come from:
- The installation manual for the exact stove model
- The appliance’s certification or listing information
- The instructions for the selected connector, liner, or chimney system
- The rules currently in force at the installation address
- The conditions attached to the applicable permit, inspection, certification, or approval
If those sources conflict with a generic diagram, video, retailer article, or rule of thumb, do not use the generic guidance. Mechanical Mentor describes its combustion-appliance material as general reading, notes that it may be incomplete, and recognizes that codes, permits, and inspections may govern the work in its content and safety limitations.
Poorly planned or defective installations can create fire, indoor-smoke, inadequate-draft, creosote, and carbon-monoxide hazards. Smoke inside the home may indicate a stove or venting problem, while poor chimney draft can create a carbon-monoxide risk; carbon monoxide cannot be detected by smell (HowStuffWorks’ wood-stove safety overview).
A fire that appears to burn normally does not prove that the installation is safe.
Stop planning or installation work and obtain qualified, site-specific help if:
- A required clearance cannot be established from the relevant documentation
- A component is unidentified or its compatibility cannot be documented
- A masonry chimney is cracked, leaking, blocked, unstable, or deteriorated
- The proposed route conflicts with framing, wiring, plumbing, ducts, or insulation
- Structural members may need alteration
- The required protection at a wall, floor, ceiling, attic, or roof penetration is uncertain
- Roof access, bracing, or waterproofing is beyond the people doing the work
- An installation or commissioning check indicates leakage, weak draft, or indoor smoke
- A smoke or carbon-monoxide alarm activates
Here, qualified professional means someone with the training, experience, and any credentials required for the specific work and jurisdiction. Formal terms such as competent-person installer should be used only when referring to a defined local scheme.
The objective is not to assemble the system and discover whether it works after lighting it. The objective is to settle the design, compatibility, approval, inspection, and commissioning requirements before routine use.
Check the Approval Path: US and UK Requirements Are Different
American and British terminology, product certifications, approval routes, and example dimensions are not interchangeable. A product described as a Class A chimney in a US article may be discussed as an insulated twin-wall flue in UK guidance, but that does not make the products, approvals, or installation requirements equivalent.
The commercial sources available for this overview are useful for orientation but are not controlling legal authorities. Confirm every legal and approval point directly with the relevant public authority before purchasing components or starting work.
United States
US permit and inspection requirements vary by state and locality. Contact the local building department or fire authority for the installation address and ask:
- Which code edition and local amendments apply?
- Is a permit required?
- May the homeowner perform any or all of the work?
- What drawings, manuals, and product documents are required?
- Must penetrations or concealed work be inspected before enclosure?
- Who conducts the final inspection?
- Are there local restrictions on solid-fuel appliances?
- Is a licensed or otherwise qualified contractor required for any part of the project?
Do not treat a retailer’s instructions for one service area as nationwide law. For example, one Virginia-area guide tells readers to consult local authorities and obtain inspection before use, but that local guidance cannot establish the requirements elsewhere (Miller Ace Hardware’s wood-stove guide).
Separately ask the insurer, lender, landlord, homeowners’ association, or property manager whether notice, records, consent, or particular contractors are required. The supplied installation sources do not establish those contractual conditions, so obtain the answer directly and retain it in writing where appropriate.
United Kingdom
Do not assume there is one identical approval route throughout England, Wales, Scotland, and Northern Ireland. Confirm the applicable process with the public building-control authority for the property and check whether a competent-person scheme is recognized for the proposed work and location.
Commercial UK guidance describes a general distinction between using Building Control for self-installed work and self-certification by an appropriately registered installer where a relevant competent-person scheme applies. Treat that only as an orientation pending confirmation from the responsible public authority; a retailer’s overview is not itself a statement of current law (Direct Stoves’ UK installation overview).
“HETAS registered” and “Building Control approved” are not interchangeable descriptions. One may describe an installer’s registration and a scheme-based route where applicable; the other describes a public approval process. Confirm which route is available before work begins.
Listed-building controls, conservation requirements, lease terms, landlord permission, and insurer conditions are separate matters. They may affect an external flue or alterations to the building, but the answer must be obtained for the particular nation, property, and project.
Assemble the project file before work
Create a physical or digital file containing:
- Exact stove make, model, serial number, and appliance identification
- Complete stove installation and operating manual
- Connector, adapter, liner, chimney, support, and terminal instructions
- Product labels, certification information, and receipts
- A route sketch showing the hearth, stove, connector, transitions, penetrations, supports, and terminal
- Hearth and combustible-clearance requirements copied from the exact manual
- Combustion-air requirements
- Permit or Building Control contact details
- Application documents and required inspection stages
- Written responses to unusual design questions
- Final inspection, certification, and commissioning records
Photograph product labels and concealed stages before they become inaccessible. This planning record does not establish compliance, but it can help an approving authority, installer, sweep, technician, or future owner identify what was installed.
Plan the Stove, Hearth, Clearances, Air Supply, and Flue Route
A safe installation begins as a coordinated design exercise. Do not buy the stove independently and then attempt to force a chimney route around it.
Select the stove for the actual heat demand
Simple room-volume formulas can provide a preliminary estimate, but they do not replace a proper heat-loss assessment. Insulation, windows, doors, draughts, room connections, and ceiling height can materially affect the result; even manufacturer guidance presenting a basic volume method identifies insulation and air leakage as important variables (Contura’s stove-planning guide).
Selection should account for:
- Calculated heat demand
- The appliance’s intended operating range
- The installation jurisdiction
- The fuel permitted by the manual
- Applicable emissions restrictions
- The available hearth and clearances
- The feasible chimney route and diameter
- Combustion-air requirements
An appliance should not be selected solely because it physically fits the room or has the desired appearance.
Verify the floor and hearth
Confirm that the floor can support the combined load of the stove, hearth, and any associated masonry or chimney support loads. Suspended timber floors, altered framing, deterioration, and unusually heavy assemblies require site-specific structural judgment rather than a generic online calculation.
Depending on the stove and floor construction, a hearth may need:
- Ember protection, intended to prevent hot material from contacting a combustible floor
- Thermal protection, intended to limit heat transfer into the floor assembly
- Both forms of protection
A surface can be non-combustible without providing the required thermal performance. Tile, glass, metal, or stone therefore does not automatically create a compliant hearth. Record the required dimensions, thickness or thermal rating, construction, and edge treatment from the exact appliance documentation and applicable rules. Commercial installation guidance distinguishes ember protection from thermal protection and repeatedly defers model-specific construction to the stove instructions (Rockford Chimney Supply’s installation guide).
Build a model-specific worksheet
Use the following as a planning aid, not as a substitute for the manuals:
| Design item | Record for the exact model |
|---|---|
| Stove make and model | |
| Heat output and heat-loss basis | |
| Appliance listing or certification | |
| Flue outlet position | Top, rear, or permitted alternatives |
| Flue outlet diameter | |
| Permitted chimney diameter | |
| Hearth dimensions | Front, rear, and sides |
| Hearth performance | Ember, thermal, or both |
| Rear clearance | |
| Side clearance | |
| Corner clearance, if applicable | |
| Clearance above stove and connector | |
| Approved shielding option, if any | |
| Combustion-air requirement | |
| Approved connector type | |
| Permitted route and bend limits | |
| Liner or chimney system | |
| Approval and inspection route |
Do not fill gaps with “typical” measurements. Stove-body clearances come from the appliance listing, manual, and applicable rules. The connector and chimney system have separate clearance requirements that may differ from those of the appliance.
A non-combustible shield does not automatically permit a reduced clearance. Any reduction is valid only when the appliance documentation and applicable rules expressly allow the specified shield or tested assembly. Construction details such as material, thickness, ventilation space, mounting, and edge treatment may all be relevant.
Assess combustion air and depressurization
A wood stove requires a reliable combustion-air supply. Assess it in the context of the whole building, including:
- Room size and layout
- Building airtightness
- Outside-air provisions required or permitted by the stove
- Kitchen extract hoods
- Bathroom extract fans
- Whole-house ventilation
- Clothes dryers
- Other combustion appliances
- Doors that may isolate the stove room
Do not install another fan as a generic cure: an extraction system can alter room pressure, so the air-supply design must consider the stove and competing systems together. UK installation guidance identifies ventilation, flue planning, and smoke testing as connected parts of the installation rather than independent decisions (Direct Stoves’ installation overview).
Choose the flue route before fixing the stove position
A predominantly vertical chimney with few changes in direction is generally preferred for natural draft. This preference does not make every internal route feasible or every external route unsuitable.
Before cutting or opening any building surface, survey the proposed route for:
- Joists, rafters, trusses, and load-bearing elements
- Electrical wiring
- Plumbing, gas lines, and ducts
- Wall, ceiling, and attic insulation
- Roof coverings and underlay
- Required chimney clearances
- Space for supports, firestops, shields, and flashing
- Attic storage and access
- Future inspection and sweeping access
- Safe installation and maintenance access at height
If the required opening or clearance envelope conflicts with framing or services, redesign the route. Do not alter a joist, rafter, or truss merely to preserve the preferred stove position.
Know the Parts: Stovepipe, Liner, and Insulated Chimney Are Not Interchangeable
The word flue is often used for several different components. That shorthand can conceal important differences in function and approval.
Connector stovepipe
Connector stovepipe joins the stove outlet to an approved chimney entry or designated transition. Depending on the appliance and design, it may be an approved single-wall or double-wall product.
Connector pipe is not automatically suitable as a chimney or building-penetration system. For the common ceiling-and-roof arrangement described by the supplied US guidance, the connector transitions to the specified insulated chimney before the ceiling penetration. The exact transition point and permitted construction must come from the appliance and chimney-system instructions.
Flexible chimney liner
A flexible liner may be specified inside a suitable existing masonry chimney. It creates a defined flue path, but it does not by itself repair structural defects or establish that the chimney is suitable for continued service.
Whether a liner is required—and its material, diameter, insulation, adapters, terminal, and installation method—depends on the chimney assessment, stove requirements, applicable rules, and liner instructions. The mere presence of an existing chimney is not enough information to choose a liner.
Listed insulated chimney or twin-wall flue
Where an approved chimney passes through or runs beside the building, the design may require a listed insulated chimney system. Terminology and certifications differ between the US and UK, so labels such as Class A, twin wall, and insulated pipe should not be treated as universally interchangeable.
What the fittings do
A complete installation may include:
- Stove adapter or approved increaser/reducer: connects identified components where the documentation permits it
- Ceiling support box or other support: carries chimney load and provides the designed transition
- Wall support: carries an external chimney
- Wall thimble or penetration component: preserves the system’s designed separation through a wall
- Firestop: maintains the required separation at a floor or ceiling boundary
- Attic insulation shield: keeps insulation or stored materials out of the specified clearance zone
- Register plate: closes a fireplace or chimney opening where the approved arrangement requires one
- Flashing: integrates the chimney penetration with the roof covering
- Storm collar: helps shed water above the flashing
- Roof or wall brace: stabilizes exposed chimney where specified
- Terminal or cap: completes the approved system
The names do not create generic assembly rules. Joint orientation, permitted fasteners, support intervals, clearance, bracing, enclosure, and weatherproofing are system-specific.
Do not combine parts from different manufacturers merely because their nominal diameters appear to match.
Use a compatibility chain
Document the installation from end to end:
Stove outlet → connector → adapter or transition → liner or insulated chimney → supports and penetration components → flashing and bracing → approved terminal
For each arrow, identify the exact instruction or approval permitting the connection. If one transition cannot be documented, the component chain is incomplete.
Route A: Connecting to an Existing Masonry Chimney
An existing chimney can simplify the visible route, but its presence does not establish its condition, dimensions, or compatibility.
Have the chimney swept and assessed before selecting a liner or connecting the stove. The assessment should address:
- Structural condition and stability
- Cracks, open joints, leakage, or deterioration
- Obstructions and accumulated deposits
- Evidence of previous damage
- Previous fuel and appliance use
- Internal dimensions and geometry
- Condition of any existing liner
- Available height and draft potential
- Compatibility with the proposed stove
- Access for cleaning and inspection
- Suitability of the fireplace opening and connection point
UK manufacturer guidance similarly advises assessing an existing chimney’s structure, cleanliness, and suitability before connection (Salamander Stoves’ installation guide).
Do not accept the blanket claim that every masonry chimney needs the same flexible stainless-steel liner. The supportable conclusion is narrower: an assessment determines whether a liner is needed, while the appliance requirements, chimney condition, applicable rules, and liner instructions determine what system is suitable.
At a planning level, the route is:
- Identify the exact stove and its chimney requirements.
- Sweep and assess the full masonry chimney.
- Resolve defects and determine whether the chimney remains suitable.
- Design the liner system if one is required.
- Provide the specified load-bearing hearth.
- Position the stove at its documented clearances.
- Connect it using approved connector and adapter components.
- Finish the opening with the designed closure, access, plate, and sealing arrangement.
- Complete the required inspection and locally accepted commissioning process.
Damaged, leaking, badly sized, unstable, or obstructed masonry is a stop-work condition, not something to conceal with a generic liner. The appropriate outcome may be repair, reconstruction, a different chimney route, or rejection of the existing chimney.
This planning guide does not explain how to lower a liner, alter masonry, or seal an opening. Those tasks depend on the identified liner system, chimney geometry, structural condition, access, termination, and approval requirements.
Route B: Installing a New Insulated Chimney
Where no suitable masonry chimney exists, the project needs a complete approved insulated chimney system. Two broad configurations are common:
- A predominantly vertical internal route through ceilings and the roof
- An approved wall transition leading to an external insulated chimney
Neither arrangement is universally best. An external route may avoid some occupied-floor penetrations but still requires an approved wall transition, supports, weather-resistant assembly, maintenance access, and an acceptable terminal position.
Ceiling-and-roof route
At planning level, the sequence is:
- Establish the approved stove and hearth position.
- Run the permitted connector only to its designated transition.
- Install the chimney system’s specified ceiling support or transition component.
- Continue with the identified insulated chimney system.
- Install the specified protection at each ceiling, floor, and attic condition.
- Keep framing, insulation, stored goods, and other combustibles outside the required clearance zone.
- Form and weatherproof the roof opening using the specified flashing arrangement.
- Support or brace the chimney as the system requires.
- Fit the approved terminal.
- Preserve the required inspection and cleaning access.
Commercial supplier guidance describes the same broad sequence—connector, insulated-chimney transition, supports, penetration protection, flashing, storm collar, and terminal—but its product-specific measurements and fastener details should not be transferred to another system (Rockford Chimney Supply’s installation guide).
Firestops and attic shields are safety components, not decorative trim. Their purpose is to preserve the system’s required separation from framing, insulation, stored materials, and other combustibles. Do not assume that insulation may touch a support, firestop, shield, or chimney unless the exact system instructions permit that condition.
Flashing, storm collars, roof supports, and braces must be compatible with the selected system and fitted according to its instructions. Similar appearance is not evidence of compatibility.
External route
The connector should run only to the transition allowed by the approved design. Where the route crosses a combustible wall, use the identified insulated chimney and wall-penetration components specified for that installation rather than improvising with connector pipe, sheet metal, masonry, or added insulation.
Outside, the design may need a base or wall support, brackets, permitted offsets, bracing, cleaning access, and an approved terminal. Support intervals, fasteners, offset limits, and bracing thresholds are product-specific.
Termination and route conflicts
Determine chimney termination requirements from the current local rules and the selected chimney-system manual. Do not transfer a published US roof-clearance formula to the UK, or a UK example height to a US installation. Roof geometry, nearby structures, and the approved product design may also affect the route.
Never cut structural framing simply to make the chimney fit. If the support box, wall penetration, or required clearance envelope conflicts with a joist, rafter, truss, pipe, cable, or duct, move the stove, revise the route, or obtain a professionally designed solution.
Qualified involvement is particularly appropriate for:
- Roof openings and flashing
- Structural alterations
- Tall or difficult-to-brace external runs
- Multi-storey or inaccessible routes
- Concealed combustible clearances
- Complex offsets
- Uncertain draft
- Unusual roof coverings
- Work at height
- Any uncertainty about weatherproofing
Commissioning: Inspection, Draft Checks, Alarms, and the First Fires
Do not confuse four separate stages:
- Pre-fire inspection: checks the completed system before any flame is introduced.
- Controlled commissioning or test firing: may be required as part of the locally accepted assessment and should be conducted by the person authorized or responsible under that process.
- Final approval or certification: occurs in the sequence required by the local authority or applicable scheme.
- The owner’s first curing fire: begins only when the installation has been released for use and the stove instructions permit it.
Because local processes differ, this article cannot prescribe whether formal approval occurs immediately before or after a controlled commissioning fire. Confirm the sequence with the approving authority and commissioning professional. Do not put the stove into routine service before the required process is complete.
The locally accepted commissioning procedure should address, as applicable:
- Flue integrity and leakage
- Draft performance
- Combustion behavior
- Smoke spillage
- Air-supply adequacy
- Interaction with extract systems
- Stove and chimney stability
- Support and separation from combustibles
- Completeness of joints, closures, and weatherproofing
There is no universal test value suitable for every stove and jurisdiction. Use the exact appliance documentation and the tests accepted by the responsible authority or commissioning professional.
Before any authorized test firing, visually confirm that the stove is stable on the hearth, the connector and chimney are supported, required components are present, accessible joints appear complete, and no stored material or insulation has entered a clearance zone. Where safely accessible, include the attic and roof space rather than inspecting only the stove room.
Install and test smoke and carbon-monoxide alarms according to current local requirements and each alarm manufacturer’s instructions. Carbon monoxide is colorless and odorless, so smell is not a reliable warning. If an alarm activates, treat it as a stop-use condition and follow the alarm instructions and local emergency guidance. If anyone develops symptoms associated with carbon-monoxide exposure during stove use, move to fresh air and seek medical advice; reported symptoms include headache, dizziness, nausea, tiredness, confusion, and difficulty concentrating (Charnwood’s carbon-monoxide guidance).
Once the appliance is approved for owner use, follow the stove manufacturer’s curing procedure. The manual may require several small fires before a hotter fire so paint and internal materials can cure gradually. Normal curing instructions do not justify ignoring smoke spillage, weak draft, excessive heat, or an alarm.
During authorized commissioning and the first owner fires, watch for:
- Smoke entering the room
- Difficulty establishing or maintaining draft
- Leakage at accessible joints
- Unexpected movement
- Unusual overheating
- Red-hot components
- Abnormal roaring or vibration
- Smoke- or carbon-monoxide-alarm activation
If any of these occurs, stop using the appliance and have the cause assessed. Follow the appliance manual and local emergency guidance rather than repeatedly relighting the stove to see whether the condition disappears. Red-hot panels, loud draft noise, and vibration are identified warning signs of overfiring in general wood-stove safety guidance (HowStuffWorks’ safety overview).
Create a commissioning record containing:
- Permit, Building Control, or scheme details
- Inspection, certification, and approval dates
- Flue-integrity, draft, combustion, and spillage results
- Alarm models, locations, and test date
- Stove, liner, connector, and chimney product information
- Manuals and installation drawings
- Photographs of labels and concealed stages
- Receipts and warranty documents
- Fuel and first-fire instructions
- The next inspection or maintenance date
Keep a copy with the property records rather than only in an installer’s account or phone.
Safe Use and Maintenance After Installation
Approval is the beginning of safe operation, not the end.
Burn dry, untreated firewood suitable for the appliance. Do not burn painted, chemically treated, or otherwise unsuitable material. Follow the stove manual for fuel size, loading, ignition, air controls, operating range, and model-specific restrictions.
Creosote is combustible residue that can accumulate in a chimney and contribute to chimney fires. Inspection is needed to determine the actual condition of the system.
Arrange regular chimney and appliance inspection and sweeping at least as often as the appliance instructions, local guidance, and competent inspection findings require. Commercial safety guidance commonly recommends annual attention, while daily or heavy use may justify more frequent sweeping. Do not assume that one schedule fits every appliance and use pattern.
Maintain all clearance zones after installation. Furniture, rugs, curtains, drying clothes, paper, kindling, and stored firewood can migrate closer to the stove over time. An approved clearance zone is not storage space.
Remove ash with suitable tools and place it in an appropriate metal container away from combustible materials. Manufacturer safety guidance recommends metal-container storage away from combustibles because ash can retain heat after the visible fire has gone out (Charnwood’s carbon-monoxide and maintenance guidance).
Take the stove out of service if you observe:
- Persistent smoke or smoke odor indoors
- Poor or suddenly changed draft
- Damaged door seals or cracked stove components
- Loose, corroded, distorted, or leaking flue parts
- Water entry affecting the stove or chimney
- A carbon-monoxide alarm
- Red-hot panels or pipe
- Unusual roaring or vibration
- Evidence of a chimney fire or other serious venting failure
Follow local emergency guidance for an active fire or alarm. Do not resume use until the system has been assessed under the appropriate local process.
Frequently Asked Questions
Can I install a woodburner stove myself?
Possibly, but the answer depends on the jurisdiction, property, project scope, and your competence.
In the US, ask the local building or fire authority whether homeowner installation is permitted and what permits and inspections apply. In the UK, commercial guidance describes Building Control as the usual route for self-installation and scheme-based self-certification as a possible route for appropriately registered installers, but this must be verified for the relevant UK nation and project (Salamander Stoves’ installation guide).
Even where homeowner work is permitted, masonry defects, structural changes, roof penetrations, concealed clearances, waterproofing, and draft uncertainty justify qualified involvement. Legal permission to perform work does not demonstrate that a particular design is safe.
Does an existing masonry chimney always need a stainless-steel liner?
No universal conclusion can be drawn before inspection. The chimney should first be swept and assessed for structural condition, leakage, deposits, obstruction, dimensions, previous use, draft potential, and compatibility with the proposed stove.
An assessment may find that a liner is necessary, but it may instead identify repairs, sizing problems, or conditions that make the chimney unsuitable. Liner material, diameter, insulation, adapters, and installation method must follow the appliance requirements, chimney assessment, applicable rules, and liner-system instructions.
Can stovepipe pass through a wall, ceiling, or roof?
Do not assume ordinary connector stovepipe can serve as the chimney through a combustible building penetration. In the common arrangements covered by the supplied guidance, it transitions to the specified insulated chimney before the penetration.
The penetration must use the supports, thimbles, firestops, shields, flashing, or other components specified by the approved design and chimney-system instructions. Never improvise a penetration with sheet metal, masonry, or added insulation.
How much clearance and hearth protection does my stove need?
Use the exact stove manual, appliance listing, connector and chimney instructions, and applicable local rules. There is no universal clearance or hearth extension suitable for every woodburner.
The hearth may require ember protection, thermal protection, or both. Clearances may be reduced only through a shielding method or tested assembly expressly permitted for that appliance and installation. Do not copy measurements from another model, retailer diagram, product family, or country.
How do I know the stove is ready for its first fire?
First establish what first fire means locally. A controlled test fire may form part of commissioning, while the owner’s first curing fire should occur only after the installation has completed the applicable inspection, commissioning, and approval sequence.
Before owner use, the system should be complete, stable, supported, separated from combustibles, and accompanied by the required records. Applicable checks should have addressed flue integrity, draft, combustion behavior, and smoke spillage. Smoke and carbon-monoxide alarms should also be installed and tested.
A successful burn does not retrospectively prove that concealed work is safe or compliant.
Go-or-No-Go Checklist
Do not begin routine operation until every applicable item below is “yes”:
- [ ] The exact stove has been selected using an appropriate heat-loss assessment.
- [ ] Its hearth dimensions and thermal requirements are recorded.
- [ ] Its rear, side, corner, overhead, and connector clearances are recorded.
- [ ] Its outlet size, chimney requirements, and combustion-air needs are recorded.
- [ ] The floor’s ability to support the complete assembly is confirmed.
- [ ] The route has been surveyed for framing, utilities, insulation, access, and waterproofing.
- [ ] The stove outlet, connector, adapters, liner or insulated chimney, supports, penetration components, and terminal are documented as compatible.
- [ ] An existing masonry chimney has been swept and assessed, or a complete approved insulated chimney system has been designed.
- [ ] Connector pipe ends at the transition required by the approved design and does not substitute for the specified chimney through a combustible penetration.
- [ ] The applicable permit, Building Control, inspection, certification, or scheme route has been confirmed directly with the responsible authority.
- [ ] Smoke and carbon-monoxide alarms are installed and tested as required.
- [ ] The pre-fire inspection, controlled commissioning, final approval, and owner first-fire stages have been identified.
- [ ] Qualified help has been engaged for masonry, structural, roof, clearance, waterproofing, or draft uncertainty.
- [ ] The required inspection, commissioning, approval, or certification process is complete.
- [ ] The appliance has been formally released for routine use.
If any answer is “no” or “unknown,” the stove is not ready for routine operation.