
Plan the Insert, Chimney Liner, and Inspection Before Work Begins
Use decision gates to verify fireplace compatibility, chimney condition, liner design, permits, commissioning, and inspection before use.
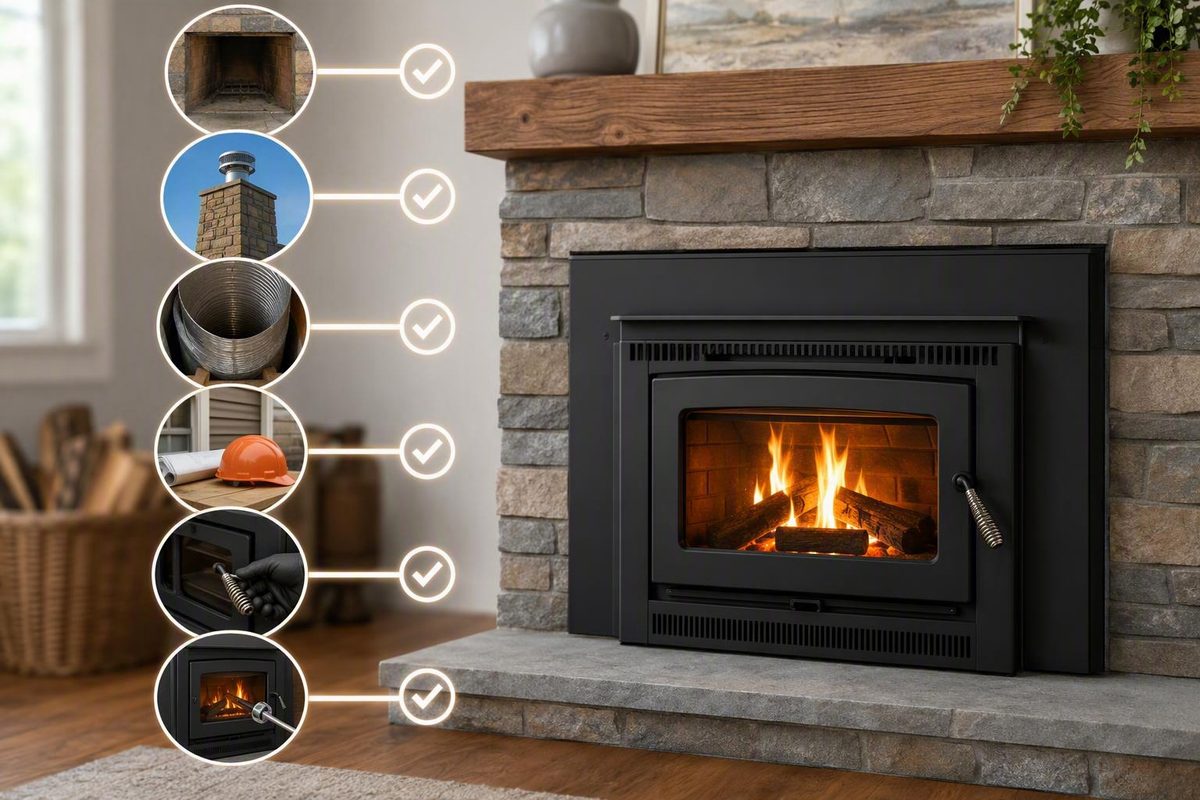
Installing a wood-burning fireplace insert is not simply a matter of finding an appliance that fits the opening and sliding it into place. It is a complete appliance-and-venting project governed by the selected insert’s listing and manual, the liner system’s instructions, the existing chimney’s condition and geometry, and locally adopted requirements.
For homeowners, the safest and most useful role is usually to document existing conditions, compare proposals, confirm approvals, and verify the completed scope—not improvise venting details on the roof or inside the chimney. This guide explains the planning and oversight process rather than presenting one configuration as a universal installation method.
What installing a wood-burning fireplace insert actually involves
A wood-burning fireplace insert is a self-contained appliance designed to fit into an existing compatible fireplace. The original fireplace provides the cavity, but the insert becomes the controlled combustion appliance. Its exhaust must connect to the approved venting system specified for the installation.
Think of the project as one coordinated system comprising:
- The listed insert
- The appliance connector or adapter
- The chimney liner and any required insulation
- Liner support, top plate, termination, and cap
- The existing fireplace and chimney
- Mantel and side clearances
- Hearth and floor protection
- Combustion-air provisions, where applicable
- A surround or trim panel
- An electrical supply for an optional or integral blower
- Permits, commissioning, and inspections
The decorative surround closes the visible gap around the appliance, but it does not complete the venting system. It cannot substitute for an approved liner connection, specified sealing or block-off treatment, adequate clearances, hearth protection, or a compliant chimney termination.
Use decision gates, not a generic installation recipe
A reliable project moves through a series of gates:
- Identify the existing fireplace. Determine whether it is masonry or factory-built, and document its make, model, and labels where applicable.
- Record the fireplace and hearth dimensions. Include the firebox interior, opening, damper route, hearth, and nearby combustible surfaces.
- Clean and inspect the fireplace and chimney. Establish whether the flue is sound, unobstructed, appropriately configured, and available exclusively to the insert.
- Choose a compatible listed insert. Compare the exact manual—not merely a sales-page dimension—with the documented site conditions.
- Confirm permits and approvals. Ask the local authority having jurisdiction what must be submitted and inspected.
- Design the venting system. Specify the liner’s material, diameter, shape, insulation, connector, support, and termination as a compatible system.
- Complete the approved installation. Protect the house, route and connect the liner, position the appliance, and finish the chimney top and fireplace opening.
- Commission and inspect the system. Verify assembly, operation, electrical work, clearances, and required approvals before routine use.
- Maintain the appliance and venting. Inspect on a recurring schedule and clean according to actual use and buildup.
A model can fit neatly into the opening and still be wrong for the fireplace, liner, hearth, or mantel. Physical fit proves only that the appliance occupies the available space; it does not establish compatibility or compliance.
The exact appliance manual and listing, the instructions and listing for the complete liner system, permit conditions, and locally adopted requirements control over dimensions or methods found in a generic online guide. Mechanical Mentor’s general-use disclaimer likewise cautions that its material may be incomplete. Project-specific technical and regulatory decisions must come from the controlling documents and the local authority—not from a publisher’s disclaimer.
Confirm that the existing fireplace can accept an insert
Begin by identifying what is already in the house. A traditional masonry fireplace is constructed from masonry and normally connects to a masonry chimney. A factory-built fireplace—often called a prefabricated or zero-clearance fireplace—is a manufactured assembly installed with its own specified chimney, components, and clearances.
Metal panels, louvers, trim, or a metal firebox may offer clues, but appearance alone is not a dependable identification method. Look for a rating plate or label around the firebox opening, behind removable trim, near a lower access area, or in another location identified by the fireplace documentation. Record the manufacturer, model, serial number, fuel type, and listing information. Search for the original manual, construction records, and prior inspection documents.
A factory-built or metal fireplace should receive an insert only when the applicable fireplace-and-insert combination is expressly tested, listed, and labeled for that use. As a jurisdictional example, Portland prohibits installing an insert in a metal fireplace or metal fire chamber unless both are specifically listed and labeled for that use (Portland’s wood-stove and fireplace-insert guidance). Although that page describes Portland requirements, the underlying planning lesson is broadly useful: physical fit is not evidence that a manufactured fireplace may be modified or used with a particular insert.
If a factory-built fireplace’s identity label is missing or unreadable, pause. Do not infer the model from its appearance or assume that a broadly marketed insert is acceptable. Compatibility needs documentation.
Pre-purchase measurement worksheet
Take preliminary measurements only when the fireplace is cool and accessible. Record the units and photograph each tape-measure position so an installer can see exactly what was measured.
| Site condition | What to record | Why it matters |
|---|---|---|
| Front opening | Width and height at the narrowest usable points | Establishes whether the appliance body can enter |
| Firebox depth | Depth at the floor and at relevant upper points if the walls slope | Affects appliance fit and flue-collar position |
| Rear wall | Rear width and usable rear height | Screens out inserts that fit only at the face |
| Firebox shape | Sloped walls, curved back, lintel, projections, ash openings, or obstructions | Identifies hidden fit and positioning conflicts |
| Hearth | Width, depth, thickness, height above the room floor, and construction if known | Supports comparison with model-specific protection requirements |
| Damper passage | Narrowest width, depth, angle, offsets, and immovable obstructions | Affects whether the specified liner and connector can be routed |
| Flue geometry | Dimensions, shape, height if known, offsets, and existing liner | Informs the vent-system design |
| Nearby combustibles | Mantel projection and height, side trim, shelves, flooring, and framing | Allows verification of listed clearances and protection |
| Electrical access | Existing receptacle location and circuit information if a blower is planned | Helps define the electrical scope |
| Fireplace identity | Masonry construction or factory-built make, model, serial number, and label photos | Establishes whether the proposed use can be verified |
These are screening measurements, not permission to order. Before purchase, obtain the exact manual for the exact model and revision under consideration. Compare the documented fireplace with the manual’s:
- Permitted fireplace types
- Minimum and maximum opening dimensions
- Flue-collar size and venting requirements
- Required connector and liner configuration
- Mantel, side-trim, and combustible clearances
- Hearth and floor-protection requirements
- Combustion-air provisions
- Electrical requirements for a blower or controls
- Restrictions on removing or modifying existing fireplace components
Insert selection commonly begins with opening height and width, firebox depth, and rear-wall dimensions, but those measurements are only one part of feasibility (Heat & Glo’s fireplace-insert overview).
Heat-output selection also requires judgment. Consider the intended use, room arrangement, movement of heat to adjacent spaces, insulation and air leakage, climate, and ceiling height. Do not treat a broad BTU range or advertised square-foot rating as a substitute for matching the appliance to the building.
Pause the purchase when:
- The fireplace type is unresolved.
- A factory-built fireplace label or manual is missing.
- The proposed fireplace-and-insert combination is not expressly permitted.
- Required mantel, trim, hearth, or floor conditions cannot be verified.
- The insert’s flue requirement conflicts with the available route.
- The proposal rests only on the claim that the appliance physically fits.
Inspect the chimney before designing the liner
The chimney is not an empty chase waiting for a new tube. Its condition, dimensions, route, termination, and relationship to the building determine whether the proposed liner can be installed as required.
Have the fireplace and chimney cleaned and inspected before finalizing the appliance or liner package. The assessment should address:
- Creosote, soot, and other deposits
- Cracked, loose, displaced, or deteriorated masonry
- The condition and continuity of an existing flue liner
- Water damage and evidence of leakage
- Obstructions, offsets, and reductions in area
- Old appliance connections or abandoned thimbles
- Damper-area restrictions
- Flue dimensions and shape
- Chimney height and termination condition
- Access at the fireplace and roof
- Whether another appliance connects to the same flue
Chimney-liner guidance recommends examining the chimney for damage, deterioration, deposits, and existing-liner condition before installation; Portland also requires damaged chimneys to be addressed and prohibits a wood-burning appliance from sharing its chimney with appliances using other fuels (This Old House’s chimney-liner overview).
Inspection findings can change the selected insert, liner size or shape, insulation method, repair scope, labor plan, schedule, and price. Where concealed defects remain unresolved, ask the inspector what further investigation and documentation are appropriate rather than assuming that one inspection method applies to every house.
What the venting components do
A common installation uses a continuous listed stainless-steel liner from the insert’s flue collar to the chimney termination. Commercial installation overviews commonly show a flexible liner lowered from the chimney top and connected directly to the appliance rather than ending loosely in the fireplace chamber (Fireplaces Direct’s installation overview).
Each component has a distinct role:
- Liner: Provides the specified vent path from the appliance to the termination.
- Appliance connector or adapter: Joins the liner to the insert’s flue collar using components approved for the two systems.
- Insulation, when required: Helps the liner assembly meet its installation conditions and can affect flue temperature and performance.
- Top plate, support, or termination component: Secures and closes the liner system at the chimney top as its instructions require.
- Cap: Completes the termination and helps exclude precipitation and debris while allowing exhaust to discharge.
These functions do not mean that every chimney uses identical products. Compatibility must be established from the flue collar through the cap.
Liner diameter and shape must match the selected insert and listed venting system. Six inches is common in commercial installation literature, but it is not universal. A liner that must pass through a narrow or offset damper area may raise questions about approved oval components, another listed configuration, or a different appliance. The answer cannot be an improvised reduction or deformation.
Treat insulation the same way. Do not assume that every liner must be insulated, or that insulation is optional merely because an uninsulated liner can physically fit. The decision depends on the appliance instructions, liner-system listing, existing chimney construction and clearances, warranty conditions, and applicable local rules.
Chimney height, offsets, flue shape, damper restrictions, liner stiffness, insulation thickness, and roof access can all affect routing difficulty. Those conditions should be documented before the final liner package and labor allowance are approved.
Conditions that stop the project
Pause the project if the inspection identifies:
- Cracked, displaced, or deteriorated masonry affecting safe use
- An obstructed or inaccessible flue
- A flue that cannot accept the required listed system
- An unlined or otherwise unsuitable chimney where an approved lining system is required
- Heavy or unexplained creosote that has not been evaluated and addressed
- A connection shared with another appliance
- Unresolved water damage or structural movement
- Geometry that would require an unapproved liner deformation or fireplace alteration
These conditions do not necessarily make an insert impossible. They mean the repair or redesign must be defined before installation proceeds.
Check the manual, listing, clearances, and permits
When documents or advice appear to conflict, use this working hierarchy:
- The exact insert’s listing and current installation manual
- The instructions and listing for the specified liner and connector system
- Current locally adopted requirements
- Permit conditions and direction from the authority having jurisdiction
- Generic articles, videos, sales pages, and rules of thumb
The first four must be reconciled rather than selectively quoted. A local rule can add conditions, while an appliance manual may be more restrictive for the listed product. If a proposed detail conflicts with a controlling document, pause until the discrepancy is resolved.
Avoid universal clearance numbers
Mantel clearance, side clearance, hearth protection, floor protection, combustion air, and connector requirements vary by appliance and jurisdiction. They may also depend on mantel projection, trim depth, hearth construction, appliance projection into the room, and whether a tested accessory heat shield is used.
Do not rely on generic statements such as “every insert needs this much hearth” or “this mantel distance is always sufficient.” Use the selected model’s diagrams and definitions. Confirm:
- The point from which each clearance is measured
- Which surrounding materials are combustible
- Whether trim projections affect the required distance
- Whether the existing hearth provides the required construction or thermal protection
- Whether the insert projects into the room
- Whether optional shields change the tested configuration
- Whether dedicated combustion air is required
The fact that an open fireplace previously burned does not establish that the new insert satisfies its combustion-air requirements.
Contact the permit authority before purchase
Ask the local building or permitting office:
- Is a mechanical or solid-fuel permit required?
- Does chimney repair or fireplace alteration require a building permit?
- Is a separate electrical permit required for a receptacle, circuit, fan, or fixed wiring?
- Are emissions certification or appliance-label requirements applicable?
- What plans, manuals, listings, or chimney reports must be submitted?
- At what stages are inspections required?
- Must the appliance manual be present on site?
- Who may perform the work under local licensing rules?
As a local example, Portland requires a mechanical permit and inspection for a fireplace wood-stove insert. It also identifies circumstances in which fan wiring requires an electrical permit and directs applicants to retain manufacturer instructions for the inspector (Portland’s permit and inspection requirements). Those details should not be generalized to another jurisdiction; they illustrate why permit research belongs at the beginning of the project.
Wood combustion may not depend on electricity, but a blower generally requires a suitable supply. Any new receptacle, circuit, or fixed wiring should be included in the documented electrical scope and completed according to the appliance instructions and applicable local requirements.
Ask the insurer whether it requests notification or particular records. Also ask the installer which documents support the appliance, liner, and labor warranties. Requirements vary, so keep a complete project file rather than assuming every insurer or manufacturer asks for the same materials.
The common installation sequence, from preparation to surround
The following is an oversight sequence, not a universal set of executable instructions. Component selection, fastening, sealing, alteration, and testing must come from the approved project documents.
1. Confirm the approved scope
Before tools arrive, the installer should confirm:
- Fireplace identity and compatibility
- Exact insert model
- Chimney findings and completed repairs
- Liner and connector specifications
- Insulation decision
- Electrical work
- Permit responsibility
- Inspection stages
- Repair allowances and change-order conditions
Unresolved compatibility questions belong here—not after the insert is unpacked.
2. Clean the system and protect the work area
The chimney and firebox should be clean enough for the planned work and verification. The crew should define floor protection, furniture protection, the equipment route, and dust control for any approved masonry or metal work.
3. Prepare the approved vent path
The installer evaluates the damper area, smoke chamber, offsets, and chimney-top access against the specified liner. Some configurations may permit removal of a damper plate or another documented action.
Cutting a damper frame, grinding metal, removing masonry, or altering a factory-built fireplace is not an automatic installation step. Supplier demonstrations may show such work in a particular configuration, but they do not establish permission for another fireplace. Any proposed alteration must be supported by the applicable fireplace and insert documentation and handled under local approval requirements.
If the liner cannot pass without an undocumented modification, stop and redesign the installation.
4. Route the liner
Installers commonly lower a flexible liner from the chimney top while another person guides it through the flue and damper passage. Chimney height, offsets, liner shape and stiffness, insulation thickness, roof conditions, and access can materially affect this stage.
This work combines roof exposure with the possibility of damaging the liner or chimney. The project plan should therefore account for weather, roof pitch, chimney condition, access equipment, and the experience required to route the specified system.
5. Connect the liner to the insert
The specified adapter or connector joins the liner to the appliance’s flue collar. Fasteners and sealing materials must be approved for the insert and liner system.
A video or supplier demonstration may show furnace cement, silicone, or a particular connector for its example. Those details should not be transferred to another product unless the applicable instructions specify them.
6. Position, level, and reassemble the appliance
Wood inserts are heavy equipment.
Only components authorized by the manual should be removed. They must be protected from damage and reinstalled exactly as directed.
The final position must satisfy more than appearance. The appliance must be supported and located as required, properly connected, serviceable, and consistent with the approved hearth and combustible-clearance conditions.
7. Complete the chimney top
The liner is secured and terminated using the approved support or top-plate arrangement and cap. The components must suit the listed liner system and the chimney-top construction; an improvised closure or unrelated cap is not an equivalent substitute.
8. Fit the surround and specified closure details
The surround finishes the fireplace opening and must preserve necessary service access. It does not replace the liner connection, correct an inadequate clearance, or automatically perform the function of a separately specified block-off plate or damper-area closure.
9. Test, commission, and arrange inspection
The installer should verify assembly, electrical operation where applicable, appliance controls, and venting performance according to the manufacturer’s process. Required inspections should occur at the appropriate stage, with manuals and product information available.
Roof work, heavy lifting, cutting, masonry alteration, vent-system assembly, and electrical additions introduce hazards beyond ordinary appliance placement. Their convergence is why an installation video should be treated as an overview rather than proof that the project is suitable for general DIY execution.
DIY preparation versus work for a qualified installer
Some retailer and supplier tutorials describe a path for experienced DIYers, while those same sources often recommend professional installation. The useful distinction is between project preparation and technical execution.
A homeowner can reduce delays and improve proposal quality by doing careful administrative and access work. That does not require taking responsibility for chimney diagnosis, listed-system assembly, roof work, or commissioning.
Reasonable homeowner preparation
Depending on site conditions and contractor instructions, a homeowner can:
- Locate appliance and fireplace manuals.
- Photograph labels, the fireplace, hearth, mantel, chimney, and roof access.
- Take preliminary measurements.
- Gather prior chimney reports, cleaning invoices, and repair records.
- Contact the local authority about permits and inspections.
- Ask the insurer what documentation it wants.
- Clear furniture and fragile items from the work route.
- Arrange parking and access for equipment.
- Compare written proposals line by line.
- Confirm responsibility for floor protection and dust control.
- Create a project file for permits, manuals, photographs, and warranties.
Do not dismantle fireplace components, enter unsafe work areas, or climb the roof simply to prepare for a quotation. Access and inspection work should remain within the homeowner’s competence, equipment, and agreed project scope.
Work to reserve for qualified professionals
The professional scope should normally include:
- Diagnosing chimney and fireplace condition
- Verifying fireplace-and-insert compatibility
- Designing the listed liner and connector assembly
- Determining whether and how liner insulation is required
- Repairing chimney or masonry defects
- Performing roof work and liner routing
- Evaluating or altering a damper area
- Completing any permitted fireplace or masonry alteration
- Moving and positioning the appliance
- Adding or modifying the electrical supply
- Performing required operational checks
- Commissioning the appliance
- Coordinating final inspection and correcting deficiencies
“Qualified” should be evaluated in relation to the actual project. Relevant training, hearth and chimney experience, familiarity with the selected products, insurance, references, and local licensing all matter. A private credential can be useful evidence of training, but no particular credential should be treated as legally mandatory unless the jurisdiction or project documents require it.
General chimney-liner guidance rates the work as difficult and best left to professionals, consistent with the combination of chimney evaluation, roof access, and liner assembly involved.
Stop-work list
Pause the project when:
- The fireplace cannot be positively identified.
- A factory-built or metal fireplace lacks documentation approving the insert.
- The proposed insert conflicts with the fireplace listing.
- The chimney is cracked, deteriorated, obstructed, wet, or otherwise unresolved.
- Another appliance shares the proposed flue.
- Heavy or unexplained creosote remains.
- Required clearances or hearth protection cannot be verified.
- Roof access or weather conditions fall outside the installer’s safe work plan.
- The liner route would require an unapproved reduction or deformation.
- Someone proposes cutting metal or masonry without documented authorization.
- The proposal conflicts with the insert manual or liner instructions.
- Permit responsibility, commissioning, or final inspection is undefined.
Questions to ask the contractor
Use the same questions for every bidder:
- What relevant hearth, chimney, and liner-installation experience do you have?
- Which licenses or qualifications apply here, and can you provide proof of insurance?
- Who obtains the permits and meets the inspector?
- How have you identified the existing fireplace?
- What did the chimney inspection find, and will I receive the report and images?
- What exact insert model and manual revision are you using?
- What liner material, diameter, shape, and product system are specified?
- Is insulation included? What project document supports that decision?
- Which connector, support, top plate, termination, and cap are included?
- Are chimney or masonry repairs included, excluded, or carried as an allowance?
- Will the damper area or masonry be altered? What document permits that work?
- What electrical work is included for the blower?
- How will the appliance be moved without damaging the house or its components?
- What commissioning and operational checks will be documented?
- Who handles cleanup and disposal?
- What warranties apply to the appliance, liner, and labor?
- Will you provide installation and chimney-top photographs?
- What conditions could trigger a change order?
Compare bids by scope, not total price. A lower proposal may exclude cleaning, insulation, top components, electrical work, permits, repairs, lifting, or commissioning that another bidder includes.
Build a complete budget instead of pricing only the insert
The appliance price is only one line in a wood-insert budget. Use a worksheet that requires each bidder to identify included, excluded, and contingent costs.
| Budget item | Included price or allowance | Questions to resolve |
|---|---|---|
| Insert and approved accessories | Does this include the door, surround, blower, and required options? | |
| Listed liner and connector | What material, diameter, shape, length, and system are specified? | |
| Liner insulation | Included, excluded, or pending inspection findings? | |
| Top support, plate, termination, and cap | Are all components approved for the specified system? | |
| Chimney cleaning | Must it occur before inspection or installation? | |
| Chimney inspection | What scope and documentation are included? | |
| Masonry or chimney repairs | Fixed price, allowance, or separate contract? | |
| Installation labor | What tasks, crew requirements, and commissioning are covered? | |
| Difficult roof access | Are lifts, scaffolding, or additional protection required? | |
| Delivery and lifting | Does the price include carrying, equipment, and floor protection? | |
| Electrical supply for blower | Is the existing supply suitable, or is new permitted work required? | |
| Permits and inspections | Who applies, pays, schedules, and attends? | |
| Hearth or floor protection | Does the existing construction satisfy the exact manual? | |
| Mantel, trim, or finish work | Is combustible-trim alteration or noncombustible finishing needed? | |
| Disposal | Who removes packaging, debris, and replaced components? | |
| Contingency | What concealed conditions could produce a change order? |
Chimney condition, height, offsets, liner geometry, appliance model, roof access, electrical requirements, and repairs can materially change the final price. A useful proposal therefore states its assumptions instead of presenting only one total.
For scale—not as a national benchmark—one manufacturer’s commercial overview says fireplace inserts generally begin in the mid-$2,000 range before installation and related work (Heat & Glo’s insert cost overview). A southeastern Pennsylvania installer, by contrast, estimated approximately $8,000–$12,000 for a fully installed wood insert in 2026, depending substantially on flue condition, chimney height, model, and labor (The Stove Shop’s regional estimate).
Those figures describe different scopes. One is a broad appliance starting point from a manufacturer’s commercial guide; the other is regional installed-project pricing from a contractor. Neither establishes what an individual project should cost, and broad estimates for constructing a new fireplace and chimney should not be repurposed as insert-installation pricing.
Do not rely on a promised half-day or one-day schedule. Chimney defects, difficult geometry, weather, roof equipment, approved fireplace alterations, electrical work, permitting, and inspection availability can all extend the project.
A useful written proposal should state:
- Exact insert and accessories
- Exact liner system and components
- Insulation decision and supporting rationale
- Cleaning and inspection scope
- Repairs and allowances
- Permit responsibility
- Electrical scope
- Delivery and lifting
- Finish work and cleanup
- Commissioning and inspection
- Exclusions and change-order rates
- Appliance, liner, and labor warranties
Commission the system before the first fire and maintain it afterward
Installation is not complete when the surround looks finished. Before routine use, reconcile the completed work with the approved documents and obtain any required local approval.
Commissioning oversight checklist
Confirm that the project record shows:
- The installed insert is the approved model.
- The appliance is assembled as its manual requires.
- The liner material, diameter, shape, and length match the specified system.
- Required liner insulation is present and documented, or its omission is supported by the applicable instructions and site conditions.
- The approved connector secures the liner to the flue collar.
-
Chimney-top support, plate, termination, and cap match the liner system.
-
Fireplace and chimney repairs are complete.
- Any damper-area or masonry work was authorized and documented.
- The insert is positioned and supported as required.
- Mantel, trim, side, hearth, and floor conditions match the approved installation.
- Required combustion-air provisions are complete.
- Blower wiring or receptacle work is finished and approved where required.
- Service access and removable components remain usable.
- Operating controls and blower functions have been demonstrated.
- Manuals, model and serial numbers, and warranty information have been delivered.
- Photographs document concealed connections and the chimney top.
- Required local inspections and approvals are complete.
Follow the selected manufacturer’s first-fire and paint-curing directions. Do not substitute a generic small-fire sequence: coatings, firebrick, catalysts, controls, and break-in requirements differ.
As part of the household safety review, confirm that any smoke or carbon-monoxide devices required by their manufacturers or local rules are present and operating. Placement and testing should follow those controlling instructions rather than distances borrowed from an unrelated appliance guide.
Do not continue routine operation if the insert releases smoke into the room, behaves materially differently from its manual, appears to overheat surrounding materials, or triggers a household safety alarm. Stop using it, follow the appliance and alarm manufacturers’ instructions, and obtain qualified evaluation before resuming use. Persistent odors should be compared with the curing behavior described in the exact appliance manual rather than dismissed or masked with operating tricks.
Inspection and cleaning after installation
Plan for inspection of the insert venting system at least annually. Commercial wood-insert guidance recommends annual inspection and cleaning, with more frequent attention when creosote accumulates faster (Fireplaces Direct’s maintenance guidance).
Buildup can vary with wood quality and moisture, burning practices, firing rate, appliance operation, chimney temperature, and draft.
Ask the service professional to document:
- The amount and character of deposits found
- Whether cleaning was performed
- The condition of the connector and liner
- Cap and termination condition
- Visible masonry condition
- Gasket, baffle, and other serviceable-component condition
- Any repairs or operating changes recommended under the appliance manual
Keep a durable project file containing:
- Appliance and fireplace manuals
- Appliance model and serial number
- Fireplace identification-label photographs
- Liner manufacturer, product, size, shape, and insulation details
- Permit and inspection records
- Chimney reports and repair invoices
- Installer proposal and final invoice
- Appliance, liner, and labor warranties
- Electrical records
- Installation and chimney-top photographs
- Commissioning notes
- Inspection and cleaning records
Frequently asked questions
Can a wood-burning insert be installed in a zero-clearance or metal fireplace?
Sometimes, but only when the applicable fireplace-and-insert combination is expressly tested, listed, and labeled for that use. Do not rely on physical dimensions or a general sales assurance.
Locate the factory-built fireplace’s identification label and manual, then compare them with the exact insert documentation. If the original fireplace cannot be identified or the permitted combination cannot be documented, pause and obtain professional verification. Do not remove louvers, doors, refractory panels, smoke shelves, or other factory-built components unless the controlling documents expressly permit it.
Does a wood fireplace insert need a full-length chimney liner?
A continuous listed stainless-steel liner from the insert’s flue collar to the chimney termination is a common approach shown in wood-insert installation guidance. It provides a defined vent path connected directly to the appliance.
Whether a particular insert requires that exact configuration must be determined from its listing and manual, the liner-system instructions, chimney conditions, and locally adopted requirements. Do not assume that allowing exhaust to discharge loosely into the old fireplace chamber is equivalent to the approved direct connection.
Is a six-inch stainless-steel liner always the correct size?
No. Six inches is common in commercial installation guidance, but the insert’s flue requirement and the listed venting system determine the permitted diameter, material, and configuration.
Do not reduce, enlarge, ovalize, or substitute a liner merely to pass through a restricted damper area unless the appliance and liner documentation permit the arrangement. If the required liner will not fit, the solution may be another listed component, a different insert, or an approved alteration—not an improvised size.
Does a wood-burning fireplace insert need electricity?
The wood fire itself may not require electricity, but a blower generally does. Other controls or accessories may also have model-specific electrical requirements.
Review the exact manual to determine the appliance’s supply and wiring needs. If the project requires a new receptacle, circuit, or fixed wiring, include qualified electrical work and any applicable permit or inspection in the project scope. Ask how the specific model operates during an outage rather than assuming every insert behaves identically.
How often should the insert liner and chimney be inspected and cleaned?
Plan for inspection at least annually, as recurring wood-insert and chimney guidance recommends (This Old House’s maintenance guidance). Clean when inspection shows deposits warrant it, and inspect sooner if use or buildup is unusually heavy.
Annual inspection does not mean cleaning is always sufficient—or always necessary—at exactly the same interval. Fuel quality, burning practices, appliance use, and system performance can change the rate of accumulation.
The final go-or-stop decision
Proceed only when all five statements are true:
- Go: The existing fireplace is identified, and the proposed insert is documented as compatible.
- Go: The chimney has been cleaned and inspected, and defects or unsuitable conditions have been resolved.
- Go: The exact insert, connector, liner, insulation decision, and termination are documented as a compatible system.
- Go: Permit, electrical, inspection, and approval requirements are understood.
- Go: A qualified installer has defined the installation, testing, commissioning, documentation, and cleanup scope.
Stop if any statement remains uncertain. The homeowner’s most valuable contribution is not finding a universal shortcut for installing a wood-burning fireplace insert. It is ensuring that every component and decision can be traced to the selected appliance, listed venting system, actual site conditions, and local approval.